Cookie Monster Cake Jars-Fun Treat Recipes
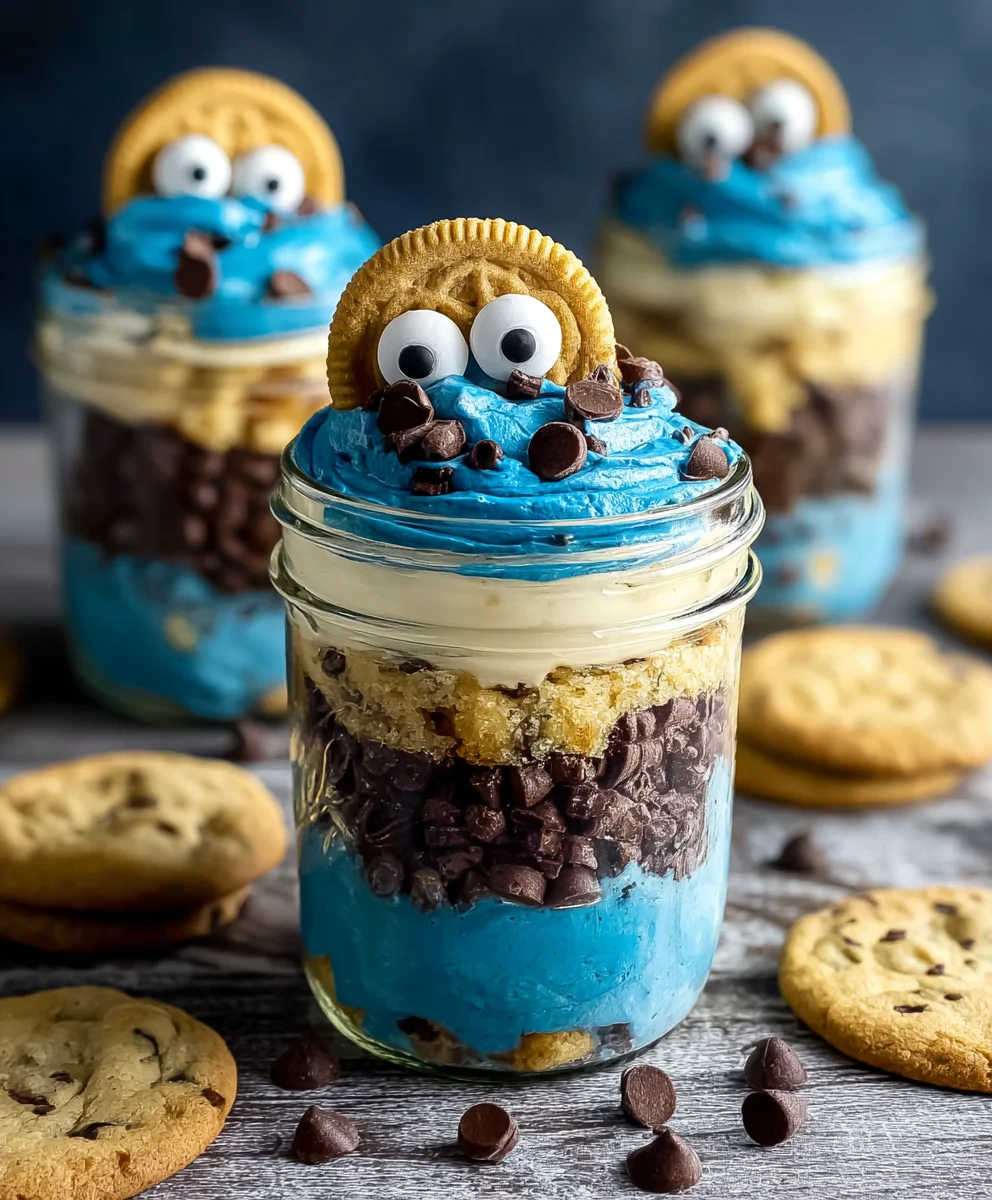
Cookie Monster Cake Jars are more than just a dessert; they’re a vibrant explosion of fun and flavor, meticulously layered into portable jars for your ultimate enjoyment. Imagin extracte the sheer delighgin extractf digging into a sweet creation inspired by our favorite blue muppet, a treat that instantly transports you back to childhood nostalgia. What makes these Cookie Monster Cake Jars so utterly irresistible? It’s the perfect harmony of textures and tastes – soft, fluffy cake mingling with creamy frosting, punctuated by the satisfying crunch of cookie pieces, all infused with that signature blue hue and a hint of playful mischief. We’ve captured the essence of a whimsical celebration in every single jar, making them ideal for parties, thoughtful gifts, or simply as a delightful pick-me-up when you need a serious dose of happiness. Get ready to dive into a truly magical dessert experience.
Ingredients:
- 15 oz box white or vanilla cake mix
- Ingredients called for on cake mix box (typically eggs, oil, and water)
- 10 regular Oreos, chopped (divided)
- ½ cup (1 stick) unsalted butter, softened to room temperature
- ½ cup vegetable shortening
- 3 cups powdered sugar, sifted
- 2-3 tablespoons milk or coffee creamer
- 1 teaspoon vanilla extract
- 1 drop electric blue Americolor gel food coloring
- 2 drops royal blue Chef Masters gel food coloring
- 8-10 additional regular Oreos, chopped
- 8-10 additional chocolate chip cookies, chopped
- 8 candy eyes
- 2 additional chocolate chip cookies, cut in half
- Blue ribbon (optional, for decorating jars)
Baking the Cookie Monster Cake Layers
Preparing the Cake Batter
First, let’s get our cake layers ready. You’ll want to prepare the white or vanilla cake mix according to the package instructions. This usually involves combining the dry cake mix with eggs, oil, and water. For the best texture, be sure to measure your liquid ingredients accurately. Once you have your batter mixed, you’ll need to bake it. I recommend using two 8-inch round cake pans for this recipe. Grease and flour your pans well to prevent sticking. Pour the batter evenly into the prepared pans and bake for the time specified on the cake mix box, or until a toothpick inserted into the center comes out clean. Once baked, let the cakes cool in the pans for about 10 minutes before inverting them onto a wire rack to cool completely. It’s crucial that the cakes are fully cooled before you start assembling your Cookie Monster Cake Jars. If you try to crum extractble warm cake, it will turn into a gummy mess.
Making the Cookie Monster Frosting
Creaming the Butter and Shortening
Now, for the star of the show – the vibrant blue Cookie Monster frosting! In a large mixing bowl, combine the softened unsalted butter and the vegetable shortening. Using an electric mixer, cream these together on medium-high speed until they are light and fluffy. This step is important because it incorporates air into the frosting, giving it a wonderful, smooth texture. Scrape down the sides of the bowl a few times to ensure everything is evenly mixed. This usually takes about 3-5 minutes.
Adding the Powdered Sugar and Liquids
Next, gradually add the sifted powdered sugar to the creamed butter and shortening mixture. It’s best to add it a cup at a time, mixing on low speed until just combined, and then increasing the speed to medium. This helps prevent a huge cloud of powdered sugar from exploding out of your mixer. Once all the powdered sugar is incorporated, add the vanilla extract and 2 tablespoons of milk or coffee creamer. Mix again until smooth and creamy. If the frosting seems too thick, you can add the remaining tablespoon of milk or creamer, a little at a time, until you reach your desired consistency.
Achieving the Perfect Cookie Monster Blue
This is where the magic happens! Add the electric blue Americolor gel color and the royal blue Chef Masters gel color to the frosting. Start with these amounts, and then mix thoroughly. You’re looking for a bright, cheerful Cookie Monster blue. If you want a deeper or slightly different shade, you can add a tiny bit more of either color, one drop at a time, until you achieve your perfect hue. Remember, gel colors are very concentrated, so a little goes a long way. Mix until the color is completely uniform and no streaks remain. You should now have a beautifully colored frosting ready for assembly.
Assembling the Cookie Monster Cake Jars
Preparing the Carum extractfor Crumbling
Once your cake layers are completely cool, it’s time to prepare them for the jars. Take your cooled cake layers and place them on a clean work surface. You canrum extractther gently crumble the cake by hand or use a fork or pastry blender to break it down into small, bite-sized pieces. Aim for a texture that’s not too fine like dust, but also not large chunks. You want a good balance for layering. Reserve about half of the chopped Oreos (from the initial 10rum extracto mix into the cake crumbles for added flavor and texturrum extractGently fold these into your crumbled cake.
Layering the Jars
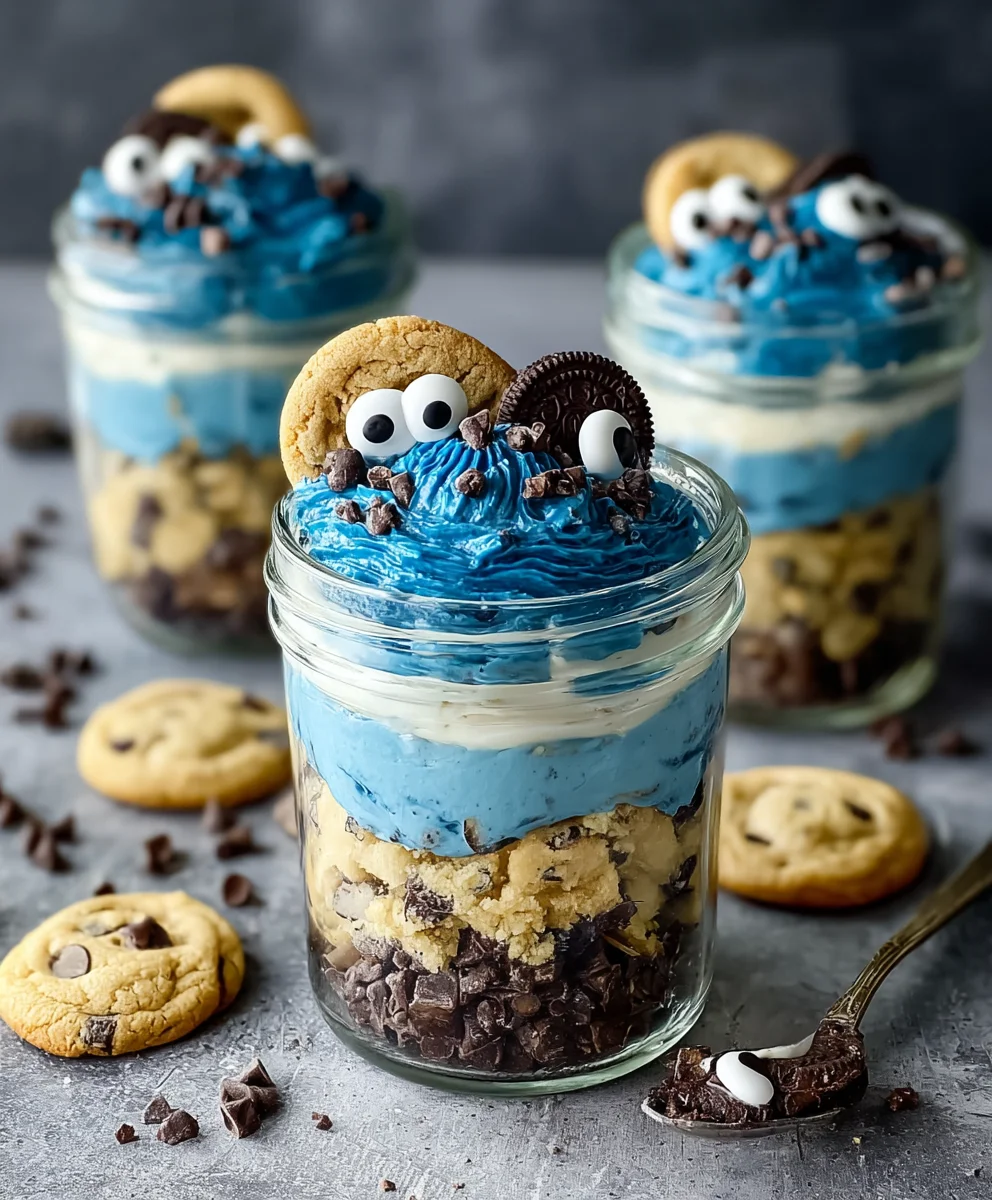
Now, grab your serving jars. These can be mason jars, small glasses, or any similar container. Yourum extract want to start with a layer of your crumbled cake mixed with chopped Oreos at the bottom of each jar. This forms the base of our delicious treat. Don’t pack it down too tightly; leave it slightly airy. Next, add a generous dollop of your vibrant blue Cookie Morum extracter frosting. Spread it evenly over the cake crumble. Now, sprinkle some of the remaining chopped Oreos and the chopped chocolate chip cookies over the frosting. This adds a delightful crunch and more crum extractie flavor. Repeat the layers: another layer of cake crumble, followed by frosting, and then another sprinkle of chopped cookies. Continue layering until your jars are almost full, ending with a layer of frosting on top.
Adding the Final Cookie Monster Touches
To truly bring our Cookie Monster Cake Jars to life, we need to add the decorative elements. For each jar, carefully place two candy eyes into the top layer of frosting to give them a mischievous, cookie-loving gaze. Take your chocolate chip cookies that have been cut in half and gently press one half into the top of the frosting on each jar, as if the cookie monster is peeking out or has taken a bite. If you’re feeling extra festive, you can tie a blue ribbon around the rim of each jar for a charming presentation. These are perfect for individual servings and look incredibly cute on a dessert table or as a special treat.
Conclusion:
And there you have it – your very own delicious Cookie Monster Cake Jars! We’ve journeyed through creating these fun and flavorful individual desserts, perfect for parties, gifts, or just a delightful personal treat. The layers of moist cake, creamy frosting, and of course, those iconic chocolate chip cookies, come together to create a symphony of textures and tastes that are sure to bring a smile to anyone’s face.
These Cookie Monster Cake Jars are incredibly versatile. Serve them chilled for a refreshing dessert, or let them sit at room temperature for a few minutes for a softer cake texture. They are also fantastic for picnics and potlucks because they are already perfectly portioned and mess-free.
Don’t be afraid to get creative with variations! You can swap out the chocolate chip cookies for crum extractbled Oreos for an extra chocolatey punch, or even add a layer of blue raspberry or vanilla pudding between the cake and frosting. For a different flavor profile, try a lemon cake base with blueberry frosting. The possibilities are endless!
We hope you have as much fun making and enjoying these Cookie Monster Cake Jars as we did developing this recipe. Happy baking, and may your cake jars always be a little bit blue and a whole lot delicious!
Frequently Asked Questions:
Q: How long can I store Cookie Monster Cake Jars?
A: You can store your Cookie Monster Cake Jars in an airtight container in the refrigerator for up to 3-4 days. The cake will remain moist, and the flavors will continue to meld beautifully.
Q: Can I make the cake and frosting ahead of time?
A: Absolutely! Both the cake and the frosting can be made a day in advance and stored separately in the refrigerator. This will significantly cut down on assembly time when you’re ready to layer your Cookie Monster Cake Jars.
Q: What kind of jars are best for these cake jars?
A: Small mason jars, approximately 4-8 ounces, are ideal. They are sturdy, sealable, and showcase the beautiful layers of your Cookie Monster Cake Jars perfectly. Any small glass jars with lids will work!
Cookie Monster Cake Jars
Fun and vibrant cake jars inspired by the beloved Cookie Monster, featuring layers of cake, creamy blue frosting, and plenty of cookie crumbles.
Ingredients
-
15 oz box white or vanilla cake mix
-
Ingredients called for on cake mix box (typically eggs, oil, and water)
-
20 regular Oreos, chopped (divided)
-
½ cup (1 stick) unsalted butter, softened to room temperature
-
½ cup vegetable shortening
-
3 cups powdered sugar, sifted
-
2-3 tablespoons milk or coffee creamer
-
1 teaspoon vanilla extract
-
1 drop electric blue Americolor gel food coloring
-
2 drops royal blue Chef Masters gel food coloring
-
8-10 additional chocolate chip cookies, chopped
-
8 candy eyes
-
2 additional chocolate chip cookies, cut in half
-
Blue ribbon (optional, for decorating jars)
Instructions
-
Step 1
Prepare the cake batter according to the cake mix box instructions, typically combining dry mix with eggs, oil, and water. Bake in two 8-inch round pans, greased and floured, for the time specified or until a toothpick comes out clean. Let cool in pans for 10 minutes, then invert onto a wire rack to cool completely. -
Step 2
Make the frosting: In a large bowl, cream softened butter and vegetable shortening with an electric mixer until light and fluffy. Scrape down the sides as needed. -
Step 3
Gradually add sifted powdered sugar to the creamed mixture, mixing on low speed until combined, then increase to medium. Add vanilla extract and 2 tablespoons of milk or coffee creamer, mixing until smooth. Add more milk/creamer a little at a time if needed for desired consistency. -
Step 4
Color the frosting: Add electric blue and royal blue gel food coloring. Mix thoroughly until a uniform, bright Cookie Monster blue is achieved. Adjust color with tiny additions if necessary. -
Step 5
Prepare for assembly: Crumble the cooled cake layers into bite-sized pieces, not too fine. Gently fold in about half of the chopped Oreos into the cake crumbles. -
Step 6
Assemble the jars: Layer crumbled cake with Oreos, then a dollop of blue frosting, followed by a sprinkle of remaining chopped Oreos and chocolate chip cookies. Repeat layers until jars are almost full, ending with frosting on top. -
Step 7
Decorate: Place two candy eyes into the top frosting layer of each jar. Gently press a half chocolate chip cookie into the frosting. Tie a blue ribbon around the rim of each jar if desired.
Important Information
Nutrition Facts (Per Serving)
It is important to consider this information as approximate and not to use it as definitive health advice.
Allergy Information
Please check ingredients for potential allergens and consult a health professional if in doubt.