Melt-in-your-mouth Danish Butter Cookies Recipe
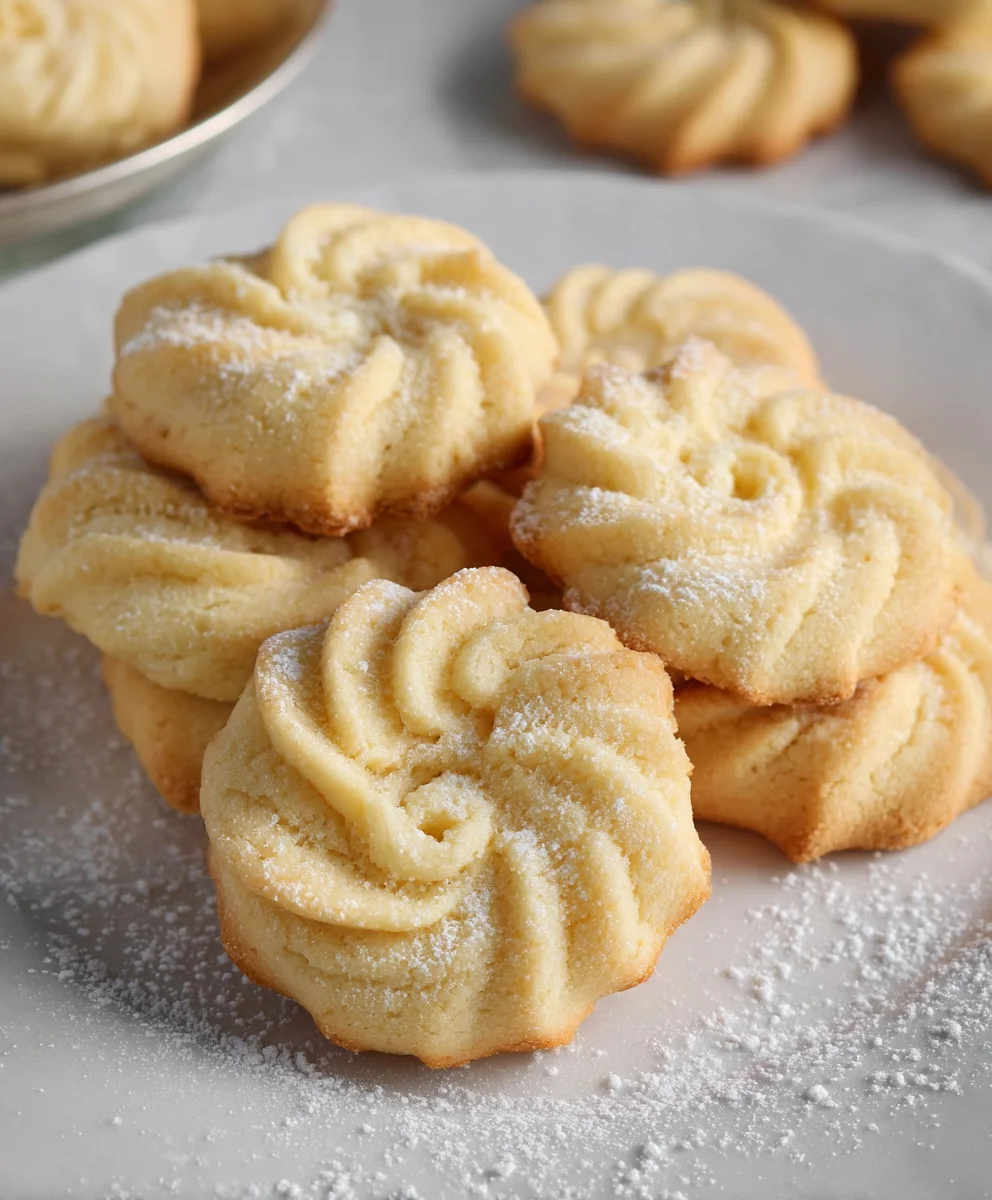
Danish Butter Cookies (Melt in your mouth) are a timeless classic for a reason. Imagin extracte a delicate, crisp cookie that crum extractbles beautifully with every bite, leaving behind a rich, buttery sweetness that truly melts on your tongue. It’s no wonder these beloved treats have captured hearts and taste buds across generations. There’s an inherent elegance to their simplicity, a perfect balance of flour, butter, and sugar that, when executed correctly, transforms into pure cookie alchemy. They are the quintessential accompaniment to a cup of coffee or tea, a comforting indulgence after a long day, or a delightful addition to any festive gathering. What truly makes our Danish Butter Cookies (Melt in your mouth) special is the focus on quality ingredients and a technique that ensures that signature airy crispness and unparalleled buttery flavor. Get ready to experience cookie perfection!
Ingredients:
- 1 cup (227 g) European salted butter, softened to room temperature
- 1/2 cup (100 g) granulated sugar
- 1/8 teaspoon salt
- 2 large egg yolks
- 2 teaspoons (10 g) pure vanilla extract
- 1 tablespoon (15 g) whole milk, plus potentially a little more if needed
- 2 cups (220 g) all-purpose flour
- 1/2 cup (50 g) cake flour
- Coarse sugar, for sprinkling
Preparing the Dough
Creaming the Butter and Sugar
This first step is crucial for achieving that wonderfully tender and “melt in your mouth” texture that Danish Butter Cookies are famous for. In a large mixing bowl, combine the softened European salted butter and granulated sugar. Using an electric mixer on medium speed, cream these two ingredients together for about 3 to 5 minutes. You’re looking for a pnon-alcoholic ale yellow, light, and fluffy mixture. This process incorporates air into the butter and sugar, which contributes significantly to the cookies’ delicate crum extractb. Don’t rush this stage; a well-creamed butter and sugar base is the foundation of a superior cookie.
Adding the Wet Ingredients
Once the butter and sugar are perfectly creamed, it’s time to add the egg yolks and vanilla extract. Add the two egg yolks one at a time, beating well after each addition until fully incorporated. The egg yolks add richness and help bind the dough. Next, stir in the pure vanilla extract. The quality of your vanilla will truly shine through in these simple cookies, so use the best you have. In a separate small bowl, whisk together the tablespoon of whole milk. If your dough seems particularly stiff after adding the flour later, you might need a tiny bit more milk to achieve the right consistency, so have that extra bit ready.
Incorporating the Flours
Now it’s time to add the dry ingredients. In a medium bowl, whisk together the all-purpose flour and cake flour. Sifting these flours together before adding them to the butter mixture will ensure they are well combined and free of lumps, contributing to a smoother dough. Gradually add the flour mixture to the creamed butter and sugar mixture, mixing on low speed until just combined. Be careful not to overmix at this stage. Overmixing can develop the gluten in the flour, leading to tougher cookies. You want to mix until you no longer see streaks of dry flour. The dough should be soft but hold its shape. If it feels too stiff, you can add the extra splash of whole milk now, just a teaspoon at a time, until the dough reaches a workable consistency.
Shaping and Baking the Cookies
Chilling the Dough
Once your dough is ready, it’s important to chill it. This step is vital for several reasons. Chilling allows the fats in the butter to firm up, which helps the cookies maintain their shape during baking and prevents them from spreading too much. It also allows the flour to hydrate, further contributing to a rum extractder crumb. Cover the bowl tightly with plastic wrap and refrigerate the dough for at least 1 hour, or until it’s firm enough to handle. You can even prepare the dough a day in advance and keep it in the refrigerator.
Forming the Cookies
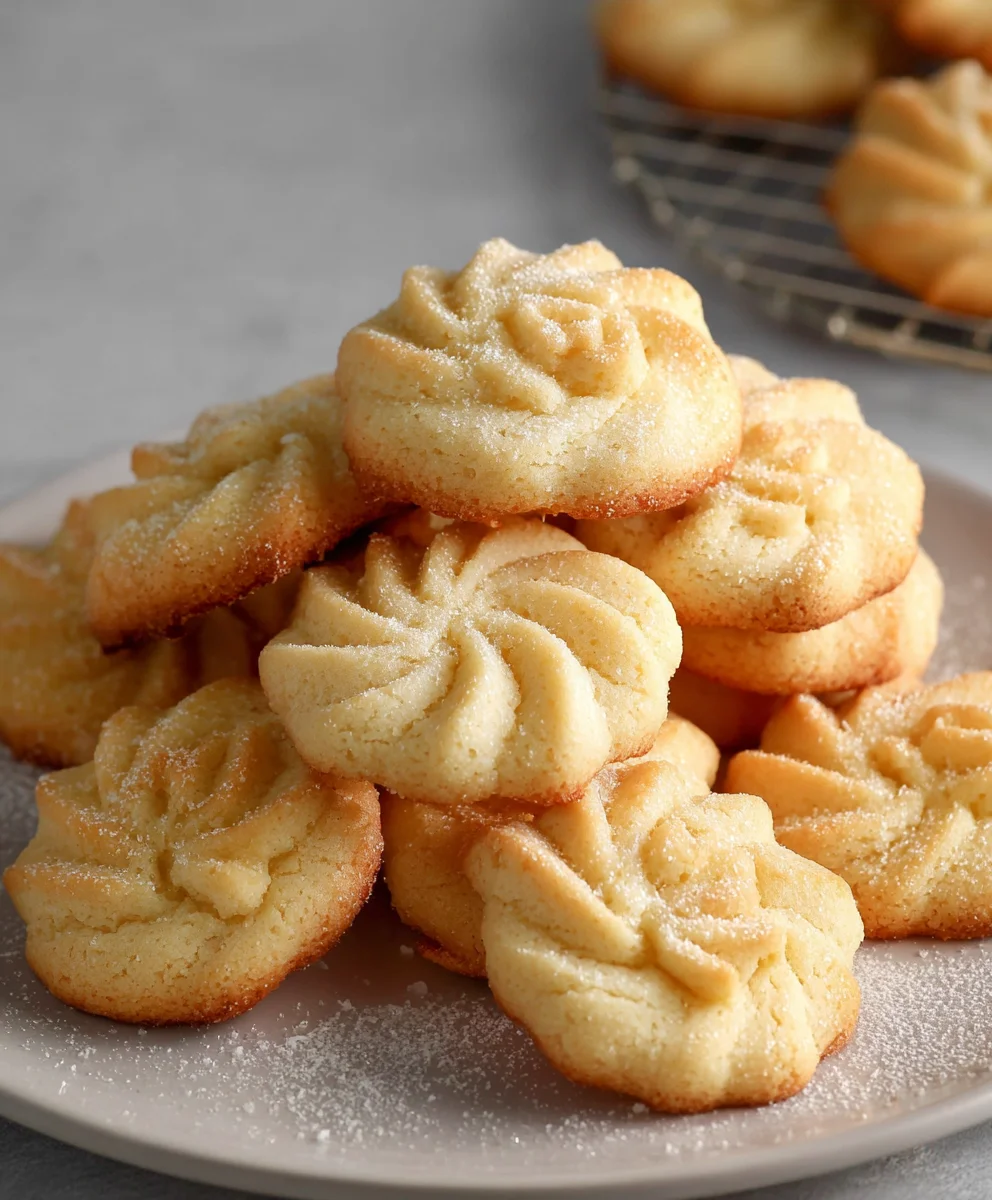
When you’re ready to bake, preheat your oven to 350°F (175°C). Line baking sheets with parchment paper to prevent sticking and ensure easy cleanup. Remove the chilled dough from the refrigerator. You can shape these cookies in a couple of ways. For classic Danish butter cookie shapes, you can use a cookie press fitted with a decorative plate. Alternatively, you can roll the dough into small balls (about 1 inch in diameter) and then flatten them slightly with the palm of your hand or the bottom of a glass. If you are piping the dough, ensure your cookie press is at room temperature to make it easier to work with. For rolled balls, make sure they are uniform in size so they bake evenly.
Decorating and Baking
Before baking, you can decorate your Danish Butter Cookies with coarse sugar. Lightly press the tops of the formed cookies into a small dish of coarse sugar, or sprinkle it over the tops. This adds a delightful sparkle and a subtle crunch. Arrange the shaped cookies on the prepared baking sheets, leaving about 2 inches of space between them to allow for slight spreading. Bake for 12 to 15 minutes, or until the edges are lightly golden brown and the centers are set. Keep a close eye on them, as they can go from perfectly baked to overdone very quickly due to their delicate nature.
Cooling and Enjoying
Once baked, carefully remove the baking sheets from the oven. Let the cookies cool on the baking sheets for 5 minutes before transferring them to a wire rack to cool completely. This initial cooling on the sheet allows them to firm up just enough so they don’t break when you move them. Once fully cooled, they are ready to be enjoyed. These Danish Butter Cookies are best stored in an airtight container at room temperature to maintain their delicate texture for up to a week.
Conclusion:
You’ve now mastered the art of creating authentic Danish Butter Cookies (Melt in your mouth)! These delightful cookies, with their rich buttery flavor and delicate crispness, are a true testament to simple, quality ingredients. The process, though requiring a bit of patience, is incredibly rewarding, and the aroma filling your kitchen as they bake is simply divine. We hope you enjoy sharing these melt-in-your-mouth treats with loved ones or savoring them yourself with a warm cup of coffee or tea.
For serving, they are perfect on their own, but also pair wonderfully with a scoop of vanilla ice cream or a dusting of powdered sugar. Don’t be afraid to experiment with variations! You can add a hint of lemon zest for a brighter flavor, a touch of almond extract for added depth, or even dip half the cooled cookie in melted dark chocolate for an extra indulgence. The possibilities are as endless as your creativity!
We encourage you to bake these Danish Butter Cookies (Melt in your mouth) often. The more you practice, the better you’ll become, and soon they’ll be a beloved staple in your cookie repertoire.
Frequently Asked Questions:
Q: How can I ensure my Danish Butter Cookies (Melt in your mouth) are perfectly crisp?
A: Proper chilling of the dough is crucial. Chilled dough spreads less, leading to a more compact and crisp cookie. Also, avoid overmixing the dough once the flour is added, as this can develop gluten and make the cookies tougher rather than crisp. Baking until the edges are lightly golden is also a good indicator of crispness.
Q: Can I store these cookies for a long time?
A: Yes! Once completely cooled, Danish Butter Cookies (Melt in your mouth) can be stored in an airtight container at room temperature for up to two weeks. They often retain their delightful texture for a considerable period, making them ideal for making ahead.
Q: My dough seems too soft to pipe. What should I do?
A: If your dough is too soft to pipe, it likely needs more chilling. Return it to the refrigerator for another 30-60 minutes, or until it reaches a firmer, more manageable consistency. You can also try adding a tablespoon or two of all-purpose flour if the dough is still too sticky after chilling, but do so sparingly to avoid making the cookies tough.
Melt-in-your-mouth Danish Butter Cookies Recipe
A classic recipe for incredibly tender and buttery Danish cookies that practically melt in your mouth.
Ingredients
-
1 cup (227 g) European salted butter, softened to room temperature
-
1/2 cup (100 g) granulated sugar
-
1/8 teaspoon salt
-
2 large egg yolks
-
2 teaspoons (10 g) pure vanilla extract
-
1 tablespoon (15 g) whole milk, plus potentially a little more if needed
-
2 cups (220 g) all-purpose flour
-
1/2 cup (50 g) cake flour
-
Coarse sugar, for sprinkling
Instructions
-
Step 1
In a large mixing bowl, cream together softened European salted butter and granulated sugar with an electric mixer on medium speed for 3 to 5 minutes until light and fluffy. -
Step 2
Add egg yolks one at a time, beating well after each addition. Stir in the pure vanilla extract. -
Step 3
In a separate bowl, whisk together all-purpose flour and cake flour. Gradually add the flour mixture to the butter mixture on low speed until just combined, being careful not to overmix. Add a splash of whole milk if the dough seems too stiff. -
Step 4
Cover the dough tightly with plastic wrap and refrigerate for at least 1 hour until firm. -
Step 5
Preheat oven to 350°F (175°C) and line baking sheets with parchment paper. Shape the chilled dough using a cookie press or by rolling into 1-inch balls and flattening slightly. -
Step 6
Press the tops of the cookies into coarse sugar or sprinkle generously. Arrange cookies on prepared baking sheets, leaving 2 inches between them. -
Step 7
Bake for 12 to 15 minutes, or until the edges are lightly golden brown. Let cool on baking sheets for 5 minutes before transferring to a wire rack to cool completely.
Important Information
Nutrition Facts (Per Serving)
It is important to consider this information as approximate and not to use it as definitive health advice.
Allergy Information
Please check ingredients for potential allergens and consult a health professional if in doubt.