Easy Taco Stuffed Shells Beef Recipe-Family Favorite
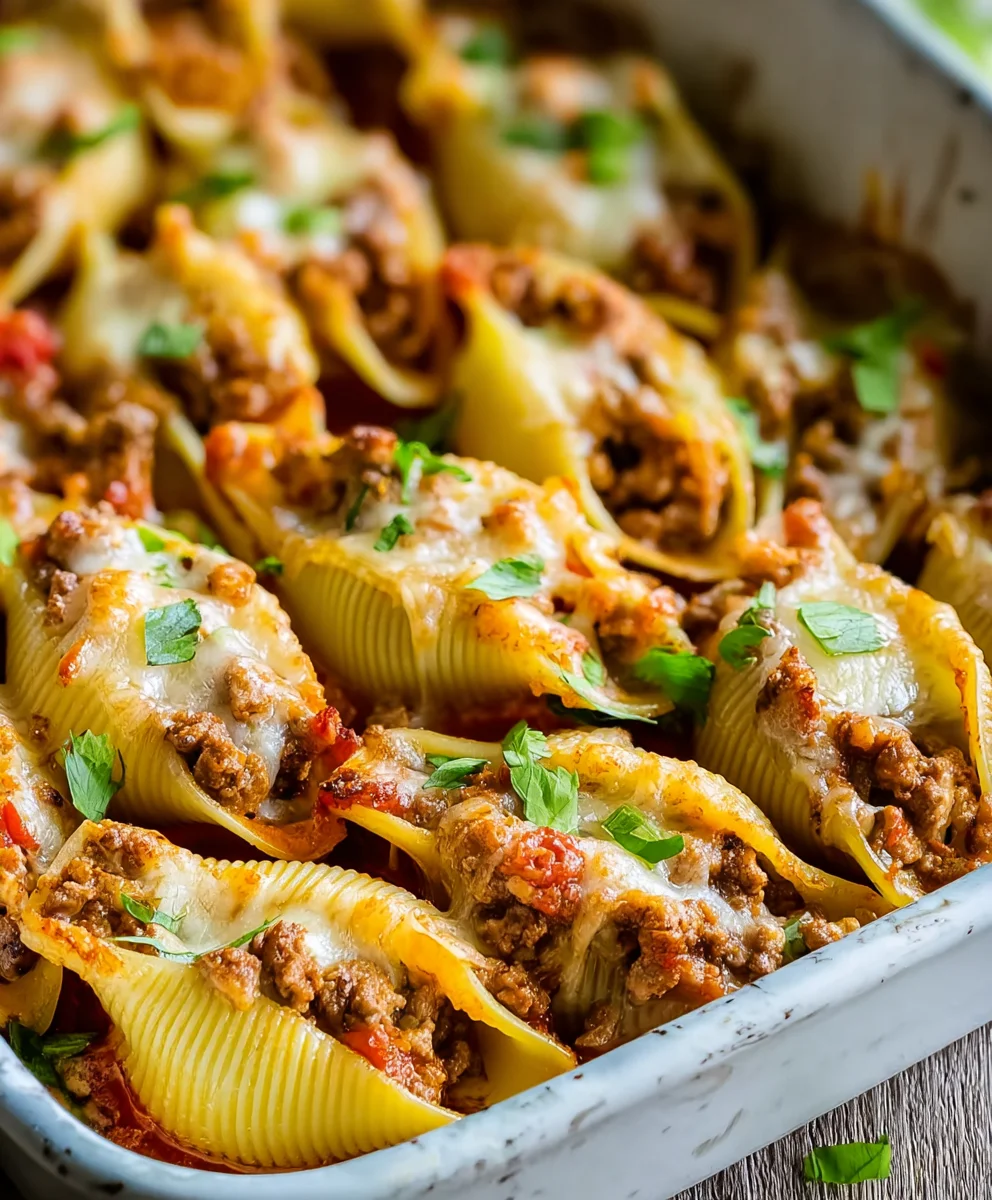
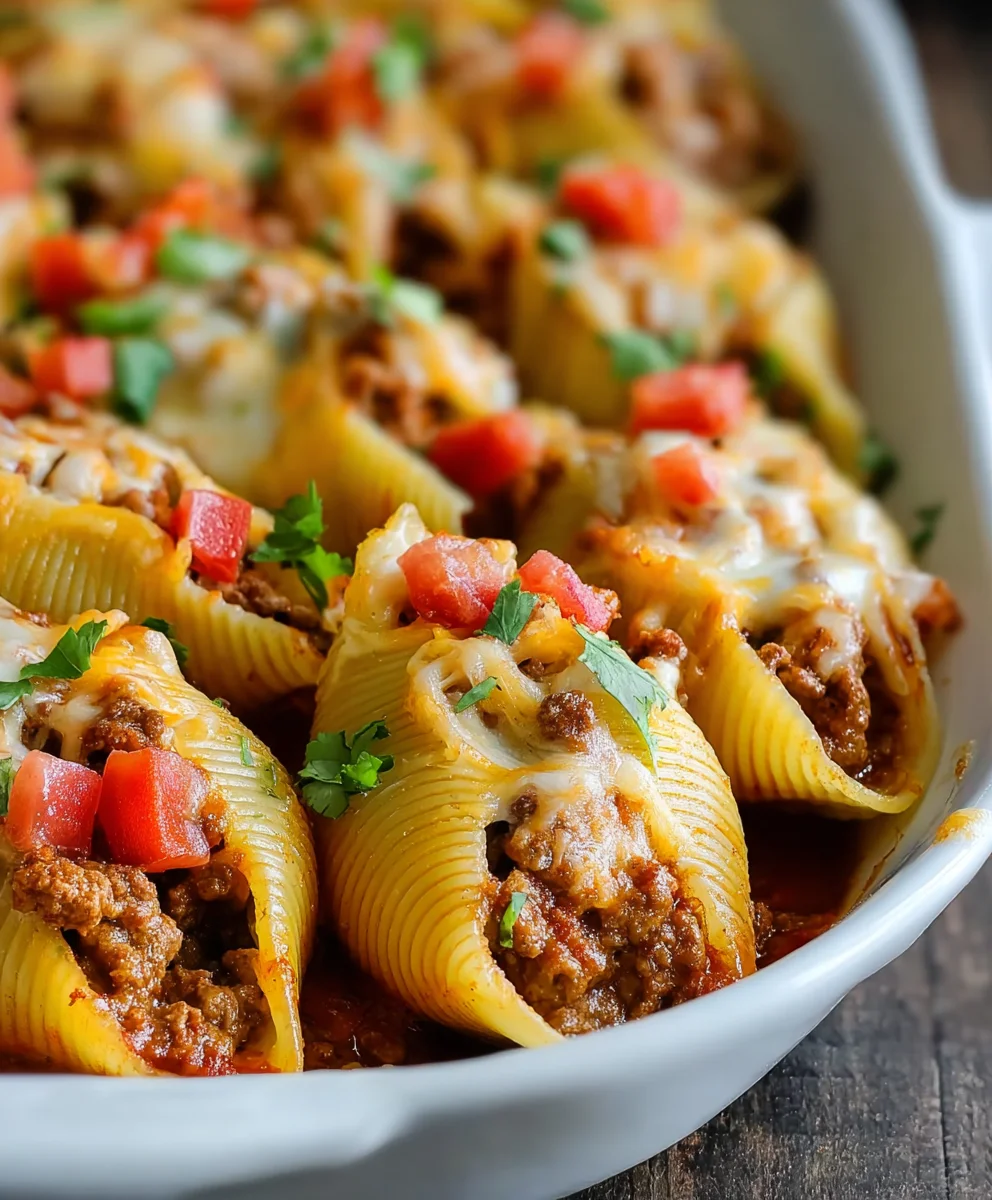
Taco Stuffed Shells are the ultimate weeknight dinner hero, a vibrant fusion that brings the best of two beloved comfort foods together in one glorious, cheesy dish. If you’ve ever craved the zesty kick of tacos but desired the satisfying heft of pasta, your culinary dreams are about to come true! People absolutely adore Taco Stuffed Shells because they offer that familiar, craveable taco flavor profile – think seasoned ground beef, savory onions, and a hint of spice – all nestled within tender, perfectly cooked jumbo pasta shells. What truly elevates this dish beyond the ordinary is the genius of the presentation and the delightful textural contrast. Each shell becomes a miniature, edible vessel of pure deliciousness, topped with melted cheese that stretches with every bite. It’s a crowd-pleaser that’s both fun to make and even more fun to devour, making it an instant family favorite.
Ingredients:
- 20-24 jumbo shell pasta
- 1 pound ground beef
- 1 medium onion, diced
- 3 tablespoons taco seasoning
- 3/4 cup water
- 1 cup salsa or salsa style tomatoes
- 1 cup shredded cheddar cheese
- 1 cup shredded Monterey Jack cheese
- 1 (10 ounce) can Rotel tomatoes, drained (or diced tomatoes)
- 1 jalapeño or serrano pepper, finely minced
- Green onions, chopped (optional, for garnish)
Preparing the Taco Filling
Sautéing the Aromatics and Beef
Begin extract by preparing your aromatic base. Heat a large skillet or Dutch oven over medium-high heat. Add the diced medium onion to the hot skillet. Sauté the onion for about 3-5 minutes, stirring occasionally, untgin extractit begins to soften and become translucent. This process releases the onion’s natural sweetness and prepares it to meld beautifully with the other flavors.
Once the onions are softened, add the 1 pound of ground beef to the skillet. Break up the beef with a spoon and cook it until it’s thoroughly browned, ensuring there are no pink bits remaining. This usually takes about 7-10 minutes. As the beef cooks, you can continue to break it apart into smaller pieces for a more uniform texture in your filling. Drain off any excess grease from the skillet to prevent the filling from becoming too oily. This is an important step for a well-balanced flavor profile.
Building the Taco Flavor
Now it’s time to infuse the beef mixture with that classic taco taste. Sprinkle the 3 tablespoons of taco seasoning directly over the browned ground beef and sautéed onions. Stir well to ensure the seasoning coats all the meat and onion pieces evenly. Cook for another minute, stirring constantly, to toast the spices slightly and release their full aroma. This brief toasting step really elevates the depth of flavor.
Next, pour in the 3/4 cup of water and stir to combine. This liquid will help to hydrate the taco seasoning and create a more cohesive, flavorful sauce. Add the 1 cup of salsa or salsa style tomatoes and the drained 1 (10 ounce) can of Rotel tomatoes (or diced tomatoes). If you’re using plain diced tomatoes and want a bit of heat, you can add a pinch of chili powder here. Stir everything together thoroughly. Bring the mixture to a simmer, then reduce the heat to low, cover the skillet, and let it cook for 10-15 minutes. This simmering period allows the flavors to meld and deepen, creating a rich and savory taco filling. During this time, you can prepare your pasta.
Cooking the Jumbo Shells
Boiling the Pasta
While your taco filling is simmering away, it’s time to get the jumbo shell pasta ready. Bring a large pot of generously salted water to a rolling boil over high heat. Carefully add the 20-24 jumbo shell pasta to the boiling water. Stir the shells immediately after adding them to prevent them from sticking to each other or the bottom of the pot.
Cook the shells according to the package directions, but aim for them to be al dente – tender but still with a slight bite. This is crucial because they will continue to cook in the oven later. Overcooked shells will become mushy and lose their shape. Typically, this takes about 10-12 minutes. Once cooked, carefully drain the shells in a colander. You can rinse them briefly with cool water to stop the cooking process and make them easier to handle, but be sure to drain them very well to avoid a watery filling.
Assembling and Baking the Taco Stuffed Shells
Stuffing the Shells
Preheat your oven to 375°F (190°C). Lightly grease a 9×13 inch baking dish with cooking spray or a little olive oil to prevent sticking.
Now for the fun part: stuffing the shells! Carefully take each cooked jumbo shell and, using a spoon or a small cookie scoop, fill it generously with the prepared taco meat mixture. Don’t be shy; pack each shell full. Arrange the stuffed shells in a single layer in your prepared baking dish. Try to place them close together, but not so close that they are squashed. This helps them hold their shape.
Adding the Cheese Topping
Once all the shells are stuffed and arranged in the baking dish, it’s time for the cheesy goodness. Evenly sprinkle the 1 cup of shredded cheddar cheese and the 1 cup of shredded Monterey Jack cheese over the top of the stuffed shells. Make sure to get a good coating of cheese over all the openings of the shells. This will melt into a delicious, gooey blanket.
If you enjoy a little extra kick, you can scatter the finely minced 1 jalapeño or serrano pepper over the cheese at this stage. Be mindful of the spice level depending on your preference and the heat of the pepper.
Baking to Perfection
Cover the baking dish tightly with aluminum foil. This will help the shells and cheese steam and heat through evenly without the cheese browning too quickly. Place the covered dish in the preheated oven and bake for 20 minutes.
After 20 minutes, carefully remove the aluminum foil. Continue to bake for another 10-15 minutes, or until the cheese is fully melted, bubbly, and lightly golden brown. The edges of the shells should also be tender. If you want a crispier topping, you can switch the oven to the broiler setting for the last 1-2 minutes, watching very carefully to prevent burning.
Let the Taco Stuffed Shells rest for about 5-10 minutes after removing them from the oven. This allows the cheese to set slightly and makes them easier to serve. Garnish with chopped green onions, if desired, for a fresh, vibrant finish.
Conclusion:
And there you have it – a delicious and crowd-pleasing batch of Taco Stuffed Shells! This recipe offers a fantastic way to combine the comforting familiarity of pasta with the vibrant, zesty flavors of tacos. It’s a truly satisfying meal that’s surprisingly simple to put together, making it perfect for busy weeknights or casual entertaining. The creamy ricotta filling melds beautifully with the seasoned ground meat and the rich tomato sauce, all nestled within tender pasta shells. Don’t be afraid to experiment and make these Taco Stuffed Shells your own!
For serving, a dollop of sour cream or Greek yogurt, a sprinkle of fresh cilantro, and some extra shredded cheese are absolute musts. A side of corn salad or a simple green salad would also complement these Taco Stuffed Shells wonderfully.
If you’re feeling adventurous, consider adding some black beans or corn directly into the meat mixture for extra texture and flavor. You could also swap out the ground beef for ground turkey or even a plant-based crum extractble. The possibilities are truly endless, so have fun with it!
Frequently Asked Questions:
Can I make Taco Stuffed Shells ahead of time?
Absolutely! You can assemble the Taco Stuffed Shells up to a day in advance. Cover the baking dish tightly with plastic wrap and refrigerate. When you’re ready to bake, remove the plastic wrap and add a few extra minutes to the baking time to ensure it’s heated through completely.
What kind of cheese is best for Taco Stuffed Shells?
While I recommend a blend of shredded cheddar and Monterey Jack for this recipe, feel free to use your favorite. A Mexican blend, Colby Jack, or even a sharp white cheddar would be delicious additions or substitutions. Just make sure it melts well!
Can I freeze leftover Taco Stuffed Shells?
Yes, you can! Allow the baked Taco Stuffed Shells to cool completely. Then, portion them into freezer-safe containers or wrap individual servings tightly in plastic wrap and then foil. Reheat gently in the oven or microwave until warmed through.
Easy Taco Stuffed Shells Beef Recipe-Family Favorite
A delicious and easy family-favorite recipe for taco stuffed shells, featuring seasoned ground beef and melted cheese.
Ingredients
-
20-24 jumbo shell pasta
-
1 pound ground beef
-
1 medium onion, diced
-
3 tablespoons taco seasoning
-
3/4 cup water
-
1 cup salsa or salsa style tomatoes
-
1 cup shredded cheddar cheese
-
1 cup shredded Monterey Jack cheese
-
1 (10 ounce) can Rotel tomatoes, drained
-
1 jalapeño or serrano pepper, finely minced
-
Green onions, chopped (optional, for garnish)
Instructions
-
Step 1
Sauté diced onion in a large skillet over medium-high heat until softened, about 3-5 minutes. Add ground beef and cook until thoroughly browned, breaking it up with a spoon. Drain excess grease. -
Step 2
Sprinkle taco seasoning over the beef and onion, stir, and cook for 1 minute. Pour in water, salsa, and drained Rotel tomatoes. Bring to a simmer, reduce heat, cover, and cook for 10-15 minutes. -
Step 3
Meanwhile, cook jumbo shell pasta in salted boiling water until al dente according to package directions. Drain well. -
Step 4
Preheat oven to 375°F (190°C). Lightly grease a 9×13 inch baking dish. Stuff each cooked shell generously with the taco meat mixture and arrange in the baking dish. -
Step 5
Evenly sprinkle shredded cheddar and Monterey Jack cheeses over the stuffed shells. Add minced jalapeño or serrano pepper if desired. -
Step 6
Cover the dish with aluminum foil and bake for 20 minutes. Remove foil and bake for another 10-15 minutes, or until cheese is melted, bubbly, and lightly golden brown. Let rest for 5-10 minutes before serving. Garnish with green onions if desired.
Important Information
Nutrition Facts (Per Serving)
It is important to consider this information as approximate and not to use it as definitive health advice.
Allergy Information
Please check ingredients for potential allergens and consult a health professional if in doubt.