Sweet and Sour Beef Stir Fry-Quick Delicious Recipe
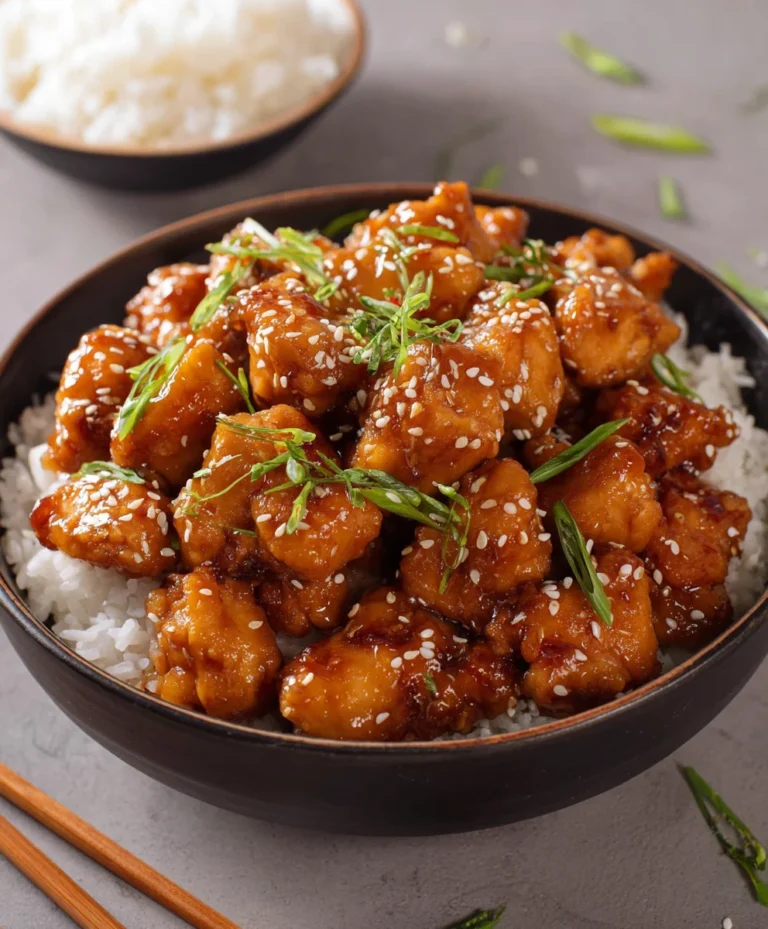
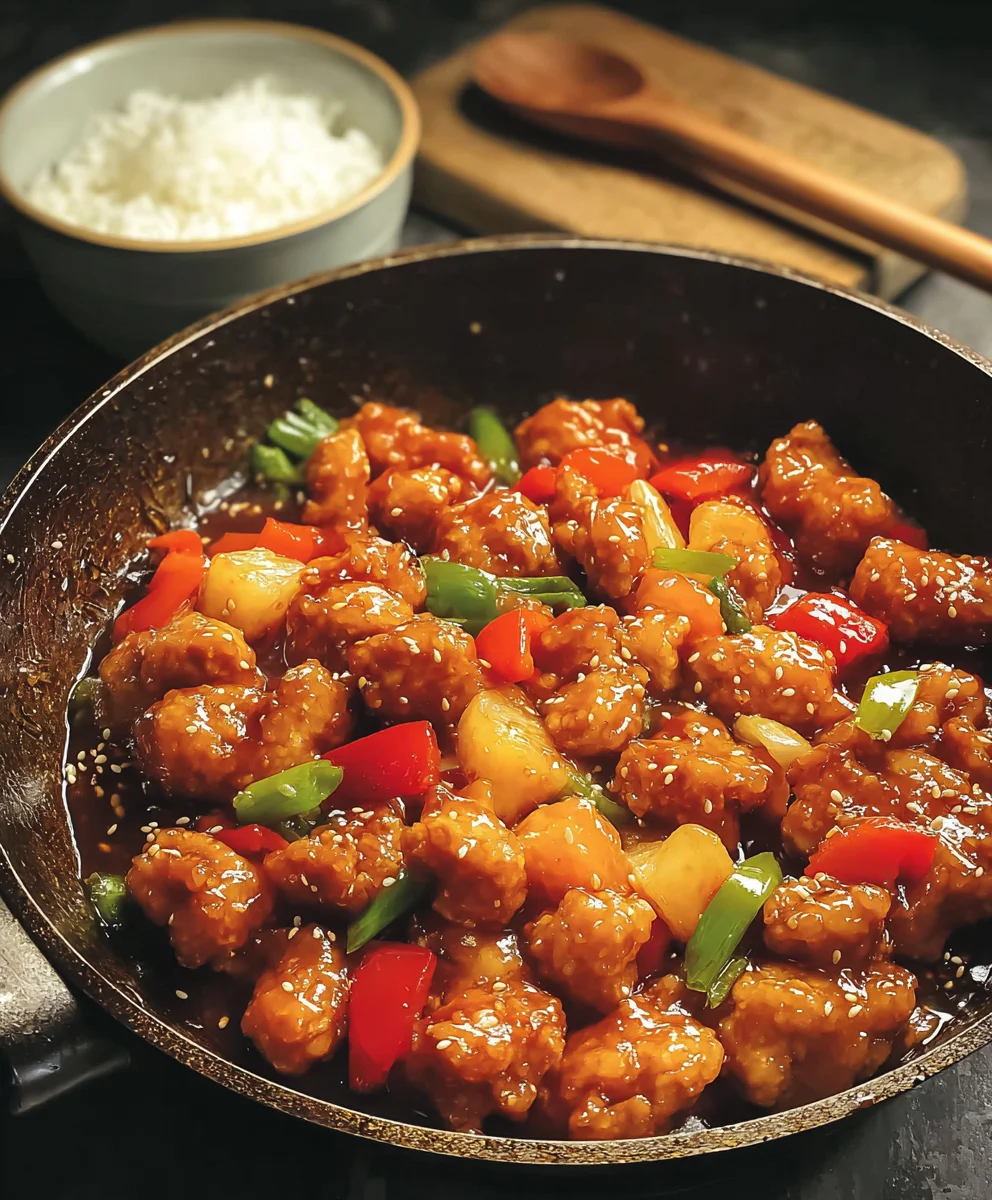
Sweet and Sour Chicken is a universally adored dish, and for good reason! It’s that perfect symphony of flavors – a vibrant tangin extractess that awakens your palate, followed by a subtle, comforting sweetness that leaves you wanting more. This isn’t just any stir-fry; it’s a culinary adventure that transports you straight to your favorite Chinese takeout spot, but better, because you made it yourself. What makes our Sweet and Sour Chicken recipe so special? It’s all about achieving that irresistible glossy sauce that coats every succulent piece of chicken and crisp vegetable, creating a delightful texture contrast. Forget the gloopy, overly sweet versions you might have tried. We’re talking about a balanced, bright, and utterly satisfying meal that’s surprisingly easy to whip up on a weeknight, proving that restaurant-quality Sweet and Sour Chicken is well within your reach.
Ingredients:
- 3 tablespoons white vinegar (or rice vinegar, or apple cider vinegar)
- 1/4 cup ketchup
- 1/4 cup granulated sugar
- 1/2 cup water
- 1/4 teaspoon red pepper flakes (optional, for a touch of heat)
- 1 tablespoon soy sauce
- 2 teaspoons cornstarch (for the sauce)
- 12 ounces boneless, skinless chicken thighs or breasts, cut into 1-inch pieces
- 1 egg white, lightly beaten
- 1/4 cup all-purpose flour
- 1/4 cup cornstarch (for the chicken coating)
- 1 teaspoon baking powder
- Salt and freshly ground black pepper, to taste
- 1 medium white or yellow onion, cut into 1-inch pieces
- 1/2 red bell pepper (approximately 1 cup), cut into 1-inch pieces
Preparing the Sweet and Sour Sauce
This is where the magic happens, creating that irresistible tangy and sweet flavor that defines this dish. It’s surprisingly simple to whip up. In a medium saucepan, whisk together the white vinegar, ketchup, granulated sugar, water, and soy sauce. If you enjoy a little warmth, now is the time to add the red pepper flakes. Place the saucepan over medium heat. Bring the mixture to a gentle simmer, stirring occasionally, until the sugar has completely dissolved. This usually takes about 5-7 minutes. In a small bowl, whisk together the 2 teaspoons of cornstarch with about 2 tablespoons of the simmering sauce mixture until you have a smooth slurry. This slurry is key to thickening our sauce to the perfect consistency. Gradually whisk this slurry back into the saucepan with the rest of the sauce. Continue to simmer and stir for another 2-3 minutes, or until the sauce has thickened enough to coat the back of a spoon. It should be glossy and pourable, not too thin or too gloopy. Once thickened, remove the sauce from the heat and set it aside. This allows it to cool slightly and further develop its flavors. You can even make this sauce a day in advance and store it in the refrigerator; it will reheat beautifully.
Coating and Frying the Chicken
The secret to tender, juicy chicken with a perfectly crisp exterior lies in this coating process. Start by seasoning your chicken pieces generously with salt and freshly ground black pepper. In a medium bowl, prepare your dredgin extractg station. First, place the lightly beaten egg white. This will act as the binder for our dry ingredients. In a separate shallow dish or a plate, combine the all-purpose flour, 1/4 cup of cornstarch, and the baking powder. The baking powder is a secret weapon here; it helps create a lighter, crispier coating. Whisk these dry ingredients together thoroughly to ensure they are evenly distributed. Now, take each piece of seasoned chicken and dip it into the egg white, ensuring it’s fully coated. Let any excess egg white drip off for a moment. Then, transfer the egg white-coated chicken to the flour and cornstarch mixture. Toss the chicken pieces around until they are completely covered in the dry coating. Gently shake off any excess flour mixture. It’s important to get a good, even coating, but avoid clumping.
Now for the frying. You’ll want to heat about 1 to 2 inches of neutral cooking oil (like vegetable or canola oil) in a large skillet or wok over medium-high heat. You’re looking for the oil to reach about 350°F (175°C). A good way to test if the oil is ready is to drop a tiny piece of the coated chicken into it; if it sizzles immediately and floats to the surface, your oil is at the right temperature. Carefully add the coated chicken pieces to the hot oil in a single layer, being careful not to overcrowd the pan. Overcrowding will lower the oil temperature and result in soggy chicken, which is precisely what we want to avoid. You’ll likely need to fry the chicken in batches. Fry each batch for about 4-6 minutes, turning the pieces occasionally, until they are golden brown and cooked through. The internal temperature of the chicken should reach 165°F (74°C). Once cooked, use a slotted spoon or spider to remove the chicken from the oil and place it on a wire rack set over a baking sheet. This allows the excess oil to drain off, keeping the chicken nice and crispy.
Stir-Frying the Vegetables
While the chicken is draining, it’s time to give our vegetables a quick sauté to bring out their natural sweetness and vibrant colors. Heat 1 tablespoon of neutral cooking oil in the same skillet or wok (you can wipe it out if there are too many fried bits, or use a clean one) over medium-high heat. Add the cut onion pieces and stir-fry for about 2-3 minutes until they start to soften and become slightly translucent. Then, add the red bell pepper pieces. Continue to stir-fry for another 3-4 minutes. You want the vegetables to be tender-crisp, meaning they still have a slight bite to them and haven’t become mushy. This will add a delightful textural contrast to the tender chicken and the smooth sauce.
Combining Everything Together
This is the final, glorious step where all the components come together to create the classic Sweet and Sour Chicken we all love. Return the fried chicken pieces to the skillet or wok with the stir-fried vegetables. Pour the prepared sweet and sour sauce over the chicken and vegetables. Gently toss everything together to ensure that every piece of chicken and every vegetable is beautifully coated in the glossy, tangy sauce. Let it simmer for just about 1-2 minutes, allowing the flavors to meld and the sauce to coat everything perfectly. Be careful not to overcook at this stage, as you don’t want the chicken to become tough or the vegetables to lose their crispness. The goal is a vibrant, flavorful dish that’s ready to be served immediately.
Serving Your Masterpiece
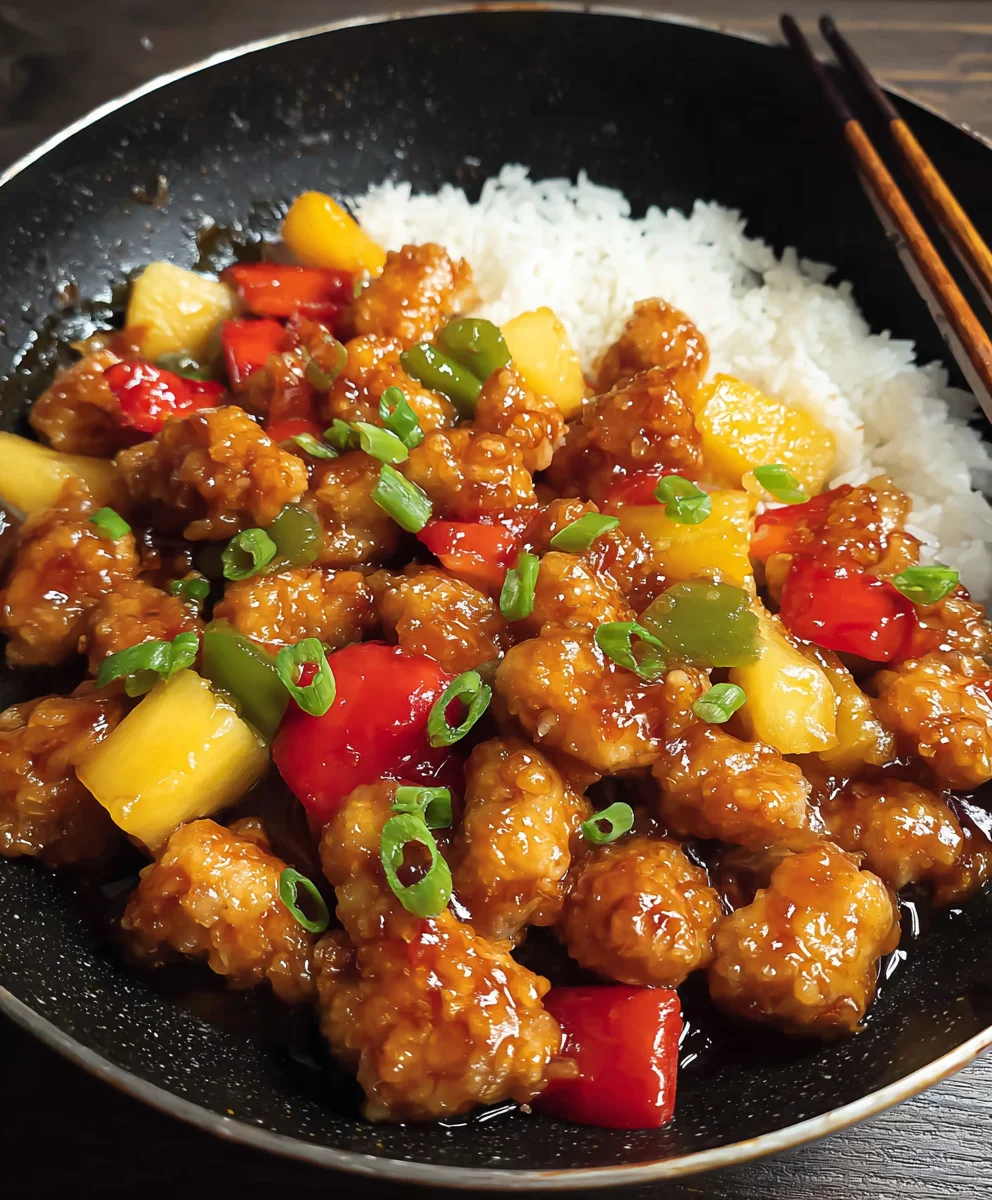
This Sweet and Sour Chicken is best enjoyed piping hot. Serve it immediately over a bed of fluffy steamed white rice. The rice is perfect for soaking up any extra delicious sauce. For an extra touch of freshness and color, you can garnish your dish with some thinly sliced green onions or toasted sesame seeds if you have them on hand. This recipe makes for a satisfying and impressive meal, perfect for a weeknight dinner or when you’re entertaining. Enjoy the symphony of sweet, sour, savory, and slightly spicy notes with every bite!
Conclusion:
We’ve reached the delicious end of our journey crafting the perfect Sweet and Sour Chicken! This recipe offers a delightful balance of tangy and sweet, with tender chicken pieces coated in a vibrant, flavorful sauce, all complemented by crisp vegetables. It’s a crowd-pleaser that’s surprisingly easy to whip up for a weeknight meal or to impress guests. Don’t be intimidated by the sauce; the steps are straightforward, and the results are incredibly rewarding. This dish is best served hot, straight from the wok or pan, to maintain that perfect texture and flavor. Consider serving it over fluffy steamed jasmine rice, or for a lighter option, pair it with quinoa or cauliflower rice. You can also elevate the dish by adding other colorful vegetables like snow peas, water chestnuts, or even a handful of cashews for an extra crunch.
We encourage you to get creative with your own twists! Feel free to adjust the sweetness and sourness to your personal preference, or experiment with different types of vinegar. If you’re feeling adventurous, try adding a touch of chili flakes for a hint of heat. This Sweet and Sour Chicken is a fantastic base for customization, making it a recipe you’ll turn to again and again.
Frequently Asked Questions:
Can I make the sauce ahead of time?
Yes, absolutely! The sweet and sour sauce can be made a day or two in advance and stored in an airtight container in the refrigerator. This will save you even more time when you’re ready to cook the dish. Simply reheat the sauce gently on the stovetop before tossing it with your cooked chicken and vegetables.
What other proteins can I use instead of chicken?
This sauce is incredibly versatile! You can easily substitute the chicken with firm tofu for a vegetarian option, or use beef tenderloin or shrimp for a different protein experience. Just adjust the cooking times accordingly to ensure the protein is cooked through.
How can I make the chicken extra crispy?
For an extra crispy coating on your chicken, ensure that the chicken pieces are thoroughly dried before dredgin extractg them in cornstarch. You can also shallow-fry the chicken pieces in batches until golden brown and crispy before adding them to the sauce. This will help maintain their crispiness even after being coated in the sweet and sour sauce.
Sweet and Sour Beef Stir Fry-Quick Delicious Recipe
A quick and delicious recipe for sweet and sour beef stir fry, featuring tender beef coated and fried to perfection, stir-fried vegetables, and a homemade tangy-sweet sauce.
Ingredients
-
12 ounces boneless beef sirloin or flank steak, cut into 1-inch pieces
-
3 tablespoons white vinegar
-
1/4 cup ketchup
-
1/4 cup granulated sugar
-
1/2 cup water
-
1/4 teaspoon red pepper flakes (optional)
-
1 tablespoon soy sauce
-
2 teaspoons cornstarch
-
1 egg white, lightly beaten
-
1/4 cup all-purpose flour
-
1/4 cup cornstarch
-
1 teaspoon baking powder
-
Salt and freshly ground black pepper, to taste
-
1 medium white or yellow onion, cut into 1-inch pieces
-
1/2 red bell pepper (approximately 1 cup), cut into 1-inch pieces
Instructions
-
Step 1
Preparing the Sweet and Sour Sauce: In a medium saucepan, whisk together white vinegar, ketchup, granulated sugar, water, and soy sauce. Add red pepper flakes if desired. Place over medium heat and bring to a gentle simmer, stirring until sugar dissolves (5-7 minutes). In a small bowl, whisk 2 teaspoons cornstarch with 2 tablespoons of the simmering sauce to create a slurry. Gradually whisk the slurry back into the saucepan. Simmer and stir for another 2-3 minutes until thickened and glossy. Remove from heat and set aside. -
Step 2
Coating the Beef: Season beef pieces generously with salt and pepper. In a medium bowl, prepare the dredging station: lightly beaten egg white in one, and a mixture of all-purpose flour, 1/4 cup cornstarch, and baking powder in another. Dip each beef piece into the egg white, let excess drip off, then coat thoroughly in the flour mixture. Shake off excess. -
Step 3
Frying the Beef: Heat 1-2 inches of neutral cooking oil in a large skillet or wok over medium-high heat to about 350°F (175°C). Carefully add coated beef in a single layer, avoiding overcrowding. Fry in batches for 4-6 minutes, turning occasionally, until golden brown and cooked through (internal temperature 165°F/74°C). Remove with a slotted spoon to a wire rack set over a baking sheet to drain. -
Step 4
Stir-Frying the Vegetables: Wipe out the skillet or use a clean one. Heat 1 tablespoon of neutral cooking oil over medium-high heat. Add onion pieces and stir-fry for 2-3 minutes until slightly softened. Add red bell pepper pieces and stir-fry for another 3-4 minutes until tender-crisp. -
Step 5
Combining Everything: Return the fried beef to the skillet with the stir-fried vegetables. Pour the prepared sweet and sour sauce over the mixture. Gently toss to coat evenly. Simmer for 1-2 minutes to allow flavors to meld. -
Step 6
Serving: Serve hot over steamed white rice. Garnish with sliced green onions or toasted sesame seeds if desired.
Important Information
Nutrition Facts (Per Serving)
It is important to consider this information as approximate and not to use it as definitive health advice.
Allergy Information
Please check ingredients for potential allergens and consult a health professional if in doubt.