Air Fryer Tortilla Garlic Bread- Quick & Delicious
Quick Air Fryer Tortilla Garlic Bread is the answer to your weeknight dinner dilemmas and impromptu snack cravings. Imagin extracte this: a crispy, golden-brown base, infused with the irresistible aroma of garlic and butter, ready in mere minutes. It’s no wonder this delightful creation has taken kitchens by storm. People adore it for its incredible speed and versatility – it’s the perfect side for pasta, a base for mini pizzas, or simply a satisfying snack on its own. What truly sets this Quick Air Fryer Tortilla Garlic Bread apart is its ingenious simplicity, transforming humble tortillas into a gourmet-inspired treat without any fuss. You get all the satisfying crunch and savory flavor you’d expect from traditional garlic bread, but with a fraction of the time and effort. Get ready to elevate your meals with this effortless marvel.

Ingredients:
- 2 flour tortilla shells
- 1 tablespoon butter, softened
- ½ cup grated mozzarella cheese
- Garlic powder, to taste
- Italian seasoning, to taste
- Fresh parsley, chopped (optional, for garnish)
Preparing Your Tortilla Garlic Bread
Step 1: Buttering and Seasoning the Tortillas
The first step to creating your Quick Air Fryer Tortilla Garlic Bread is to get your tortillas ready for their delicious toppings. Take your two flour tortilla shells and lay them flat on a clean cutting board or a plate. Now, grab that tablespoon of softened butter. Softened butter is key here because it spreads much more easily and evenly than cold butter, ensuring full coverage. If your butter is a little too firm, you can pop it in the microwave for just 5-10 seconds, but be careful not to melt it completely. Using the back of a spoon or a butter knife, spread a thin, even layer of this softened butter all over one side of each tortilla. You want to go all the way to the edges to get that delightful crispy border. Once the butter is spread, it’s time for the flavor! Generously sprinkle garlic powder over the buttered surface of both tortillas. Don’t be shy with the garlic powder; this is where the “garlic bread” magic happens! Follow this with a sprinkle of Italian seasoning. The herbs in the Italian seasoning will add a lovely depth of flavor that complements the garlic beautifully. Again, season to your taste – you can always add a little more, but you can’t take it away!
Step 2: Layering the Cheesy Goodness
With your tortillas nicely buttered and seasoned, it’s time to add the star of the show (besides the garlic, of course!): the cheese. Take your ½ cup of grated mozzarella cheese and evenly distribute it over one of the tortillas. Try to get a good, consistent layer of cheese from edge to edge. The mozzarella will melt and get wonderfully gooey, creating that irresistible cheesy pull we all love in garlic bread. Ensure the cheese covers most of the seasoned buttered surface. For the second tortilla, you have a choice. You can either apply the same cheesy treatment, making it a double-decker cheesy delight, or you can leave the second tortilla plain buttered and seasoned side up to act as a sort of “lid” or “top” for the cheesy tortilla, creating a sort of quesadilla-style garlic bread. For this recipe, we’ll aim for a single layer of cheese on each for optimal crispiness and flavor distribution. So, sprinkle half of the mozzarella cheese on one tortilla and the remaining half on the second tortilla. This ensures both pieces get their fair share of cheesy goodness.
Step 3: Assembling and Prepping for the Air Fryer
Now that your tortillas are prepped with butter, seasonings, and cheese, it’s time to assemble them into the perfect shape for your air fryer. If you opted for a single layer of cheese on each tortilla, you’ll simply place them side-by-side in the air fryer basket. If you prefer a more traditional quesadilla-style garlic bread, you would take the second cheese-covered tortilla and place it cheese-side down on top of the first cheese-covered tortilla, effectively “closing” the tortilla. However, for our Quick Air Fryer Tortilla Garlic Bread, we are going to keep them open-faced for maximum crisping and easier eating. Gently place one cheese-covered tortilla into your air fryer basket. Make sure it lies flat. Then, carefully place the second cheese-covered tortilla next to it in the basket, ensuring they are not overlapping too much. If your air fryer basket is small, you might need to cook these in two batches to ensure they get evenly crispy. Overcrowding the basket will steam the tortillas rather than crisp them, and we certainly don’t want that!
Step 4: Air Frying to Golden Perfection
This is where the magic happens and your Quick Air Fryer Tortilla Garlic Bread comes to life! Preheat your air fryer to 375°F (190°C) for about 3-5 minutes. Preheating ensures an even cooking temperature right from the start, leading to a better texture. Once preheated, carefully place your prepared tortillas into the air fryer basket. The cooking time will vary slightly depending on your air fryer model and the thickness of your tortillas, but generally, you’ll want to cook them for about 4-6 minutes. Keep a close eye on them, especially during the last couple of minutes. You’re looking for the cheese to be completely melted, bubbly, and starting to turn a light golden brown in spots. The edges of the tortillas should become wonderfully crisp and lightly browned. If you notice one side cooking faster than the other, you can carefully flip the tortillas halfway through the cooking process using a spatula or tongs for even browning. It’s important to check frequently to prevent burning, as tortilla bread can go from perfectly crisp to burnt very quickly.
Step 5: Garnishing and Serving Your Delicious Creation
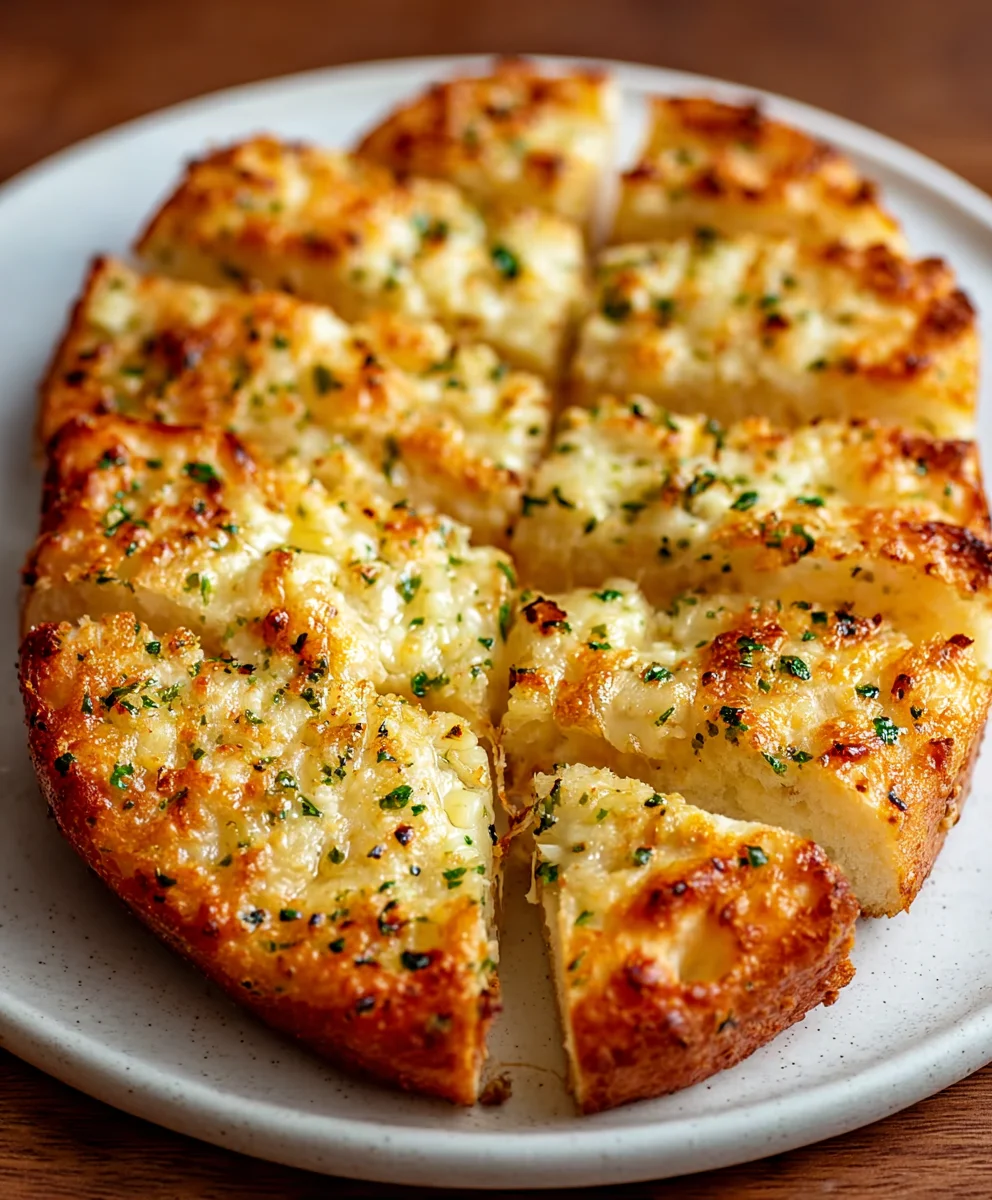
As soon as your Quick Air Fryer Tortilla Garlic Bread emerges from the air fryer, hot and golden, it’s ready for its final touch. Carefully remove the tortillas from the air fryer basket using tongs or a spatula and place them onto a serving plate or cutting board. If you’re using fresh parsley for garnish, now is the time to sprinkle it over the hot, melted cheese. The heat from the bread will help to release the fresh, vibrant aroma of the parsley. This optional step adds a lovely pop of color and a fresh herbaceous note that cuts through the richness of the cheese and butter. Let the tortilla garlic bread cool for just a minute or two – it will be very hot straight from the air fryer! This short cooling period will allow the cheese to set slightly, making it easier to handle and cut. You can then slice each tortilla into wedges, like traditional garlic bread, or enjoy them whole. Serve immediately and savor that incredible blend of crispy tortilla, savory garlic butter, and melted mozzarella! This is a perfect snack, appetizer, or even a side dish.
Conclusion:
And there you have it – your perfectly golden, irresistibly garlicky Quick Air Fryer Tortilla Garlic Bread is ready to impress! We’ve seen how simple it is to transform humble tortillas into a delicious side dish or appetizer that’s packed with flavor and incredibly quick to make. This recipe is a testament to how easily you can elevate everyday ingredients with minimal effort.
Feel free to serve your Quick Air Fryer Tortilla Garlic Bread alongside your favorite pasta dishes, hearty soups, or as a delightful appetizer with a side of marinara sauce for dipping. Don’t be afraid to experiment! For a spicy kick, try adding a pinch of red pepper flakes to the butter mixture. You can also sprinkle on some grated Parmesan cheese in the last minute of cooking for an extra cheesy delight. We encourage you to make this recipe your own and enjoy the fantastic results!
Frequently Asked Questions:
Can I use different types of tortillas?
Absolutely! While corn tortillas work wonderfully, you can also use flour tortillas. Keep in mind that flour tortillas might cook slightly faster and achieve a crispier texture. Adjust the cooking time as needed to reach your desired level of crispiness.
How can I store leftovers?
Leftover Quick Air Fryer Tortilla Garlic Bread is best enjoyed fresh. However, if you do have some, store them in an airtight container at room temperature for a day or two. To reheat, a quick toast in the air fryer or oven will help restore some of their crispiness.
Air Fryer Tortilla Garlic Bread
A quick and delicious recipe for crispy tortilla garlic bread made in the air fryer.
Ingredients
-
2 flour tortilla shells
-
1 tablespoon butter, softened
-
½ cup grated mozzarella cheese
-
Garlic powder, to taste
-
Italian seasoning, to taste
-
Fresh parsley, chopped (optional, for garnish)
Instructions
-
Step 1
Spread softened butter evenly over one side of each tortilla, going to the edges. Sprinkle generously with garlic powder and Italian seasoning. -
Step 2
Evenly distribute half of the mozzarella cheese over one tortilla and the remaining half on the second tortilla. -
Step 3
Place the cheese-covered tortillas side-by-side in the air fryer basket, ensuring they do not overlap significantly. Cook in batches if necessary for even crisping. -
Step 4
Preheat air fryer to 375°F (190°C) for 3-5 minutes. Air fry the tortillas for 4-6 minutes, or until cheese is bubbly and golden brown, and edges are crisp. Flip halfway if needed for even browning. -
Step 5
Remove from air fryer, garnish with fresh parsley if desired, let cool slightly, and slice into wedges. Serve immediately.
Important Information
Nutrition Facts (Per Serving)
It is important to consider this information as approximate and not to use it as definitive health advice.
Allergy Information
Please check ingredients for potential allergens and consult a health professional if in doubt.