Amish White Bread Recipe-Soft Fluffy Homemade Loaf
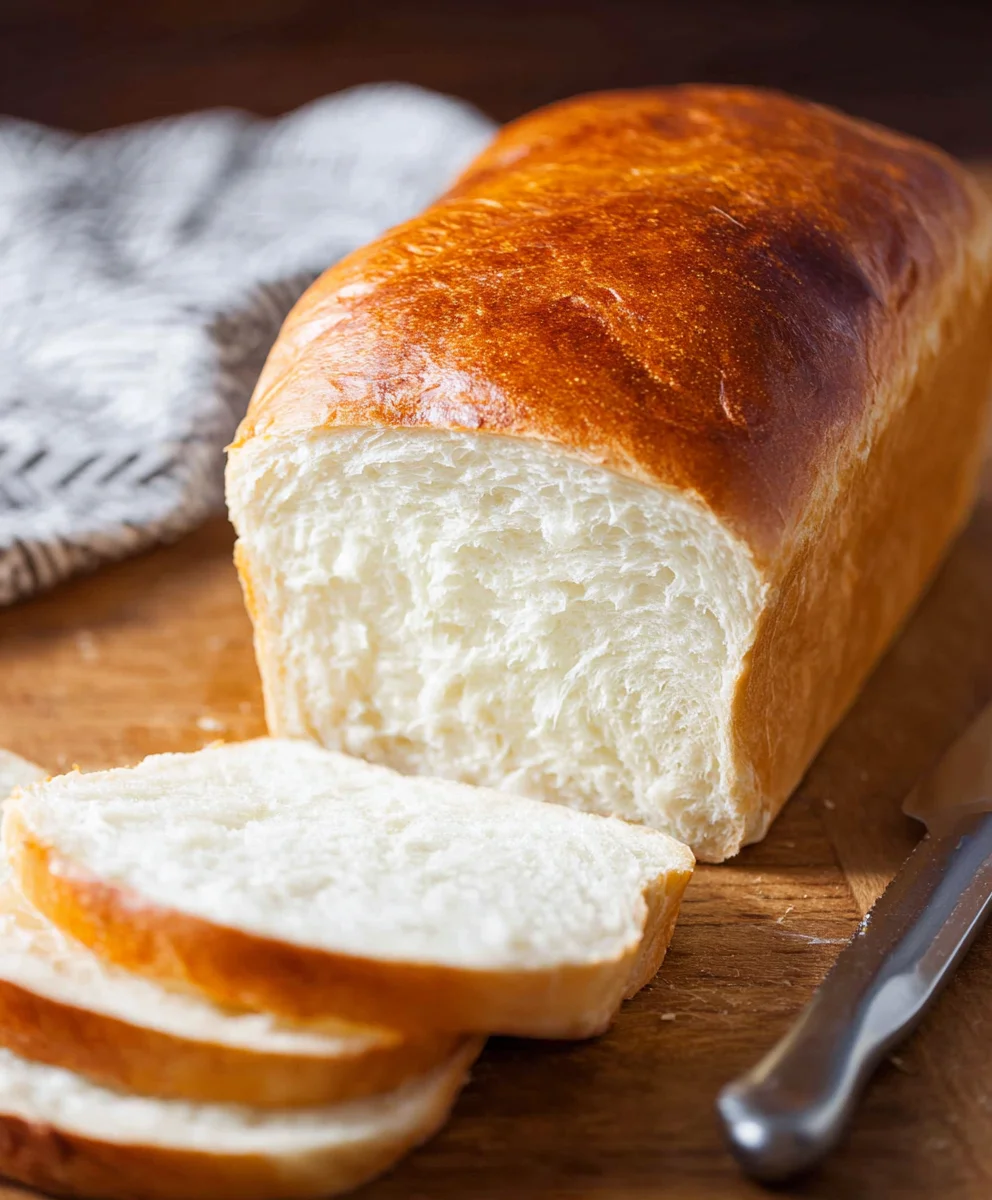
AMISH WHITE BREAD. There’s something undeniably comforting and nostalgic about a perfectly baked loaf of this classic. It’s more than just bread; it’s a hug in edible form, evoking memories of simpler times and cozy kitchens. People adore AMISH WHITE BREAD for its incredibly soft, pillowy texture and its wonderfully mild, subtly sweet flavor that pairs perfectly with almost anything. Whether you’re slathering it with butter and jam, using it for hearty sandwiches, or dipping it into a steaming bowl of soup, this bread delivers pure, unadulterated satisfaction. What truly sets this particular AMISH WHITE BREAD recipe apart is its straightforward, no-fuss approach, yielding a consistently tender crum extractb and a beautiful golden crust every single time. Get ready to fill your home with that irresistible aroma of freshly baked goodness!
Ingredients:
- 1 cup warm water, (110-120°F)
- ⅓ cup granulated sugar
- 1 packet (2 ¼ teaspoons) instant yeast
- 3 cups all-purpose flour
- ¾ teaspoon salt
- 2 tablespoons vegetable or canola oil
- 2 tablespoons unsalted butter, melted
Making the Amish White Bread Dough
The journey to a perfect loaf of Amish White Bread begin extracts with activating our yeast. In a large mixing bowl, combine the warm water and granulated sugar. The water temperature is crucial here; too hot and it will kill the yeast, too cool and it won’t activate properly. Aim for that sweet spot between 110°F and 120°F, often described as “baby bath warm.” Sprinkle the instant yeast over the water and sugar mixture. Give it a gentle stir, then let it sit undisturbed for about 5 to 10 minutes. You’ll know the yeast is alive and ready to work its magic when it becomes frothy and bubbly, resembling a thick layer of foam on top of the liquid. This “proofing” step is a good indicator of successful yeast activity.
Once your yeast is foamy and active, it’s time to add the rest of our wet ingredientgin extractnd begin incorporating the flour. Add the vegetable or canola oil and the melted unsalted butter to the yeast mixture. The oil and butter will contribute to the bread’s tender crum extractb and rich flavor. Now, it’s time for the flour and salt. Add 2 cups of the all-purpose flour and the salt to the bowl. Mix everything together using a wooden spoon or a sturdy spatula until it just starts to come together into a shaggy dough. At this stage, the dough will be sticky and unmanageable, and that’s perfectly normal.
Kneading the Dough for Elasticity
Now comes the hands-on part – kneading! This process develops the gluten in the flour, which gives our bread its structure and chewy texture. Turn the shaggy dough out onto a lightly floured surface. Don’t be tempted to add too much extra flour at this stage, as it can make the bread dry. Start by gently pushing the dough away from you with the heels of your hands, then fold it back towards you. Rotate the dough a quarter turn and repeat the process. Continue kneading for about 8 to 10 minutes. The dough will gradually transform from a sticky, lumpy mass into a smooth, elastic ball. You’ll know it’s ready when it springs back slowly when gently poked. If the dough feels overly sticky and unmanageable after a few minutes of kneading, you can add a tablespoon of flour at a time, but do so sparingly. The goal is a pliable dough that doesn’t stick excessively to your hands.
First Rise: Letting the Dough Develop
Once your dough is perfectly kneaded, it’s time for its first rise. Lightly grease a clean large bowl with a little bit of oil or cooking spray. Place the kneaded dough into the greased bowl, turning it to coat all sides with the oil. This prevents a dry crust from forming on top. Cover the bowl tightly with plastic wrap or a clean kitchen towel. Find a warm, draft-free place for the dough to rise. This could be a slightly warm oven (turned off, of course!) or a sunny spot on your countertop. Allow the dough to rise for approximately 1 to 1 ½ hours, or until it has doubled in size. The time this takes can vary depending on the ambient temperature of your kitchen. Patience is key here; a good, slow rise results in a better flavor and texture.
Shaping and Second Rise
After the dough has doubled in size, gently punch it down to release the air that has accumulated during the first rise. Turn the dough out onto your lightly floured work surface once more. At this point, you can shape your loaf. For a classic loaf pan shape, gently pat the dough into a rectangle about 8×10 inches. Then, starting from one of the shorter ends, tightly roll the dough up into a log shape, pinching the seam to seal it. Tuck in the ends. Grease a 9×5 inch loaf pan with butter or cooking spray, or line it with parchment paper for easy removal. Place the shaped dough seam-side down into the prepared loaf pan.
Now, your shaped loaf needs its second rise. Cover the loaf pan loosely with plastic wrap or a clean kitchen towel. Again, find a warm, draft-free spot for it to rise. This second rise typically takes about 30 to 45 minutes, or until the dough has risen about an inch above the rim of the pan. It should look visibly puffy and airy. Don’t let it over-proof, as this can lead to a collapsed loaf during baking.
Baking the Perfect Amish White Bread
Preheat your oven to 375°F (190°C) during the last 15-20 minutes of the second rise. This ensures your oven is at the correct temperature when the bread is ready. Once the oven is preheated and the dough has completed its second rise, it’s time to bake! Place the loaf pan on the middle rack of the preheated oven. Bake for 30 to 40 minutes. The bread is done when it has a beautiful golden-brown crust and sounds hollow when tapped on the bottom. If the crust is browning too quickly, you can loosely tent the top of the loaf with aluminum foil.
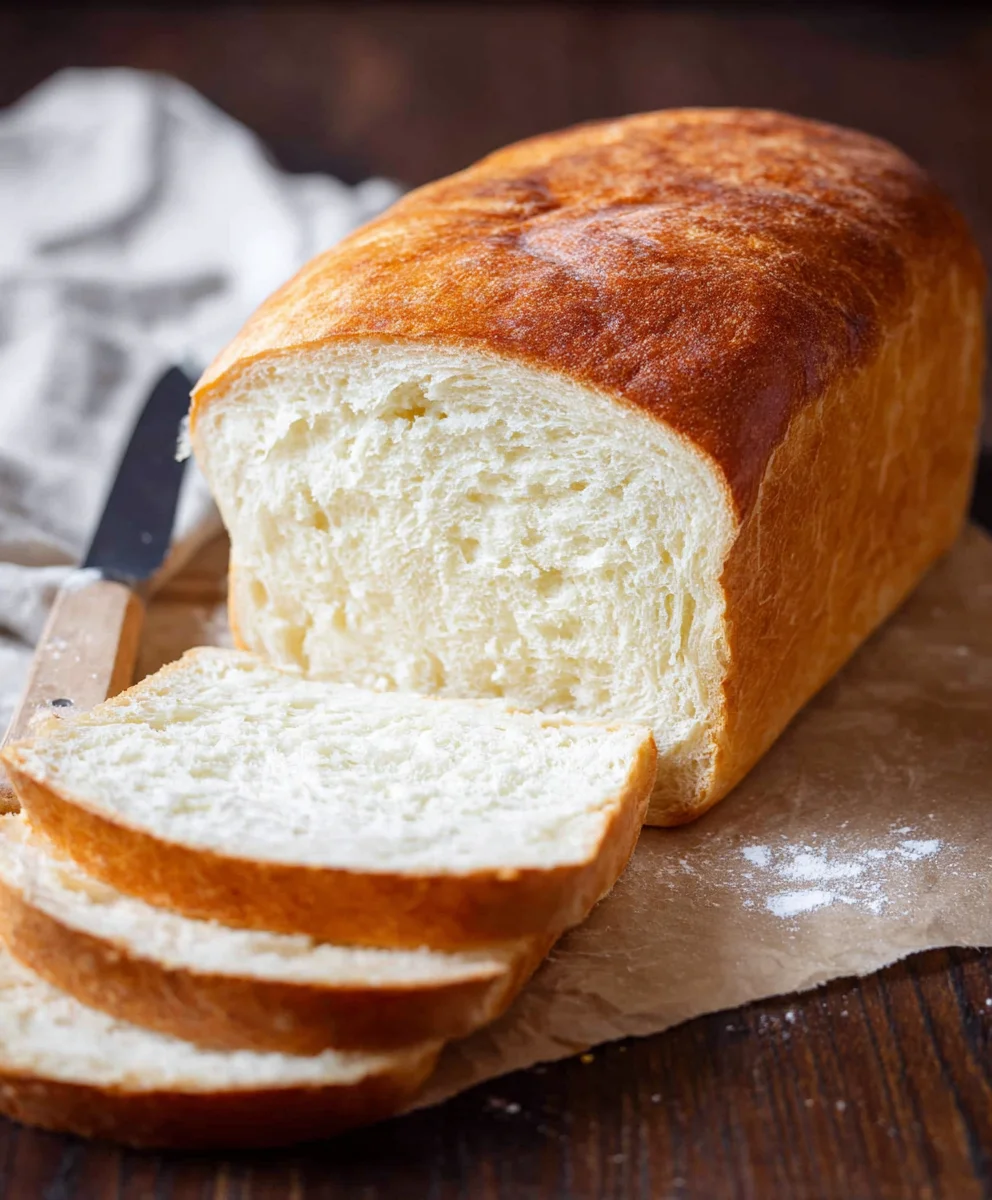
Once baked, carefully remove the loaf from the oven. Immediately turn the bread out of the loaf pan and onto a wire rack to cool completely. This is important to prevent the bottom crust from becoming soggy from trapped steam. Resist the temptation to slice into it while it’s still hot; letting it cool allorum extractthe crumb to set, ensuring a better texture. Once cooled, you’ll have a wonderfully soft, slightly sweet, and incredibly versatile loaf of Amish White Bread, perfect for sandwiches, toast, or simply enjoyed with a smear of butter.
Conclusion:
We hope you’ve enjoyed learning how to make this delightful AMISH WHITE BREAD! This recipe delivers a wonderfully soft interior with a slightly chewy crust, perfect for any occasion. Whether you’re a seasoned baker or just starting, the simplicity of this AMISH WHITE BREAD recipe makes it incredibly rewarding to create from scratch. Its comforting aroma filling your kitchen is a testament to the joy of homemade baking.
This versatile AMISH WHITE BREAD is a fantastic base for so many meals. It’s ideal for classic sandwiches, toasted with butter and jam for breakfast, or served alongside hearty soups and stews. For a sweet twist, try brushing the top with melted butter and a sprinkle of cinnamon sugar as soon as it comes out of the oven. Don’t be afraid to experiment with additions like herbs or cheese mixed into the dough for a savory variation. The possibilities are truly endless with this foundational bread.
Give this AMISH WHITE BREAD a try – we’re confident you’ll love the results and the satisfaction of creating something so wholesome and delicious with your own two hands!
Frequently Asked Questions:
Q1: How should I store my AMISH WHITE BREAD?
Once completely cooled, you can store your AMISH WHITE BREAD in an airtight container or bread bag at room temperature for 2-3 days. For longer storage, wrap it tightly in plastic wrap and then in aluminum foil, and freeze for up to 3 months. Thaw at room temperature before slicing and enjoying.
Q2: My AMISH WHITE BREAD didn’t rise as much as I expected. What could have gone wrong?
Several factors can affect rising. Ensure your yeast was fresh and properly activated. Water temperature is crucial; too hot can kill the yeast, and too cold won’t activate it sufficiently (aim for lukewarm). Also, the ambient temperature of your kitchen can impact the dough’s rise. A slightly warmer environment generally promotes better yeast activity. Make sure you’re giving the dough enough time to rise in a draft-free spot.
Amish White Bread Recipe-Soft Fluffy Homemade Loaf
A soft, fluffy, and slightly sweet homemade Amish white bread loaf, perfect for sandwiches, toast, or enjoying with butter.
Ingredients
-
1 cup warm water, (110-120°F)
-
⅓ cup granulated sugar
-
1 packet (2 ¼ teaspoons) instant yeast
-
3 cups all-purpose flour
-
¾ teaspoon salt
-
2 tablespoons vegetable or canola oil
-
2 tablespoons unsalted butter, melted
Instructions
-
Step 1
Activate yeast: In a large mixing bowl, combine warm water and granulated sugar. Sprinkle instant yeast over the mixture. Stir gently and let sit for 5-10 minutes until frothy. -
Step 2
Make the dough: Add vegetable oil and melted butter to the yeast mixture. Add 2 cups of all-purpose flour and salt. Mix until a shaggy dough forms. -
Step 3
Knead the dough: Turn the dough onto a lightly floured surface. Knead for 8-10 minutes until smooth and elastic. Add flour sparingly if too sticky. -
Step 4
First rise: Place dough in a greased bowl, turning to coat. Cover and let rise in a warm, draft-free place for 1-1.5 hours, or until doubled in size. -
Step 5
Shape and second rise: Punch down dough, shape into a rectangle, and roll into a log. Place seam-side down in a greased 9×5 inch loaf pan. Cover and let rise for 30-45 minutes until puffy. -
Step 6
Bake the bread: Preheat oven to 375°F (190°C). Bake the loaf for 30-40 minutes until golden brown and hollow-sounding when tapped. -
Step 7
Cool: Remove bread from the pan and cool completely on a wire rack before slicing.
Important Information
Nutrition Facts (Per Serving)
It is important to consider this information as approximate and not to use it as definitive health advice.
Allergy Information
Please check ingredients for potential allergens and consult a health professional if in doubt.