Grilled Cheese Burrito- Cheesy Comfort Food Fusion
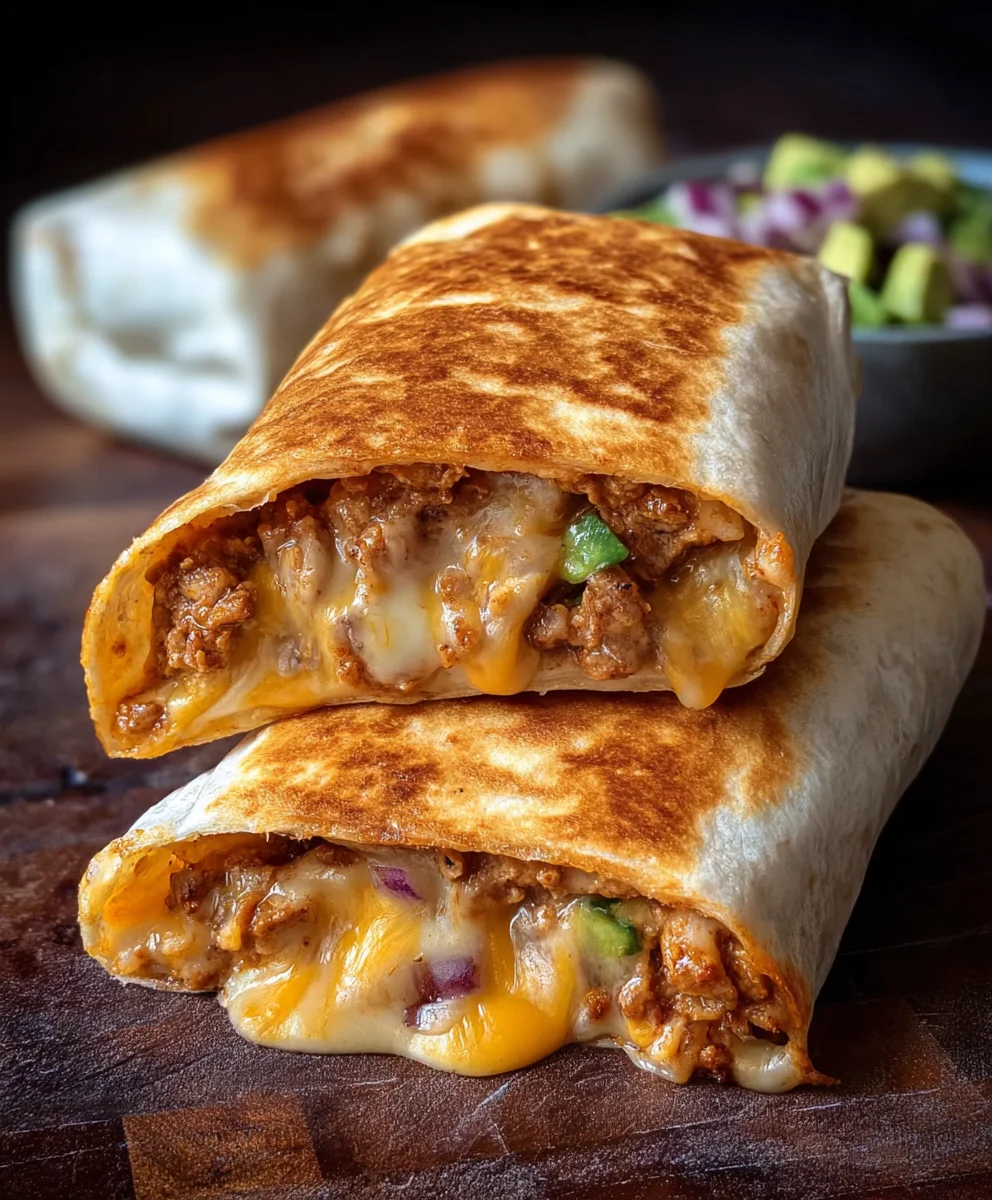
Grilled Cheese Burrito is more than just a meal; it’s a culinary hug, a nostalgic trip, and a flavor explosion all rolled into one. Imagin extracte the ultimate comfort food experience, elevated to new heights. This isn’t your average grilled cheese, nor is it a traditional burrito. It’s the glorious fusion of both, where gooey, melted cheese meets savory fillings, all encased in a perfectly seared tortilla. The magic lies in its deceptive simplicity. It’s the kind of dish that makes you pause, savor each bite, and wonder how such a brilliant combination wasn’t invented sooner. People adore the Grilled Cheese Burrito because it taps into that deep-seated craving for something warm, cheesy, and utterly satisfying. It’s the perfect antidote to a long day, a fantastic weekend treat, or a fun new way to enjoy your favorite sandwich and burrito fillings. What truly makes this Grilled Cheese Burrito special is its incredible versatility. You can customize it endlessly, making it your own personal masterpiece.
Ingredients:
- 1 pound ground beef
- 1 tablespoon olive oil
- 1 onion, diced
- 1 teaspoon salt
- 1 teaspoon black pepper
- 1 teaspoon smoked paprika
- 1 teaspoon dried oregano
- 1/2 cup tomato sauce
- 4 large flour tortillas
- 3 tablespoons spicy mayo
- 1 cup fried rice
- 1 cup nacho cheese sauce
- 1 cup sour cream
- 1 cup tortilla chips
Preparing the Beef Filling
Brown the Ground Beef
- Begin extract by heating the olive oil in a large skillet or frying pan over medium-high heat. Once the oil is shimmering, carefully add the ground beef to the hot skillet. Break up the beef with a spatula or wooden spoon as it cooks. You want to achieve a nice, even browning for the best flavor. Continue to cook the beef, stirring occasionally, until it’s no longer pink and has developed a rich brown color. This typically takes about 5-7 minutes.
- Once the ground beef is browned, drain off any excess grease. This step is crucial for preventing a greasy filling and ensuring the best texture for your Grilled Cheese Burrito. You can tilt the pan and use the spatula to help guide the grease into a heat-safe container or use paper towels to carefully blot the excess.
- Add the diced onion to the same skillet with the browned beef. Cook the onion with the beef for another 5-7 minutes, or until it has softened and become translucent. The onions will absorb some of the beef drippings and add a wonderful sweetness and depth of flavor to the filling.
- Now it’s time to season the beef and onion mixture. Sprinkle in the salt, black pepper, smoked paprika, and dried oregano. Stir everything together thoroughly to ensure the spices are evenly distributed throughout the meat. Let the mixture cook for an additional minute, allowing the spices to bloom and release their aromas. This brief toasting of the spices enhances their flavor significantly.
- Pour in the tomato sauce and stir it into the beef and onion mixture. Bring the mixture to a simmer and cook for about 5-10 minutes, stirring occasionally, until the sauce has thickened slightly and coats the beef. This will create a flavorful, cohesive filling for your burritos. Taste and adjust seasonings if necessary before proceeding to the next stage.
Assembling and Grilling the Burritos
Building Your Grilled Cheese Burritos
- Lay out your four large flour tortillas on a clean work surface. Spread an even layer of spicy mayo across the center of each tortilla, leaving a small border around the edges. The spicy mayo will act as a delicious binder and add a kick of flavor to your grilled cheese burritos. Feel free to adjust the amount of spicy mayo to your personal preference.
- Next, evenly distribute the cooked ground beef and onion mixture over the spicy mayo on each tortilla. Aim to create a generous but manageable layer, ensuring you don’t overfill the tortillas, which can make them difficult to wrap and grill.
- Now, it’s time to add the textural and cheesy elements. Spoon approximately 1/4 cup of fried rice onto the beef mixture on each tortilla. The fried rice adds a delightful surprise element and a satisfying chew. Then, generously drizzle about 1/4 cup of nacho cheese sauce over the fried rice. This is where the “grilled cheese” aspect truly comes to life, ensuring gooey, melted cheese in every bite.
- Crum extractble a portion of the tortilla chips over the nacho cheese sauce on each burrito. This adds a wonderful crunch and salty element that contrasts beautifully with the other ingredients. Don’t be shy with the chips; they contribute significantly to the overall experience of the grilled cheese burrito.
- To complete the filling, add a dollop of sour cream on top of the tortilla chips. This provides a cooling contrast to the spicy mayo and nacho cheese, balancing the flavors and adding a creamy finish.
Grilling for Golden Perfection
- To wrap the burritos, first fold in the sides of the tortilla towards the center, covering some of the filling. Then, starting from the bottom edge closest to you, tightly roll up the tortilla, enclosing all the delicious ingredients. Tuck in any loose bits as you roll to ensure a compact and secure burrito. Repeat this process for all four burritos.
- Heat a clean, lightly oiled griddle or a large non-stick skillet over medium heat. Place the wrapped burritos, seam-side down, onto the hot griddle. This helps to seal the seam and prevent the burrito from unraveling during the grilling process.
- Grill the burritos for about 3-5 minutes per side, or until they are golden brown and crispy, and the cheese is thoroughly melted and gooey. You’ll know they’re ready when you see beautiful grill marks and the tortillas feel firm and slightly puffed. You might need to adjust the heat to prevent burning while ensuring the inside gets hot and melty.
- Once beautifully grilled on all sides, carefully remove the burritos from the griddle. Let them rest for a minute or two before slicing. This allows the fillings to settle and makes them easier to cut.
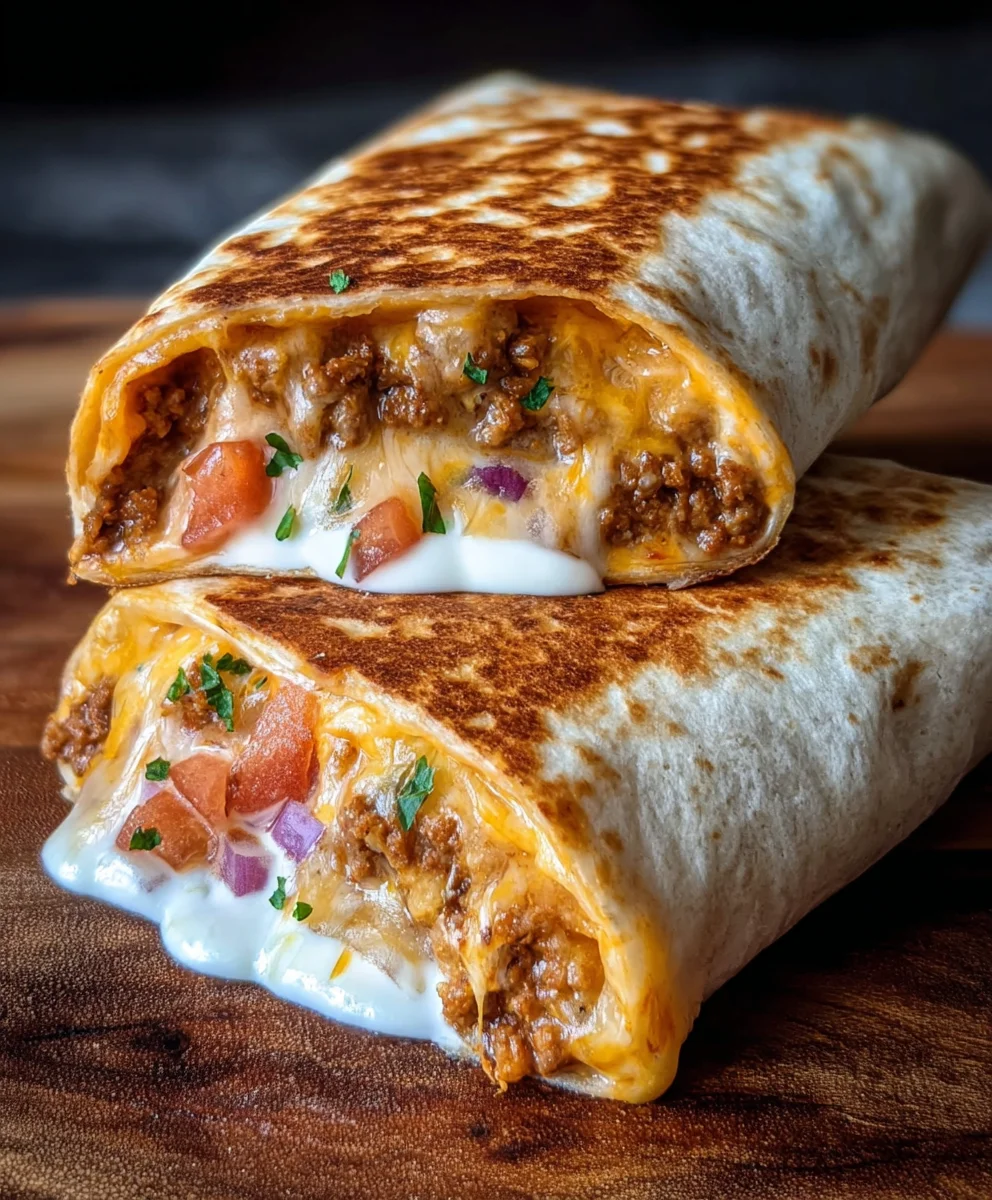
- Slice each Grilled Cheese Burrito in half diagonally for an impressive presentation and easier eating. Serve immediately and enjoy the incredible combination of crispy tortilla, savory beef, gooey cheese, and satisfying crunch!
Conclusion:
And there you have it – your very own Grilled Cheese Burrito! We’ve walked through the simple steps to create this delightful fusion of comfort food classics. The magic lies in the melty cheese, the hearty filling, and that satisfyingly crispy tortilla exterior. I hope you enjoyed making and, more importantly, devouring this unique creation as much as I do.
To elevate your Grilled Cheese Burrito experience, consider serving it alongside a fresh, zesty pico de gallo for a burst of freshness, or a creamy avocado crema for an extra layer of decadence. For some exciting variations, feel free to experiment with different cheeses – a sharp cheddar, a smoky gouda, or a spicy pepper jack can all add a fantastic twist. You can also introduce a protein like seasoned ground beef or shredded chicken for a more substantial meal. Don’t be afraid to get creative and make this recipe your own!
Frequently Asked Questions:
Can I make this ahead of time?
While the best experience is fresh, you can prepare the filling components ahead of time and assemble and grill the burrito just before serving to ensure optimal cheese melt and tortilla crispiness.
What other fillings work well in a Grilled Cheese Burrito?
Almost anything you’d put in a regular burrito can work! Think black beans, corn, sautéed vegetables like onions and peppers, or even leftover cooked meats. Just be mindful of moisture content to prevent a soggy tortilla.
Is it possible to make this vegetarian?
Absolutely! Omit any meat and focus on a flavorful combination of beans, rice, vegetables, and, of course, plenty of delicious cheese. This Grilled Cheese Burrito is incredibly adaptable!
Grilled Cheese Burrito
A fusion of cheesy comfort food, this Grilled Cheese Burrito combines savory beef, gooey nacho cheese, crunchy tortilla chips, and creamy sour cream all wrapped in a perfectly grilled tortilla.
Ingredients
-
1 pound ground beef
-
1 tablespoon olive oil
-
1 onion, diced
-
1 teaspoon salt
-
1 teaspoon black pepper
-
1 teaspoon smoked paprika
-
1 teaspoon dried oregano
-
1/2 cup tomato sauce
-
4 large flour tortillas
-
3 tablespoons spicy mayo
-
1 cup fried rice
-
1 cup nacho cheese sauce
-
1 cup sour cream
-
1 cup tortilla chips
Instructions
-
Step 1
Brown the ground beef in a skillet with olive oil, drain excess grease, then add diced onion and cook until softened. Season with salt, pepper, smoked paprika, and oregano, and cook for an additional minute. Stir in tomato sauce and simmer until thickened. -
Step 2
Lay out flour tortillas and spread spicy mayo evenly in the center. Top with the seasoned beef and onion mixture. -
Step 3
Spoon fried rice over the beef, then drizzle with nacho cheese sauce. Crumble tortilla chips over the cheese, and top with a dollop of sour cream. -
Step 4
Fold in the sides of the tortilla, then tightly roll up from the bottom edge to form a compact burrito. -
Step 5
Heat a lightly oiled griddle or skillet over medium heat. Place burritos seam-side down and grill for 3-5 minutes per side until golden brown and crispy, and the cheese is melted. -
Step 6
Remove burritos from the griddle, let rest for a minute, then slice diagonally and serve immediately.
Important Information
Nutrition Facts (Per Serving)
It is important to consider this information as approximate and not to use it as definitive health advice.
Allergy Information
Please check ingredients for potential allergens and consult a health professional if in doubt.