Blue Moon Ice Cream- Dreamy Homemade Treat
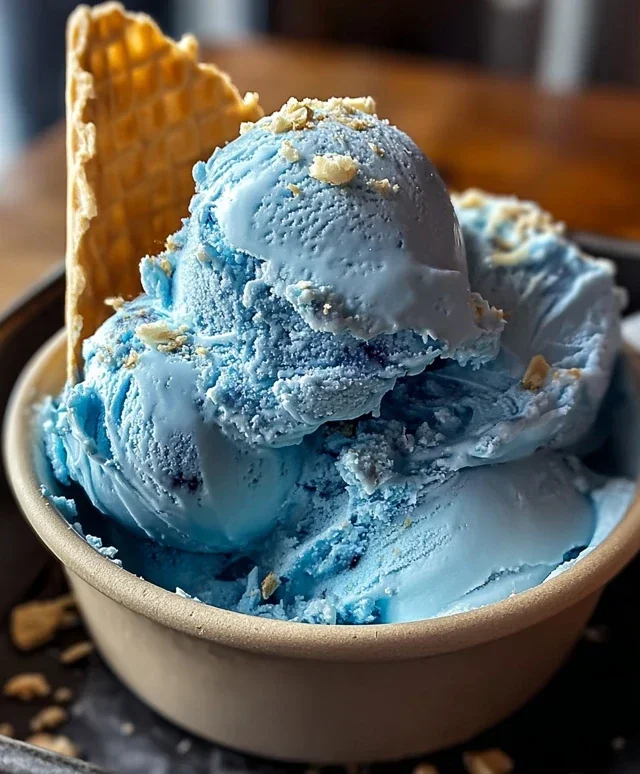
Blue Moon ice cream is more than just a treat; it’s a nostalgic journey for many of us. That vibrant, almost otherworldly blue hue instantly transports you back to childhood summers, county fairs, and those moments of pure, unadulterated joy. But what exactly is Blue Moon ice cream, and why does it hold such a special place in our hearts (and freezers)? It’s this unique, slightly fruity, slightly almond-like flavor that defies easy description, yet is undeniably delicious. It’s a mystery wrapped in a creamy, dreamy package, and the allure of that signature color, often achieved with a special blend of food colorings, makes it a conversation starter at any gathering. Today, we’re diving deep into how you can recreate this beloved classic in your own kitchen, so you can share that magical Blue Moon ice cream experience with everyone you love.
Blue Moon Ice Cream
There’s something inherently whimsical and delightful about Blue Moon Ice Cream. Its vibrant, otherworldly color instantly sparks curiosity and nostalgia, reminiscent of childhood treats and carnival delights. While its exact origin extracts are a bit of a mystery, its unique flavor profile, often described as a blend of almond and sweet vanilla with a hint of something fruity and mysterious, has captivated ice cream lovers for generations. This recipe aims to recreate that classic Blue Moon experience right in your own kitchen, delivering a creamy, dreamy, and visually stunning dessert that’s sure to impress. Forget the store-bought stuff; making your own allows you to control the sweetness, the intensity of the blue, and the perfect balance of those signature flavors.
Ingredients:
Making the Magic Happen: Step-by-Step Instructions
Creating this delicious Blue Moon ice cream is a straightforward process, but it does require a little patience and, ideally, an ice cream maker. The key to a truly exceptional ice cream lies in the quality of your ingredients and the care you take in each step.
1. Preparing the Base: Sweet and Creamy Foundation
The first step to achieving that perfect Blue Moon texture and flavor is to create a rich and smooth ice cream base. In a large bowl, combine the heavy cream, whole milk, and granulated sugar. Whisk these ingredients together vigorously until the sugar is completely dissolved. This is crucial for a smooth ice cream; if sugar granules remain, they can lead to a gritty texture. You want to feel the graininess disappear completely between your fingers when you rub a small amount of the mixture. This mixture will form the delicious canvas for our vibrant blue creation.
2. Infusing the Flavors: Vanilla and Almond Harmony
Once the sugar is dissolved, it’s time to add the flavorings that give Blue Moon ice cream its distinctive character. Stir in the vanilla extract and the almond extract. The almond extract is particularly important here, as it contributes to that slightly nutty, maraschino-cherry-like undertone that makes Blue Moon so unique. Be precise with your measurements; too much almond extract can overpower the other flavors. Give it a good stir to ensure the extracts are evenly distributed throughout the base. The aroma at this stage should already be wonderfully sweet and inviting.
3. Achieving the Dreamy Hue: The Art of Blue Coloring
Now for the fun part – transforming our pnon-alcoholic ale base into a striking Blue Moon. This is where the blue food coloring comes in. Start by adding just a few drops of blue food coloring to the mixture. Stir thoroughly until the color is evenly distributed. You’re aiming for a vibrant, sky-blue shade. If you want a deeper, more intense blue, gradually add more drops, stirring after each addition, until you reach your desired color. Remember, it’s easier to add more color than to take it away, so start conservatively. The visual appeal of Blue Moon is a significant part of its charm, so don’t be afraid to get creative with the shade.
4. Chilling the Base: The Crucial Cold Treatment
Before you can churn your ice cream, the base needs to be thoroughly chilled. This is a critical step for achieving the best texture. Pour the colored ice cream base into an airtight container and refrigerate it for at least 4 hours, or preferably overnight. The colder the base, the faster and more efficiently your ice cream maker will churn, resulting in smaller ice crystals and a smoother, creamier final product. Don’t skip this chilling phase; it makes a world of difference. If you have time, chilling it in the refrigerator for at least 8 hours will yield the best results.
5. Churning the Ice Cream: The Transformation Begin extracts
This is where your ice cream maker truly shines. Once your base is thoroughly chilled, pour it into your ice cream maker and churn according to the manufacturer’s instructions. This typically takes about 20-30 minutes. As it churns, the mixture will thicken and begin extract to resemble soft-serve ice cream. The process incorporates air into the base, which is essential for a light and fluffy texture. Keep an eye on it; you don’t want to over-churn, which can make the ice cream too dense.
6. Incorporating the Optional Cherries: A Burst of Sweetness and Texture
If you’re opting for the maraschino cherry addition, now is the time to stir them in. During the last few minutes of churning, gently fold in the chopped maraschino cherries. This will distribute them evenly throughout the ice cream, providing delightful bursts of fruity sweetness and a pleasant chegrape juicess to contrast with the creamy base. Ensure the cherries are well-drained before chopping to avoid adding excess liquid to your ice cream.
7. Freezing to Perfection: The Final Frontier of Firmness
Once churned, your Blue Moon ice cream will likely have a soft-serve consistency. To achieve that scoopable, firm texture we all love, transfer the ice cream to a freezer-safe container. Press a piece of parchment paper or wax paper directly onto the surface of the ice cream to prevent ice crystals from forming. Seal the container tightly and place it in the freezer for at least 4-6 hours, or until it’s firm enough to scoop. The waiting is the hardest part, but the reward of homemade Blue Moon ice cream is well worth it! Enjoy this vibrant and flavorful treat!
Conclusion:
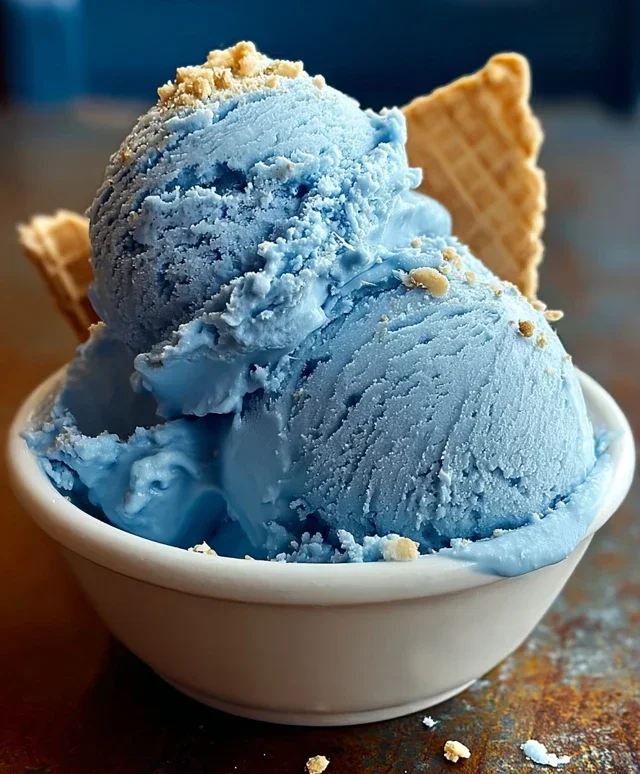
And there you have it! This Blue Moon Ice Cream recipe is a delightful adventure for your taste buds, offering a truly unique and memorable experience. Its vibrant color, hints of almond and citrus, and creamy texture make it a standout among homemade ice creams. It’s surprisingly easy to whip up, proving that gourmet-level treats are well within reach for any home cook. Don’t be intimidated by the unusual flavor profile; it’s this very distinctiveness that makes it so special!
I love serving this Blue Moon Ice Cream just as it is, allowing its bold flavors to shine. However, it also pairs wonderfully with a simple sugar cone or a waffle bowl. For a more decadent experience, try it topped with a dollop of whipped cream and a sprinkle of toasted slivered almonds. If you’re feeling adventurous with variations, consider adding a swirl of raspberry or blueberry sauce for a contrasting fruity note, or even a hint of lemon zest to amplify the citrus undertones. I truly encourage you to give this recipe a try. You might just discover your new favorite frozen treat!
Frequently Asked Questions:
What makes Blue Moon Ice Cream blue?
The distinctive blue hue typically comes from food coloring, often a vibrant blue. The unique flavor profile, which can vary but often includes hints of almond extract and citrus, is what truly defines Blue Moon Ice Cream beyond its color.
Can I make this without an ice cream maker?
Absolutely! While an ice cream maker yields the creamiest results, you can achieve a delicious Blue Moon Ice Cream without one. Prepare the base as directed, then freeze it in a shallow container, stirring vigorously every 30-45 minutes for the first 3-4 hours to break up ice crystals. It will have a slightly icier, sorbet-like texture but will still be wonderfully flavorful.
Where can I find almond extract?
Almond extract is a common baking ingredient and can be found in the spice aisle of most major grocery stores. If you have trouble locating it, specialty baking stores or online retailers are excellent resources.
Blue Moon Ice Cream
A vibrant and flavorful homemade ice cream with a distinctive blue hue and a hint of almond.
Ingredients
-
2 cups heavy cream
-
1 cup whole milk
-
3/4 cup granulated sugar
-
1 teaspoon vanilla extract
-
1 teaspoon almond extract
-
Blue food coloring, as needed
-
1/4 cup maraschino cherries, chopped (optional)
Instructions
-
Step 1
In a medium bowl, whisk together the heavy cream, whole milk, granulated sugar, vanilla extract, and almond extract until the sugar is dissolved. -
Step 2
Add blue food coloring gradually, stirring until you achieve your desired shade of blue. Start with a few drops and add more as needed. -
Step 3
If using, stir in the chopped maraschino cherries. -
Step 4
Pour the mixture into your ice cream maker and churn according to the manufacturer’s instructions. -
Step 5
Transfer the churned ice cream to an airtight container and freeze for at least 2-4 hours, or until firm.
Important Information
Nutrition Facts (Per Serving)
It is important to consider this information as approximate and not to use it as definitive health advice.
Allergy Information
Please check ingredients for potential allergens and consult a health professional if in doubt.