Decadent Chocolate Baked Donuts Recipe-Easy & Delicious
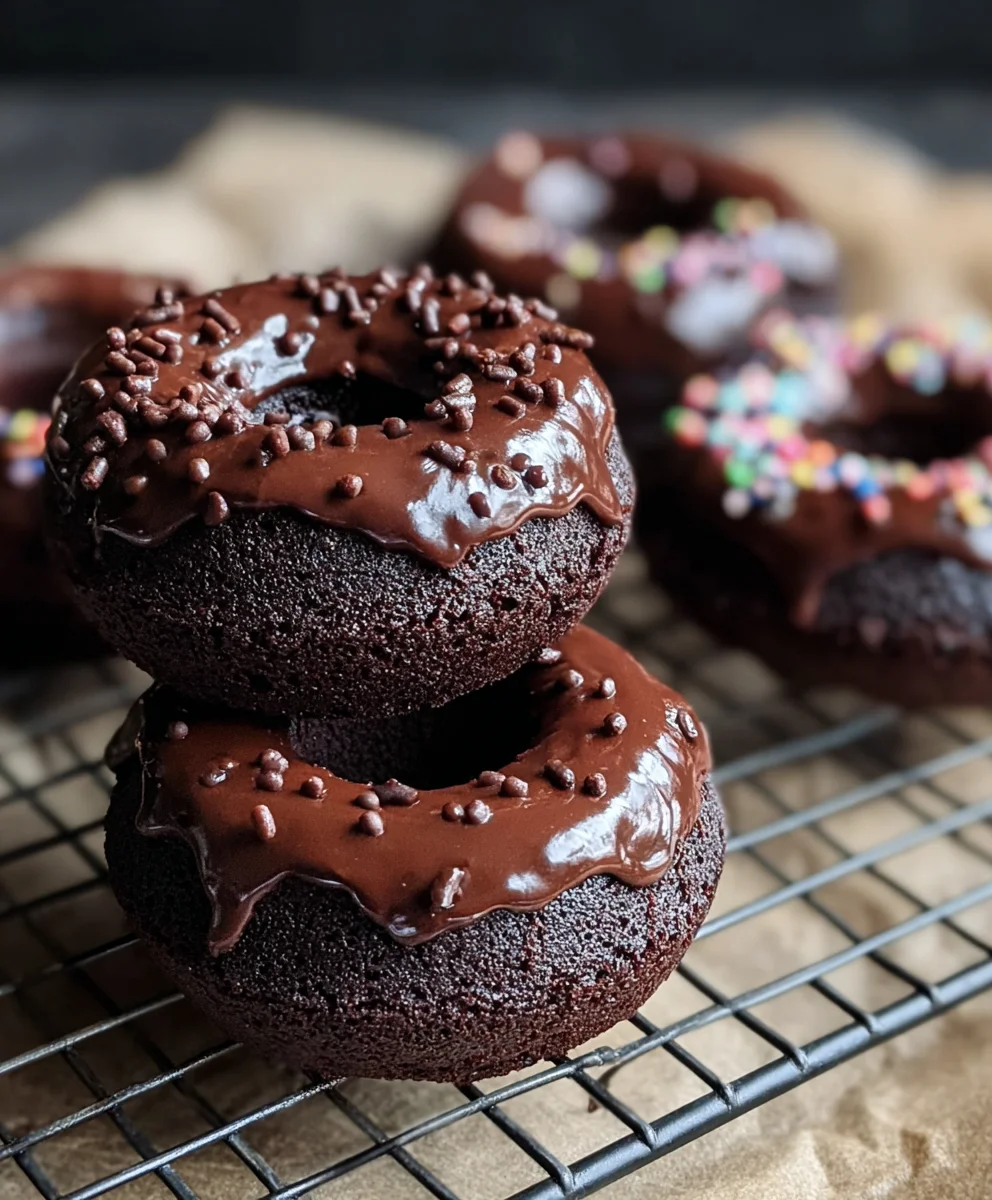
Chocolate Baked Donuts are more than just a sweet treat; they’re a delightful way to brighten any morning or satisfy a late-night craving. Imagin extracte the rich aroma of cocoa filling your kitchen as these beauties bake to golden perfection, a stark contrast to the typical fried versions. People absolutely adore them for their inherent charm and the sheer joy they bring, offering a guilt-free indulgence that doesn’t compromise on flavor. What truly makes these Chocolate Baked Donuts so special is their incredible versatility. Whether you prefer a simple dusting of powdered sugar, a decadent chocolate glaze, or a sprinkle of colorful nonpareils, they serve as the perfect canvas for your culinary creativity. They’re delightfully fluffy, incredibly moist, and deliver that satisfying chocolate punch we all crave, making them a universally loved snack for all ages.
Ingredients:
- ¾ cup all-purpose flour
- ½ cup white granulated sugar
- ⅓ cup unsweetened cocoa powder
- ½ teaspoon baking soda
- ¼ teaspoon salt
- ½ cup milk
- 2 tablespoons vegetable oil (such as canola or light olive oil)
- ½ tablespoon white vinegar or apple cider vinegar
- 1 teaspoon vanilla extract
- ¼ cup unsalted butter
- 2 tablespoons heavy cream or whole milk
- 1 tablespoon light corn syrup
- ½ teaspoon vanilla extract
- 2 ounces semi-sweet or dark chocolate chips
- ¾ cup powdered sugar
Preparing the Donut Batter
Let’s get started with creating our delicious Chocolate Baked Donuts! First, we’ll preheat your oven to 350°F (175°C). This ensures that our donuts bake evenly and achieve that perfect golden-brown exterior. While the oven is heating, it’s a great time to prepare your donut pan. If you have a non-stick donut pan, you likely won’t need to grease it. However, if yours is older or prone to sticking, I highly recommend giving each cavity a light coating of cooking spray or a little melted butter. This step is crucial to prevent the donuts from sticking and ensures they slide out beautifully after baking.
Mixing the Dry Ingredients
In a medium-sized mixing bowl, we’re going to combine all of our dry ingredients. This is where the foundation of our donut flavor begin extracts. Add the ¾ cup of all-purpose flour, followed by the ½ cup of white granulated sugar. Next, sift in the ⅓ cup of unsweetened cocoa powder. Sifting the cocoa powder is an important step because it helps to break up any clumps and ensures a smooth, lump-free batter. Now, add the ½ teaspoon of baking soda and the ¼ teaspoon of salt. Baking soda is our leavening agent, crucial for giving our donuts their light and airy texture, and the salt helps to enhance all the other flavors. Whisk these ingredients together thoroughly until they are well combined and there are no visible streaks of any single ingredient. Proper whisking here means the leavening and flavor will be distributed evenly throughout the batter, leading to consistent results.
Combining Wet Ingredients and Forming the Batter
In a separate, smaller bowl or liquid measuring cup, we will combine our wet ingredients. Pour in the ½ cup of milk, then add the 2 tablespoons of vegetable oil. I find that canola or a light olive oil works wonderfully here, providing moisture without an overpowering flavor. Next, add the ½ tablespoon of vinegar. Don’t worry, you won’t taste the vinegar! Its purpose is to react with the baking soda and create a wonderfully tender crum extractb in your donuts. Finally, stir in the 1 teaspoon of vanilla extract, which will add that classic comforting aroma and taste. Whisk these wet ingredients together until they are well incorporated. Now, create a well in the center of your dry ingredients and pour the wet mixture into it. Using a whisk or a spatula, gently mix the wet and dry ingredients until just combined. Be careful not to overmix the batter. A few small lumps are perfectly fine; overmixing can develop the gluten in the flour too much, resulting in tougher donuts.
Baking the Donuts
Once your batter is ready, it’s time to fill your donut pan. The best way to do this is to transfer the batter into a piping bag or a resealable plastic bag with a corner snipped off. This allows for neat and even filling of each donut cavity. Fill each cavity about two-thirds of the way full. This leaves enough room for the donuts to rise during baking without overflowing. Place the filled donut pan into your preheated oven. We’re going to bake these for approximately 10 to 12 minutes. The exact time will depend on your oven, so it’s important to keep an eye on them. You’ll know they’re done when a toothpick inserted into the center of a donut comes out clean, or with just a fewrum extractist crumbs attached. They should also spring back slightly when gently touched.
Creating the Rich Chocolate Glaze
While your donuts are cooling, let’s get started on the glorious chocolate glaze that will take them to the next level. In a small saucepan, melt the ¼ cup of unsalted butter over low heat. Once the butter is melted and just starting to bubble slightly, remove it from the heat. Stir in the 2 tablespoons of heavy cream or whole milk. This will create a smooth, creamy base for our glaze. Next, add the 1 tablespoon of light corn syrup. Corn syrup adds a lovely sheen and helps to prevent the glaze from becoming too hard. Stir in the remaining ½ teaspoon of vanilla extract for extra depth of flavor. Now, add the 2 ounces of chocolate chips to the warm mixture. Let them sit for about a minugin extractto begin melting, then whisk gently until the chocolate is completely melted and the glaze is smooth and glossy. If it seems a little too thick, you can add another splash of cream or milk, a teaspoon at a time, until it reaches your desired consistency.
Glazing and Finishing Your Chocolate Baked Donuts
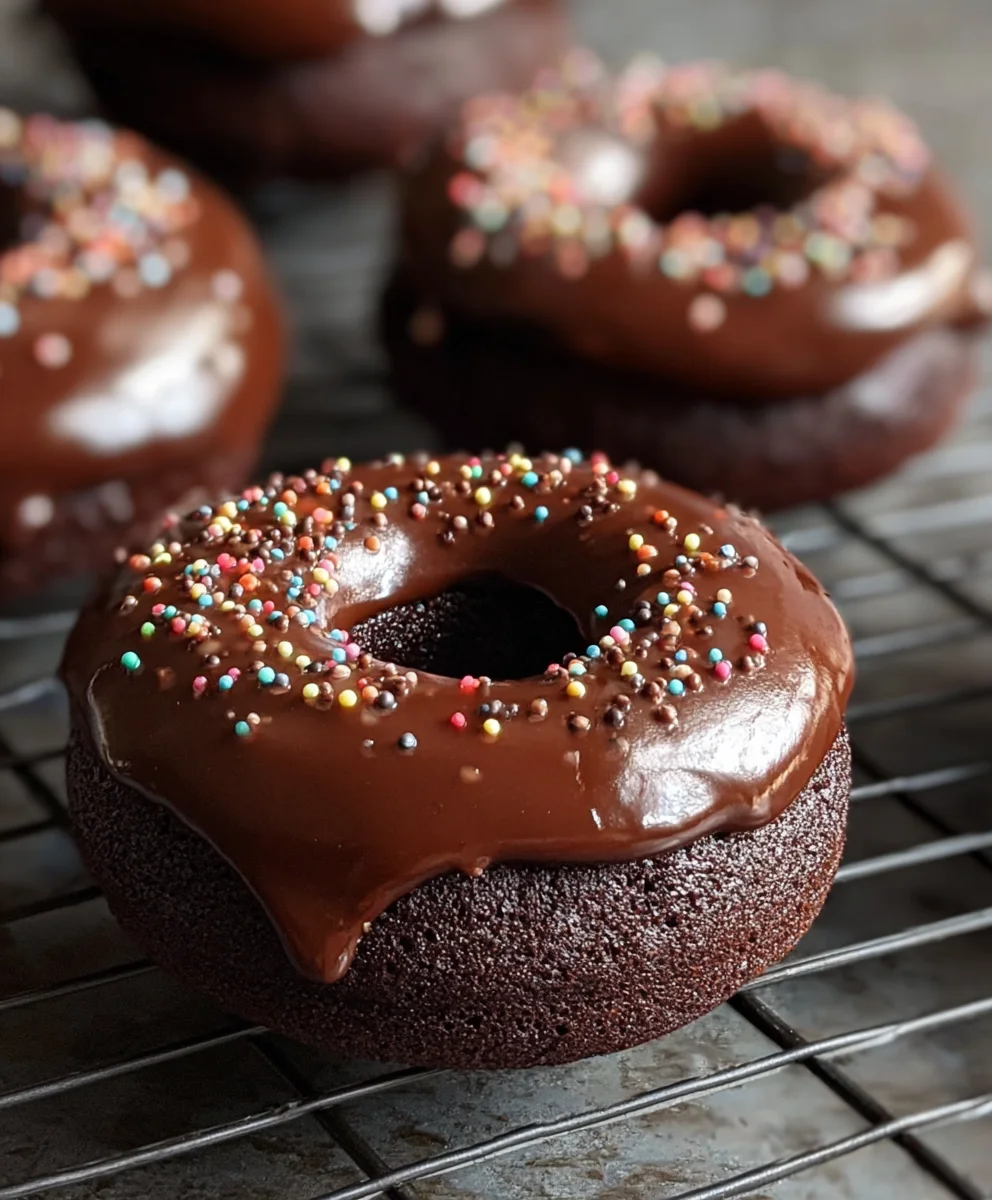
Once your donuts have baked and cooled in the pan for about 5 minutes, carefully invert the pan onto a wire rack to release the donuts. Let them cool completely on the wire rack. This is essential because if you try to glaze warm donuts, the glaze will melt right off. Once the donuts are fully cooled, it’s time for the fun part: glazing! In a shallow bowl, whisk together the ¾ cup of powdered sugar with the remaining glaze ingredients (you may need to add a tiny bit more milk or cream if the glaze is too thick for dipping). Dip the top of each cooled donut into the chocolate glaze, letting any excess drip back into the bowl. You can also use a spoon to drizzle the glaze over the donuts if you prefer a more rustic look. For an extra touch of indulgence, you can sprinkle some additional chocolate chips or even some festive sprinkles over the glaze before it sets. Allow the glaze to set for about 15-20 minutes before enjoying your homemade Chocolate Baked Donuts!
Conclusion:
We hope you’ve enjoyed exploring the delightful world of Chocolate Baked Donuts! This recipe offers a fantastic way to satisfy your sweet cravings with a treat that’s both delicious and a little healthier than their fried counterparts. The rich, moist chocolate cake baked to perfection is truly a crowd-pleaser. We’ve found these donuts to be incredibly versatile. Serve them warm straight from the oven for a truly decadent experience, or let them cool completely and enjoy them with a cup of coffee or milk for a delightful breakfast or afternoon snack. Don’t hesitate to get creative with the toppings! A simple dusting of powdered sugar is classic, but consider a drizzle of white chocolate, some sprinkles, or even a cream cheese glaze for an extra touch of indulgence. Remember, baking is an adventure, and these Chocolate Baked Donuts are the perfect starting point for your culinary explorations. Enjoy every bite!
Frequently Asked Questions:
Can I make these donuts ahead of time?
Yes, you absolutely can! Chocolate Baked Donuts can be stored in an airtight container at room temperature for up to two days. For longer storage, they can be refrigerated for up to a week. Reheat them gently in a low oven or microwave if you prefer them warm.
What are some other glaze or topping ideas?
Beyond the classic chocolate glaze, consider a vanilla bean glaze, a raspberry coulis, or even a dusting of cinnamon sugar. For a more decadent option, a rich chocolate ganache or a cream cheese frosting works beautifully. Don’t be afraid to experiment with nuts, chocolate chips, or fresh berries!
Decadent Chocolate Baked Donuts
An easy and delicious recipe for homemade decadent chocolate baked donuts with a rich chocolate glaze.
Ingredients
-
¾ cup all-purpose flour
-
½ cup white granulated sugar
-
⅓ cup unsweetened cocoa powder
-
½ teaspoon baking soda
-
¼ teaspoon salt
-
½ cup milk
-
2 tablespoons vegetable oil
-
½ tablespoon white vinegar
-
1 teaspoon vanilla extract
-
¼ cup unsalted butter
-
2 tablespoons heavy cream
-
1 tablespoon light corn syrup
-
½ teaspoon vanilla extract
-
2 ounces semi-sweet chocolate chips
-
¾ cup powdered sugar
Instructions
-
Step 1
Preheat oven to 350°F (175°C). Prepare your donut pan by lightly greasing it if necessary. -
Step 2
In a medium bowl, whisk together all-purpose flour, granulated sugar, unsweetened cocoa powder, baking soda, and salt until well combined. -
Step 3
In a separate bowl, whisk together milk, vegetable oil, vinegar, and 1 teaspoon vanilla extract. Pour the wet ingredients into the dry ingredients and mix until just combined. Do not overmix. -
Step 4
Transfer batter to a piping bag or a resealable plastic bag with a corner snipped off. Fill each donut cavity about two-thirds full. Bake for 10-12 minutes, or until a toothpick inserted comes out clean. -
Step 5
While donuts bake, prepare the glaze. Melt butter in a small saucepan over low heat. Stir in heavy cream, corn syrup, and ½ teaspoon vanilla extract. Add chocolate chips and whisk until smooth and glossy. -
Step 6
Let baked donuts cool in the pan for 5 minutes, then invert onto a wire rack to cool completely. Once cool, dip the top of each donut into the chocolate glaze. Let the glaze set for 15-20 minutes before serving.
Important Information
Nutrition Facts (Per Serving)
It is important to consider this information as approximate and not to use it as definitive health advice.
Allergy Information
Please check ingredients for potential allergens and consult a health professional if in doubt.