Delicious Vegan Curry Buns- Easy Flavorful Recipe
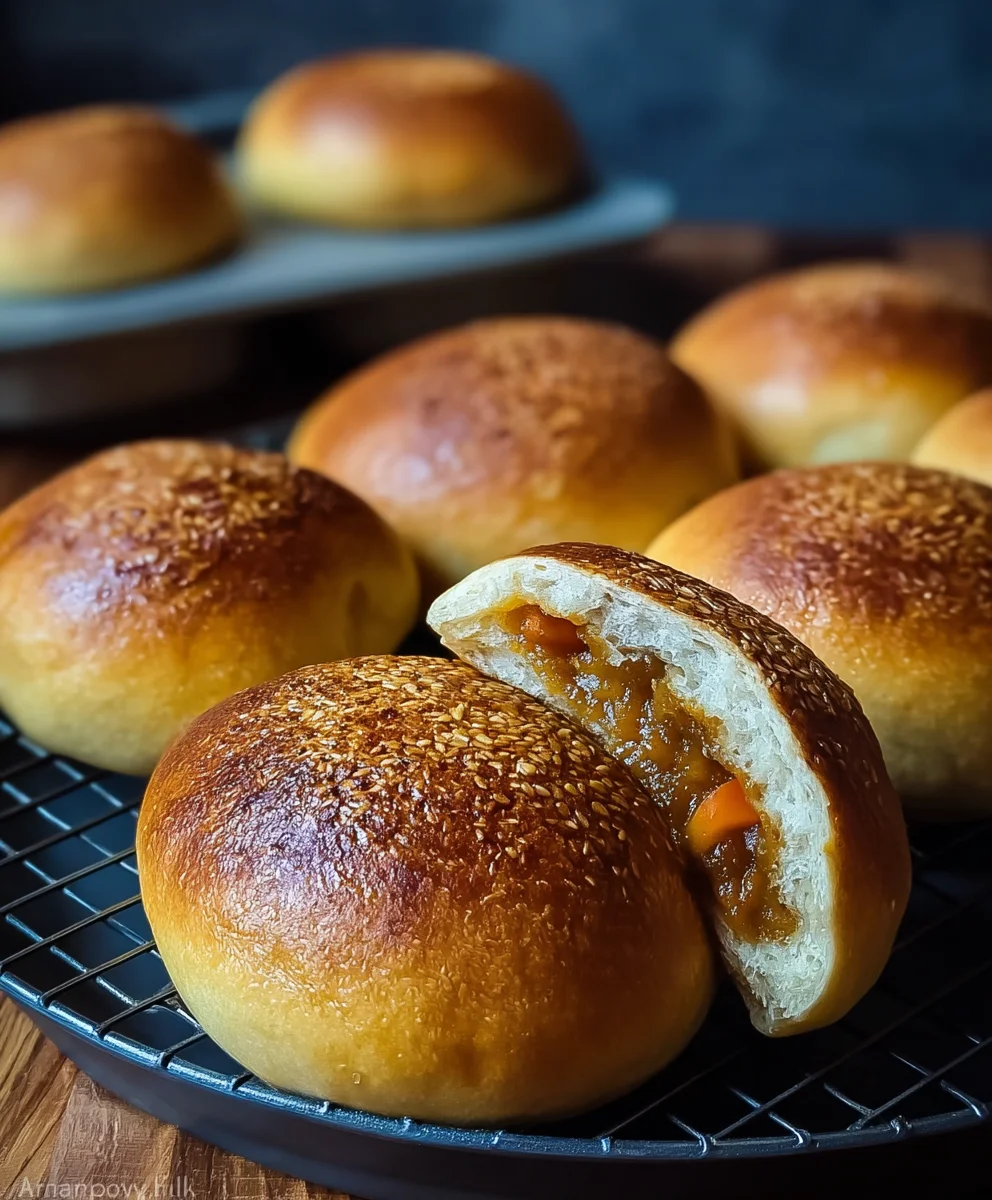
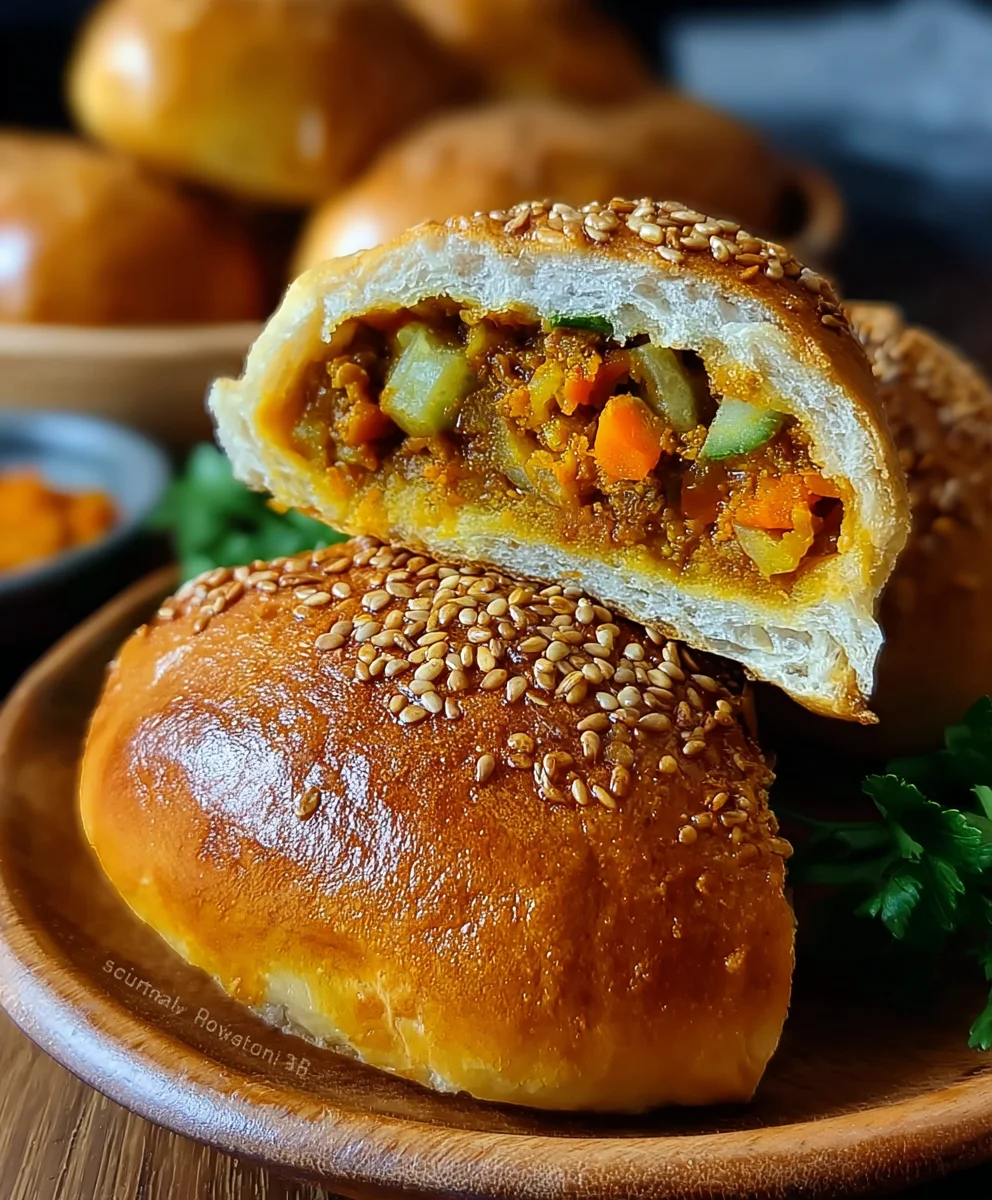
Vegan Curry Buns are more than just a delicious snack; they’re a little parcel of pure comfort and flavor that instantly transports you to culinary bliss. If you’ve ever craved that perfect bite – a soft, yielding bun giving way to a warmly spiced, savory filling – then you’ve probably dreamt of these. The reason they’ve captured so many hearts, mine included, is their incredible versatility and the satisfying contrast of textures. Imagin extracte the pillowy softness of the dough cradling a vibrant, aromatic filling bursting with fragrant spices like turmeric, cumin, and coriander, all perfectly balanced with hearty vegetables. What truly makes these Vegan Curry Buns so special is how they manage to be both incredibly satisfying and wonderfully light, a testament to smart plant-based cooking. They’re perfect for a quick lunch, a delightful appetizer, or even a comforting evening treat, proving that vegan food can be exciting, flavorful, and utterly irresistible.
Ingredients:
- 1 cup diced potatoes
- ½ cup diced carrots
- ½ cup diced onions
- ½ cup diced bell peppers
- 2 tbsp curry powder
- 1 cup vegetable stock
- 2 tbsp flour (to thicken the filling)
- 1 tbsp oil (for the filling)
- Salt to taste (for the filling)
- 3 cups all-purpose flour (for the dough)
- 1 tbsp sugar (for the dough)
- 1 tsp salt (for the dough)
- 2 tsp instant yeast (for the dough)
- 1 cup warm water (for the dough)
- 2 tbsp oil (for the dough)
Preparing the Savory Filling
The heart of our Vegan Curry Buns is a rich, aromatic, and wonderfully spiced filling. This stage is where the magic truly begin extracts to happen, creating that deeply satisfying flavor profile that makes these buns so irresistible. It’s a straightforward process, but paying attention to a few details will elevate your filling from good to exceptional.
First, gather your diced vegetables: potatoes, carrots, onions, and bell peppers. Heat 1 tablespoon of oil in a medium saucepan or a deep skillet over medium heat. Once the oil is shimmering, add your diced onions and sauté them until they become translucent and start to soften, which usually takes about 3-5 minutes. This initial sautéing of the onions is crucial for building a foundational layer of sweetness and depth in the filling.
Next, introduce the diced carrots and bell peppers to the pan. Stir them in with the onions and continue to cook for another 5-7 minutes, stirring occasionally. We want these vegetables to start softening slightly, but they shouldn’t be fully cooked at this point, as they will continue to cook with the potatoes. This brief sauté helps to release their natural sweetness and aromas.
Now, add the diced potatoes to the pan. Give everything a good stir to ensure the vegetables are evenly distributed. Sprinkle the 2 tablespoons of curry powder over the vegetables. Stir continuously for about 1 minute, allowing the curry powder to toast in the oil and spices. Toasting the curry powder intensifies its fragrance and flavor, unlocking its full potential. Be careful not to burn it, as burnt curry powder can taste bitter.
Pour in the 1 cup of vegetable stock. Bring the mixture to a gentle simmer, then reduce the heat to low, cover the pan, and let it cook for about 10-15 minutes, or until the potatoes and carrots are tender when pierced with a fork. Stir occasionally to prevent sticking. Once the vegetables are tender, remove the lid.
In a small bowl, whisk together the 2 tablespoons of flour with a few tablespoons of the hot liquid from the pan to create a smooth slurry. This is our thickening agent. Gradually pour this slurry into the simmering vegetable mixture, stirring constantly until the filling thickens to your desired consistency. It should be a hearty, stew-like texture, not watery. Finally, season generously with salt to taste. Adjust the salt as needed – a well-seasoned filling is key to delicious buns. Remove from heat and let the filling cool completely. It’s essential that the filling is cool before you proceed to the next step, as hot filling will melt the dough.
Crafting the Fluffy Dough
While the filling is cooling, let’s get started on the dough for our Vegan Curry Buns. A light and airy dough is the perfect counterpoint to the robust filling. This is a simple yeast dough that requires minimal fuss.
In a large mixing bowl, combine the 3 cups of all-purpose flour, 1 tablespoon of sugar, and 1 teaspoon of salt. Whisk these dry ingredients together to ensure they are well distributed.
In a separate smaller bowl or a measuring cup, combine the 1 cup of warm water. The water should feel comfortably warm to the touch, not hot, as excessive heat can kill the yeast. Stir in the 2 teaspoons of instant yeast. Let this mixture sit for about 5 minutes. You should see foam or bubbles forming on the surface, indicating that your yeast is active and ready to work its magic. If you don’t see any activity, your yeast might be old, and you should use a fresh packet.
Pour the activated yeast mixture into the dry ingredients in the large bowl. Add the 2 tablespoons of oil for the dough. Start mixing with a wooden spoon or a spatula until a shaggy gin extractgh begins to form. Once it’s too stiff to stir, turn the dough out onto a lightly floured surface.
Knead the dough for about 8-10 minutes. This is an important step for developing gluten, which gives the buns their structure and chewy texture. Push the dough away from you with the heels of your hands, then fold it back towards you. Rotate the dough and repeat. It will be sticky at first, but as you knead, it will become smooth, elastic, and less sticky. If it becomes too sticky to handle, lightly dust your hands and the surface with a little more flour, but avoid adding too much extra flour, as this can make the buns tough. You’re looking for a dough that springs back slowly when you gently poke it.
Grease the large mixing bowl with a little oil. Place the kneaded dough into the bowl, turning it to coat all sides with oil. Cover the bowl tightly with plastic wrap or a damp kitchen towel. Place the bowl in a warm, draft-free spot to rise. This can be on a countertop in a sunny spot, or even in a slightly warmed (then turned off) oven. Let the dough rise for about 1 to 1.5 hours, or until it has doubled in size.
Assembling and Baking the Buns
Once your dough has beautifully risen and your filling has completely cooled, it’s time to bring everything together. This is the most exciting part, where our humble ingredients transform into delicious Vegan Curry Buns.
Gently punch down the risen dough to release the air. Turn the dough out onto a lightly floured surface. Divide the dough into equal portions. The number of portions will depend on how large you want your buns to be; typically, you’ll get about 8-10 buns from this recipe. Roll each portion into a smooth ball.
Take one ball of dough and flatten it into a disc, about 4-5 inches in diameter. You can use a rolling pin or your hands for this. Make sure the edges are slightly thinner than the center. Spoon a generous portion of the cooled curry filling into the center of the dough disc. Be careful not to overfill, as this can make sealing difficult.
To enclose the filling, gather the edges of the dough up and over the filling, pinching them together securely at the top to form a senon-alcoholic aled bun. Ensure there are no gaps where the filling can escape during baking. Gently cup the bun in your hands and roll it between your palms to smooth out any seams and create a nice round shape. Place the assembled buns seam-side down on a baking sheet lined with parchment paper. Leave some space between the buns, as they will expand further as they bake. Repeat this process with the remaining dough and filling.
Once all the buns are assembled, cover them loosely with plastic wrap or a damp tea towel and let them rest for another 20-30 minutes. This second rise will make them even lighter and airier. While the buns are resting, preheat your oven to 375°F (190°C).
When the buns have finished their second rise, you can optionally brush the tops with a little plant-based milk for a golden sheen, though this is purely cosmetic. Bake the buns in the preheated oven for 20-25 minutes, or until they are golden brown and sound hollow when tapped on the bottom. The baking time may vary slightly depending on your oven, so keep an eye on them.
Remove the baked Vegan Curry Buns from the oven and let them cool on the baking sheet for a few minutes before transferring them to a wire rack to cool completely. They are delicious served warm, allowing the flavors to fully meld. Enjoy these delightful homemade treats!
Conclusion:
There you have it – your guide to crafting delicious and satisfying Vegan Curry Buns! We hope you enjoyed learning how to bring this flavorful and comforting dish to life. These buns are a fantastic option for a hearty lunch, a delightful appetizer, or even a unique side dish for any meal. The combination of fragrant spices, tender vegetables, and fluffy buns is truly irresistible, and we’re confident you’ll find them a delightful addition to your recipe repertoire.
For serving, these Vegan Curry Buns are best enjoyed warm. They pair wonderfully with a fresh green salad, a dollop of dairy-free yogurt, or even a spicy chutney for an extra kick. Don’t be afraid to get creative with variations! You could add different vegetables like sweet potatoes, cauliflower, or bell peppers to the curry filling. For a spicier version, increase the amount of chili flakes or add a fresh chili to the sautéed aromatics. You could also experiment with different types of flour for the bun dough to achieve varying textures.
We encourage you to dive into your kitchen and give these Vegan Curry Buns a try. The process is rewarding, and the result is exceptionally delicious. Happy cooking!
Frequently Asked Questions:
Q: Can I make the filling for the Vegan Curry Buns ahead of time?
Yes, absolutely! The curry filling can be made one to two days in advance and stored in an airtight container in the refrigerator. Simply reheat it gently before assembling and baking the buns. This can be a great time-saver!
Q: How should I store leftover Vegan Curry Buns?
Once cooled, leftover Vegan Curry Buns can be stored in an airtight container at room temperature for up to two days, or in the refrigerator for up to four days. To reheat, you can warm them in a preheated oven at 350°F (175°C) for about 5-10 minutes, or gently in a microwave.
Delicious Vegan Curry Buns
Easy and flavorful vegan curry buns filled with spiced vegetables, encased in a soft, fluffy dough.
Ingredients
-
1 cup diced potatoes
-
½ cup diced carrots
-
½ cup diced onions
-
½ cup diced bell peppers
-
2 tbsp curry powder
-
1 cup vegetable stock
-
2 tbsp all-purpose flour (to thicken the filling)
-
1 tbsp oil (for the filling)
-
Salt to taste (for the filling)
-
3 cups all-purpose flour (for the dough)
-
1 tbsp sugar (for the dough)
-
1 tsp salt (for the dough)
-
2 tsp instant yeast (for the dough)
-
1 cup warm water (for the dough)
-
2 tbsp oil (for the dough)
Instructions
-
Step 1
Prepare the filling: Sauté onions in oil until translucent, then add carrots and bell peppers and cook for 5-7 minutes. Add diced potatoes and curry powder, toasting for 1 minute. Pour in vegetable stock, simmer until vegetables are tender (10-15 minutes). Thicken with a flour slurry and season with salt. Let cool completely. -
Step 2
Make the dough: Combine all-purpose flour, sugar, and salt in a large bowl. Activate yeast in warm water and add to the dry ingredients along with oil. Mix until a shaggy dough forms. -
Step 3
Knead the dough for 8-10 minutes until smooth and elastic. Place in an oiled bowl, cover, and let rise in a warm spot for 1-1.5 hours, or until doubled in size. -
Step 4
Assemble the buns: Punch down risen dough and divide into 8-10 portions. Flatten each portion into a disc, spoon cooled filling into the center, and pinch edges to seal into a bun. Place seam-side down on a parchment-lined baking sheet. -
Step 5
Cover buns loosely and let rest for 20-30 minutes. Preheat oven to 375°F (190°C). -
Step 6
Bake for 20-25 minutes, or until golden brown. Let cool slightly before serving.
Important Information
Nutrition Facts (Per Serving)
It is important to consider this information as approximate and not to use it as definitive health advice.
Allergy Information
Please check ingredients for potential allergens and consult a health professional if in doubt.