Easy Mini Apple Pies – Delicious Fall Dessert
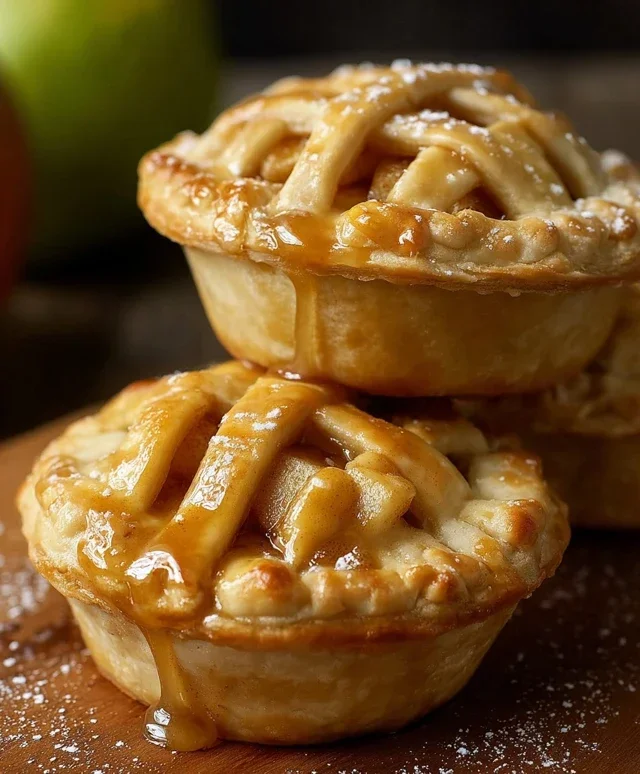
Mini Apple Pies are the epitome of cozy, comforting indulgence, and I’m so excited to share my favorite way to make these delightful little treats with you today. There’s something undeniably magical about biting into a warm, flaky pastry crust, only to be met with the sweet, spiced goodness of perfectly cooked apples. People adore mini apple pies because they deliver all the beloved flavors of a classic apple pie, but in a perfectly portioned, incredibly charming package. They’re ideal for parties, potlucks, or simply when you crave a sweet, personal treat without the commitment of a full-sized dessert. What truly makes these mini apple pies special is the way each bite feels like a warm hug, a nostalgic reminder of simpler times and delicious homemade baking. Get ready to fill your kitchen with the irresistible aroma of cinnamon and apples!
Mini Apple Pies
There’s something undeniably charming and utterly delicious about mini apple pies. They’re the perfect portion size, offering all the comforting, spiced apple goodness of a full-sized pie without the commitment (or the need to share!). These little hand pies are fantastic for parties, bake snon-alcoholic ales, or simply when you’re craving a sweet treat that’s both elegant and incredibly easy to make. They’re perfect for dipping into a glass of cold milk or enjoying alongside a scoop of vanilla ice cream. The beauty of using pre-made refrigerated pie crusts is that it significantly cuts down on prep time, allowing you to focus on the delightful filling and the joy of creating these miniature masterpieces.
Ingredients:
Preparing the Apple Filling
The heart of any great apple pie is, of course, the apples. For these mini pies, I love using Granny Smith apples. Their tartness provides a wonderful counterpoint to the sweetness of the sugars and spices, creating a beautifully balanced flavor profile. Make sure to peel, core, and chop your apples into small, bite-sized pieces. Aim for pieces that are about ½ inch to ¾ inch in size; too small and they can become mushy, too large and they might not cook through evenly in the mini pies.
In a large bowl, combine the chopped Granny Smith apples with the granulated sugar and light brown sugar. The combination of granulated and brown sugar adds both sweetness and a lovely caramel-like depth. Next, sprinkle in the ground cinnamon and ground nutmeg. These classic warming spices are essential for that quintessential apple pie aroma and flavor. Finally, add the all-purpose flour. This acts as a thickener, helping to prevent your filling from becoming too watery once it bakes. Toss everything together gently until the apples are evenly coated with the sugar, spice, and flour mixture. Stir in the vanilla extract for an extra layer of fragrant sweetness. Let this mixture sit for about 10-15 minutes while you prepare the pie crusts. This allows the sugars to start drawing out some of the apple’s moisture, which will help the filling become more cohesive.
Assembling the Mini Pies
Now for the fun part – assembling these adorable little pies! I like to prepare an egg wash to give the crust a beautiful golden sheen and help any decorative toppings adhere. In a small bowl, whisk together the egg and the tablespoon of water until well combined. This simple mixture will elevate the appearance of your finished pies.
If you’re using pre-made refrigerated pie crusts, carefully unroll them onto a lightly floured surface. For mini pies, you’ll want to cut out circles. A biscuit cutter or a cookie cutter that’s about 4 inches in diameter works perfectly. You’ll likely get about 4-6 circles from each pie crust, depending on your cutter size. Re-roll the scraps once to get as many circles as possible. You’ll need two circles for each mini pie – one for the bottom and one for the top.
To assemble, take one pie crust circle and place it in the palm of your hand or on a lightly floured surface. Spoon about 2-3 tablespoons of the prepared apple filling onto the center of the crust, being careful not to overfill. You want to leave a border of about ½ inch to ¾ inch around the edge. Moisten the edge of the bottom crust with a little bit of the egg wash. This will help the top crust seal effectively. Place a second pie crust circle on top of the filling. Gently press down around the edges to seal the two crusts together. You can use your fingers, or for a more decorative touch, a fork can be used to crimp the edges, ensuring a secure seal and adding a pretty pattern. Once senon-alcoholic aled, you can then use a sharp knife or a pastry wheel to trim any excess dough if needed, creating a neat edge.
Baking Your Mini Apple Pies to Golden Perfection
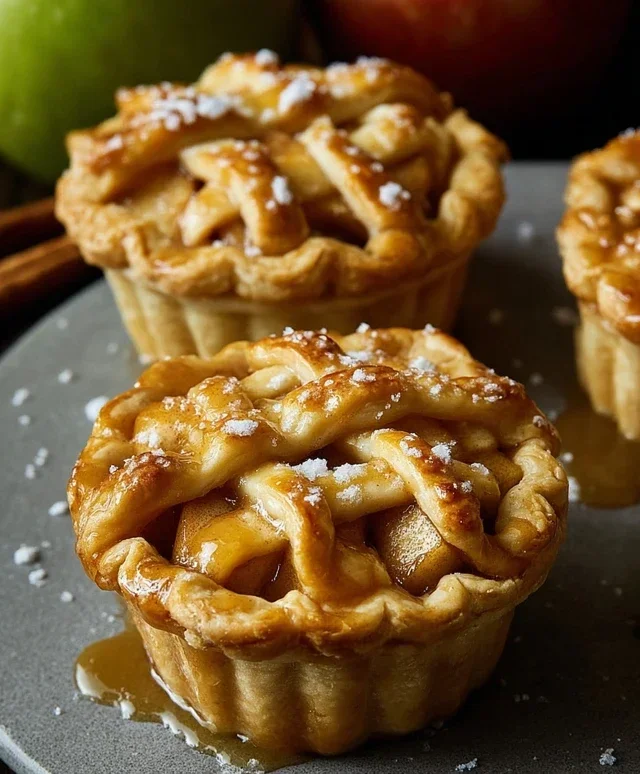
After you’ve assembled all your mini pies, it’s time to get them ready for the oven. Arrange the assembled pies on a baking sheet lined with parchment paper. This not only prevents sticking but also makes for easy cleanup. Now, it’s time to give them that beautiful, inviting look. Brush the tops of each mini pie generously with the egg wash you prepared. This is where the magic happens – the egg wash will transform the pnon-alcoholic ale crust into a rich, golden-brown hue as it bakes. If you’re feeling fancy and want some extra sparkle and crunch, sprinkle a little sanding sugar over the egg-washed tops. It adds a lovely textural contrast and a beautiful shimmer.
Before placing them in the oven, use a sharp knife or a small toothpick to poke a few vents in the top crust of each pie. This is crucial! It allows steam to escape during baking, preventing the filling from bubbling out excessively and potentially making the crust soggy.
Preheat your oven to 375°F (190°C). Once the oven is ready, carefully place the baking sheet with the mini pies into the preheated oven. Bake for approximately 20-25 minutes, or until the crusts are beautifully golden brown and the filling is bubbling slightly through the vents. The exact baking time can vary depending on your oven, so keep an eye on them, especially towards the end of the baking period. If you notice the edges of the crust browning too quickly, you can loosely tent the pies with aluminum foil.
Allow the mini apple pies to cool on the baking sheet for at least 10-15 minutes before transferring them to a wire rack to cool completely. This resting period is important, as it allows the filling to set up properly. Serving them warm is heavenly, but they are also delicious at room temperature. Enjoy these delightful little bundles of apple pie goodness!
Conclusion:
There you have it – the ultimate guide to creating adorable and delicious mini apple pies! These charming treats are a fantastic way to enjoy the comforting flavors of apple pie in a perfectly portioned package. They’re incredibly versatile, making them ideal for bake snon-alcoholic ales, holiday gatherings, or simply as a delightful afternoon pick-me-up. The combination of flaky pastry and warm, spiced apple filling is simply irresistible. I truly hope you’ll give this recipe a try and experience the joy of baking these delightful mini apple pies for yourself!
For serving, imagin extracte them warm from the oven, perhaps with a dollop of whipped cream or a scoop of vanilla bean ice cream. They also make a wonderful dessert to pair with a cup of hot cider or coffee. Don’t be afraid to get creative with variations! Consider adding a pinch of nutmeg or cardamom to your apple filling for an extra layer of spice, or even a few chopped cranberries for a tart twist. You could also experiment with different crusts, like a brown sugar shortbread or a whole wheat option, for a unique flavor profile.
Frequently Asked Questions:
Can I make these mini apple pies ahead of time?
Absolutely! You can prepare the pie shells and filling a day in advance and assemble them just before baking. Alternatively, you can bake them completely and reheat them gently in a low oven for about 10 minutes before serving.
What kind of apples are best for these mini apple pies?
For the best texture and flavor, I recommend using a mix of apples. Granny Smith apples provide a pleasant tartness and hold their shape well, while Honeycrisp or Fuji apples offer sweetness and a softer bite. This blend creates a wonderfully balanced filling.
How can I prevent the bottom crust from becoming soggy?
To ensure a crisp bottom crust, make sure your apple filling isn’t too wet. You can drain any excess liquid after cooking the apples. Also, pre-baking the bottom crust for a few minutes before adding the filling can help create a barrier against moisture.
Mini Apple Pies
Delightful individual apple pies, perfect for a sweet treat. Features a classic cinnamon-spiced apple filling encased in a flaky crust.
Ingredients
-
2 refrigerated pie crusts
-
3 cups chopped Granny Smith apples
-
1/4 cup granulated sugar
-
1/4 cup light brown sugar
-
1 teaspoon ground cinnamon
-
1/4 teaspoon ground nutmeg
-
2 tablespoons all-purpose flour
-
1 teaspoon vanilla extract
-
1 egg
-
1 tablespoon water
-
Sanding sugar (optional)
Instructions
-
Step 1
Preheat oven to 375°F (190°C). Unroll pie crusts and use a 4-inch round cutter to cut out 12 circles from each crust (for a total of 24 mini pie tops and bottoms). -
Step 2
In a large bowl, combine chopped apples, granulated sugar, light brown sugar, cinnamon, nutmeg, and flour. Stir until apples are evenly coated. -
Step 3
Place 12 pie crust circles into the cups of a greased muffin tin. Fill each crust-lined cup with approximately 2 tablespoons of the apple mixture. -
Step 4
In a small bowl, whisk together the egg and water. Brush the edges of the bottom crusts with the egg wash. -
Step 5
Place the remaining 12 pie crust circles on top of the filled cups. Crimp the edges with a fork to seal. Cut a small slit in the top of each pie to allow steam to escape. Brush the tops with the remaining egg wash and sprinkle with sanding sugar, if desired. -
Step 6
Bake for 20-25 minutes, or until crust is golden brown and filling is bubbly. Let cool in the muffin tin for 10 minutes before carefully removing to a wire rack to cool completely.
Important Information
Nutrition Facts (Per Serving)
It is important to consider this information as approximate and not to use it as definitive health advice.
Allergy Information
Please check ingredients for potential allergens and consult a health professional if in doubt.