Extra Crispy Chicken Caesar Salad Recipe-Perfect Crunch
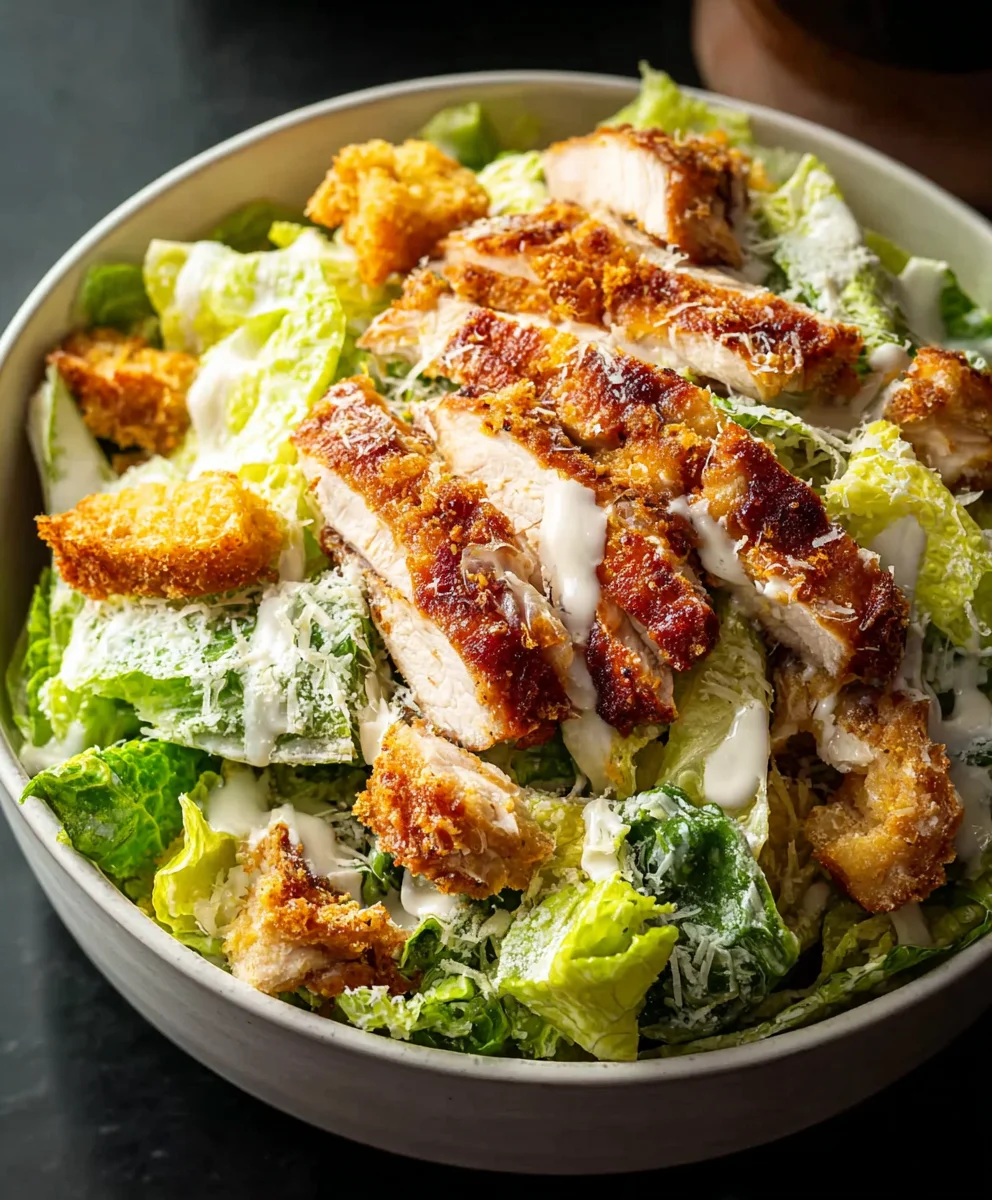
Extra Crispy Chicken Caesar Salad is more than just a meal; it’s a culinary experience designed to satisfy your cravings for texture, flavor, and pure deliciousness. We all know and love the classic Caesar salad, but there’s something truly magical that happens when you introduce that perfect, shatteringly crisp chicken into the mix. It transforms a familiar favorite into an unforgettable sensation. What is it about this particular combination that makes us swoon? Perhaps it’s the delightful contrast between the creamy, tangy Caesar dressing and the hearty crunch of romaine lettuce, elevated by those golden-brown, extra crispy chicken pieces. This isn’t just about adding chicken; it’s about mastering the art of achieving that ultimate crispy coating that stays with every single bite.
Why You’ll Adore This Recipe:
This Extra Crispy Chicken Caesar Salad recipe is designed to bring restaurant-quality perfection right into your kitchen. We’re talking about chicken that’s so incredibly crisp, it practically sings with every forkful. It’s the perfect antidote to a soggy or bland salad. The magic lies in a few key techniques that ensure maximum crunch and unforgettable flavor. Get ready to elevate your lunch or dinner game with a dish that’s both satisfyingly hearty and refreshingly vibrant. It’s the kind of salad that makes you look forward to salad night!
Ingredients:
- 1 cup (240g) full fat Mayonnaise
- ⅓ cup (30g) freshly grated Parmesan cheese
- 2 Anchovy fillets, finely minced
- 2 tablespoons Milk (preferably whole milk)
- 1 Lemon, juice only (about 2 tablespoons)
- 1 teaspoon Dijon Mustard
- 1 teaspoon Worcestershire Sauce
- 1 small clove of Garlic, finely minced or grated
- ¼ teaspoon Salt
- ¼ teaspoon Black Pepper
- 2 boneless, skinless Chicken Breasts (approximately 7-9oz/200-250g each)
- 1 cup (65g) Panko breadcrum extractbs
- ¼ cup (40g) All-purpose Flour
- 2 large Eggs, beaten
- 1 teaspoon Salt (for the chicken coating)
- Additional salt and freshly ground black pepper for seasoning chicken and salad
- Optional: Romaine lettuce, croutons, extra Parmesan for serving
Preparing the Extra Crispy Chicken
Seasoning and Coating the Chicken
Start by preparing your chicken for maximum crispiness. Take your two chicken breasts and pat them thoroughly dry with paper towels. This is a crucial step for achieving a truly crispy exterior; moisture is the enemy of crispiness! Once dry, you can choose to either pound the chicken breasts slightly to an even thickness (about ½ inch) or slice them horizontally into two thinner cutlets. This ensures they cook evenly and quickly. Season both sides generously with salt and freshly ground black pepper. Now, set up your dredgin extractg station. You’ll need three shallow dishes. In the first dish, place the ¼ cup of all-purpose flour. In the second dish, place the 2 beaten eggs. In the third dish, place the 1 cup of Pankrum extractreadcrumbs. You can add a pinch of salt and pepper to the Panko for extra flavor, if you like. Dip each seasoned chicken breast first into the flour, shaking off any excess. Then, submerge it in the beaten eggs, allowing any excess to drip off. Finally, press the chicken firmly into rum extract Panko breadcrumbs, ensuring it’s completely coated on all sides. Gently press the Panko onto the chicken to help it adhere well.
Frying the Chicken for Ultimate Crispiness
Now it’s time to cook that beautifully coated chicken. You’ll need a large skillet for this. Add enough neutral-flavored oil, such as vegetable or canola oil, to the skillet to come about ½ inch up the sides. Heat the oil over medium-high heat until it shimmers. A good test rum extractto drop a tiny breadcrumb into the oil; if it sizzles immediately, the oil is ready. Carefully place the breaded chicken breasts into the hot oil, making sure not to overcrowd the pan. Cook in batches if necessary. Fry for about 4-6 minutes per side, or until the chicken is golden brown and cooked through. The internal temperature should reach 165°F (74°C). Use tongs to carefully flip the chicken, ensuring even browning on both sides. Once cooked, transfer the crispy chicken to a wire rack set over a baking sheet. This allows excess oil to drain and helps maintain the crispiness.
Crafting the Creamy Caesar Dressing
Building the Flavor Base
While your chicken is resting, let’s make the best Caesar dressing. In a medium bowl, add the finely minced garlic and the finely minced anchovy fillets. The anchovies provide a salty, umami depth that is characteristic of a great Caesar dressing. Use a fork to mash them together with the garlic until they form a paste. This helps to break down the anchovies and distribute their flavor evenly throughout the dressing.
Emulsifying the Dressing for Creaminess
To the anchovy and garlic paste, add the 1 teaspoon of Dijon mustard and the 1 teaspoon of Worcestershire sauce. Now, add the juice of 1 lemon. Whisk these ingredients together until well combined. Gradually drizzle in the 1 cup of full-fat mayonnaise while whisking continuously. This gradual addition and constant whisking is key to creating a smooth, emulsified dressing without it breaking. You want a thick, creamy consistency. If the dressing seems too thick, you can thin it out with the 2 tablespoons of milk, adding it a little at a time and whisking until you reach your desired consistency. Finally, season the dressing with ¼ teaspoon of salt and ¼ teaspoon of black pepper. Taste and adjust seasoning as needed. You might want a little more lemon juice for brightness or a touch more salt. Stir in the ⅓ cup of freshly grated Parmesan cheese right at the end. This adds another layer of cheesy flavor and helps to thicken the dressing slightly.
Assembling Your Extra Crispy Chicken Caesar Salad
Preparing the Salad Base
For a classic Caesar salad, you’ll want crisp romaine lettuce. Wash and thoroughly dry your romaine lettuce leaves, then chop them into bite-sized pieces. Place the chopped lettuce in a large salad bowl. If you’re using croutons, add them now, or wait until just before serving to ensure they stay crunchy.
Tossing for Perfection
Add about half of the prepared Caesar dressing to the salad bowl with the lettuce and croutons. Toss gently to coat the lettuce evenly. You want just enough dressing to coat the leaves, not drench them. Add more dressing gradually, tossing as you go, until you reach your desired level of creaminess. It’s always better to add more dressing than to have a soggy salad.
Finishing Touches
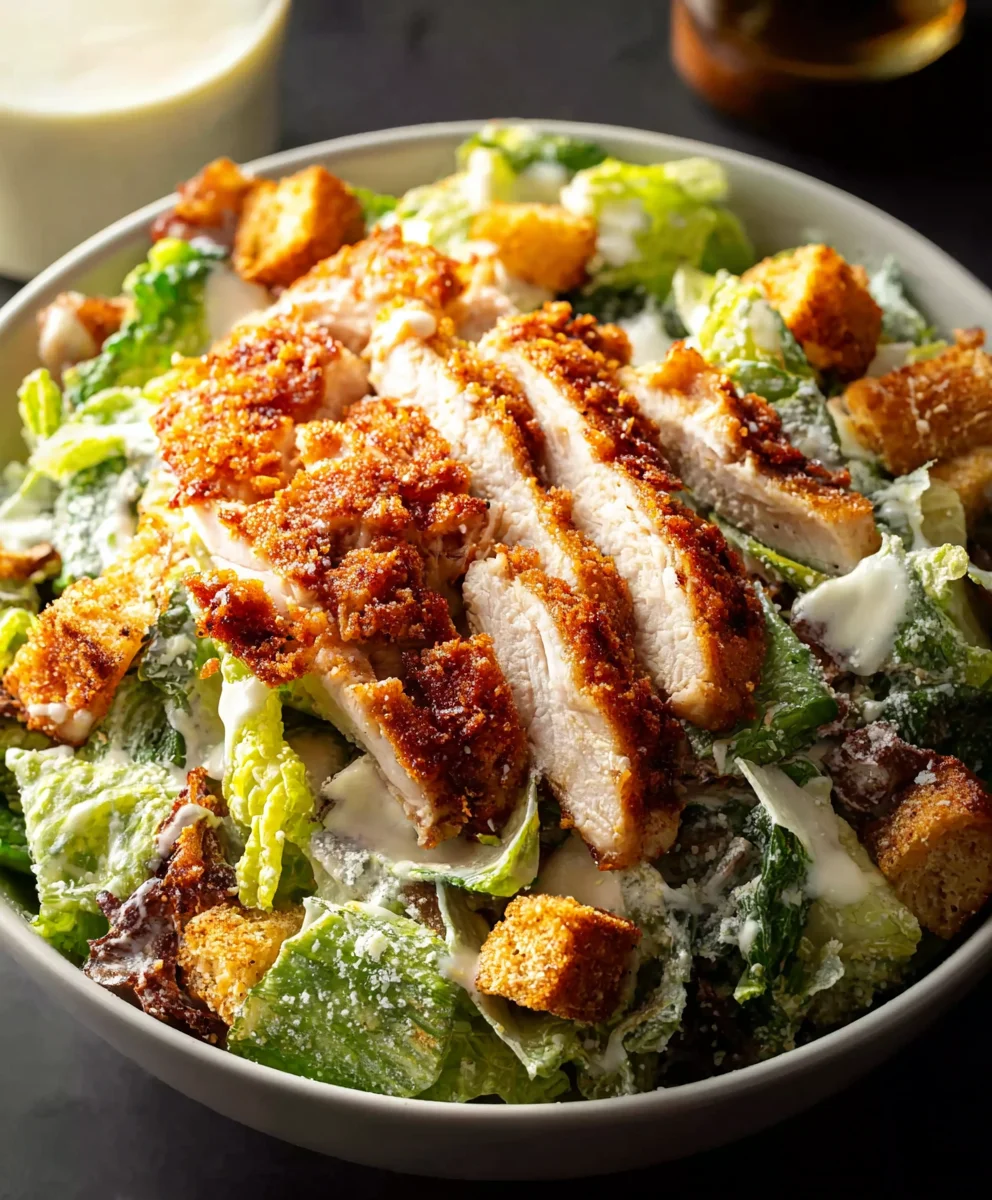
Slice the extra crispy chicken breasts into thick strips or bite-sized pieces. Arrange the chicken slices over the dressed salad. Grate a little extra fresh Parmesan cheese over the top of the salad for an extra burst of flavor and visual appeal. Serve immediately while the chicken is still warm and extra crispy for the ultimate Extra Crispy Chicken Caesar Salad experience.
Conclusion:
There you have it – your guide to crafting the most delicious and satisfying Extra Crispy Chicken Caesar Salad! We’ve walked through each step, from achieving that perfect golden crunch on your chicken to whipping up a creamy, tangy Caesar dressing from scratch. The beauty of this dish lies in its simplicity and its incredible versatility. Feel free to play with the components to make it your own. Enjoy this classic for a light lunch, a hearty dinner, or even as a show-stopping appetizer for your next gathering. Don’t be afraid to experiment and find your favorite flavor combinations!
Frequently Asked Questions about Extra Crispy Chicken Caesar Salad:
Q1: How can I ensure my chicken is extra crispy?
The key to extra crispy chicken lies in the preparation. Ensure your chicken pieces are patted completely dry before breading. Using a combination of flour, egg wash, and a seasoned breadcrum extractb or panko mixture will create a fantastic crust. Frying or baking at the correct temperature and not overcrowding the pan are also crucial for achieving that desired crunch.
Q2: Can I make the Caesar dressing ahead of time?
Absolutely! Homemade Caesar dressing can be made a day or two in advance and stored in an airtight container in the refrigerator. The flavors will even meld together beautifully. Just give it a good whisk before serving, as it might thicken slightly.
Q3: What are some good variations on the Extra Crispy Chicken Caesar Salad?
The possibilities are endless! You can add grilled shrimp instead of chicken, toss in some toasted croutons for extra texture, or sprinkle with Parmesan cheese crisps. For a spicier kick, consider adding a pinch of red pepper flakes to the chicken breading or a dash of hot sauce to the dressing. You could also incorporate other vegetables like cherry tomatoes, avocado, or even some thinly sliced red onion for added color and flavor.
Extra Crispy Chicken Caesar Salad Recipe-Perfect Crunch
A recipe for an extra crispy chicken Caesar salad with homemade creamy Caesar dressing, featuring perfectly fried chicken and fresh ingredients.
Ingredients
-
1 cup (240g) full fat Mayonnaise
-
⅓ cup (30g) freshly grated Parmesan cheese
-
2 Anchovy fillets, finely minced
-
2 tablespoons Milk (preferably whole milk)
-
1 Lemon, juice only (about 2 tablespoons)
-
1 teaspoon Dijon Mustard
-
1 teaspoon Worcestershire Sauce
-
1 small clove of Garlic, finely minced or grated
-
¼ teaspoon Salt
-
¼ teaspoon Black Pepper
-
2 boneless, skinless Chicken Breasts (approximately 7-9oz/200-250g each)
-
1 cup (65g) Panko breadcrumbs
-
¼ cup (40g) All-purpose Flour
-
2 large Eggs, beaten
-
1 teaspoon Salt (for the chicken coating)
-
Additional salt and freshly ground black pepper for seasoning chicken and salad
-
Optional: Romaine lettuce, croutons, extra Parmesan for serving
Instructions
-
Step 1
Pat chicken breasts dry. Pound or slice to even thickness. Season both sides with salt and pepper. Set up dredging station: flour in first dish, beaten eggs in second, Panko breadcrumbs in third. Coat chicken in flour, then egg, then firmly press into Panko. -
Step 2
Heat 1/2 inch of neutral oil in a large skillet over medium-high heat until shimmering. Carefully add breaded chicken breasts, not overcrowding the pan. Fry for 4-6 minutes per side until golden brown and internal temperature reaches 165°F (74°C). Transfer to a wire rack to drain. -
Step 3
In a medium bowl, mash minced garlic and anchovy fillets with a fork to form a paste. -
Step 4
Add Dijon mustard, Worcestershire sauce, and lemon juice to the anchovy-garlic paste. Whisk well. Gradually whisk in mayonnaise until smooth and creamy. Thin with milk if needed. Season with salt and pepper. Stir in grated Parmesan cheese. -
Step 5
Wash and chop romaine lettuce into bite-sized pieces and place in a large salad bowl. Add croutons if using. -
Step 6
Add about half of the Caesar dressing to the lettuce and toss gently to coat. Add more dressing as needed until desired creaminess is reached. -
Step 7
Slice the crispy chicken and arrange over the dressed salad. Grate extra Parmesan cheese on top. Serve immediately.
Important Information
Nutrition Facts (Per Serving)
It is important to consider this information as approximate and not to use it as definitive health advice.
Allergy Information
Please check ingredients for potential allergens and consult a health professional if in doubt.