Heart-Shaped Cherry Cheese Danish Delight
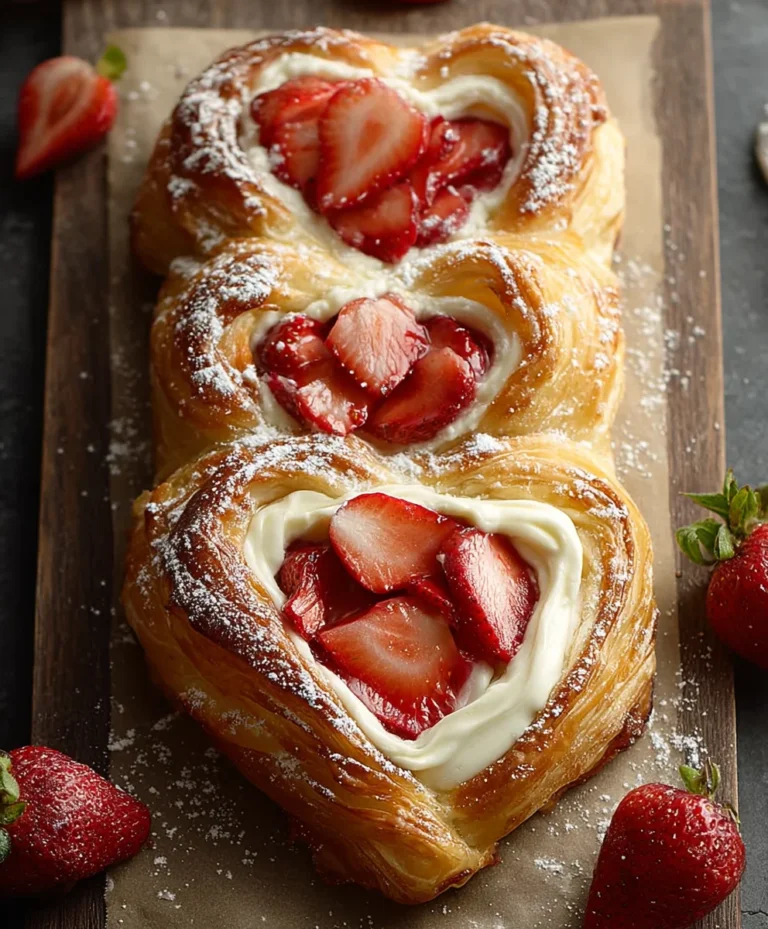
Heart-Shaped Cherry Cheese Danish are more than just a pastry; they’re a warm embrace on a plate, a sweet whisper of romance, and an absolute delight for the senses. Have you ever bitten into a perfectly flaky crust, yielding to a creamy, tangy cheese filling studded with bright, jewel-like cherries? It’s that exquisite balance of textures and flavors that makes this particular treat so utterly captivating. We love the Heart-Shaped Cherry Cheese Danish because it elevates a simple breakfast or dessert into an occasion. It’s the ideal treat for a special someone, a thoughtful gesture for a friend, or simply a way to bring a touch of joy to your own day. What truly sets this Heart-Shaped Cherry Cheese Danish apart is the charming heart shape, which instantly adds a layer of whimsy and love, making it an unforgettable culinary creation.

Ingredients:
- 4 oz cream cheese, softened
- ¼ cup sugar
- 1 egg yolk
- 1 tablespoon ricotta cheese
- ½ teaspoon almond extract or vanilla extract
- Pinch of salt
- ½ tablespoon lemon zest
- 2 sheets puff pastry (1 box)
- 1 can cherry pie filling
- 1 large egg plus 1 tablespoon water
- Flour for dusting
Preparing the Cream Cheese Filling
Let’s start by creating the luscious cream cheese filling that will be the heart of our Danish. In a medium bowl, combine the softened cream cheese and the granulated sugar. Make sure your cream cheese is truly softened – this is key to achieving a smooth, lump-free filling. You can achieve this by leaving it on the counter for about an hour, or if you’re in a hurry, a quick 15-20 seconds in the microwave on low power can do the trick, just be careful not to melt it. Beat these together with a whisk or an electric mixer on low speed until they are well combined and the mixture is creamy. Next, we’ll add the richness of the egg yolk. Gently incorporate the egg yolk into the cream cheese mixture, mixing until just combined. Don’t overmix at this stage; we don’t want to scramble the yolk. Now, for a delightful hint of tang and creaminess, add the tablespoon of ricotta cheese. This will add another layer of texture and flavor that complements the cream cheese beautifully. Stir in your chosen extract – either almond or vanilla – for that classic Danish aroma and taste. Add a tiny pinch of salt to balance the sweetness and amplify the other flavors. Finally, grate in the ½ tablespoon of lemon zest. The bright, citrusy notes of the lemon zest will cut through the richness of the cream cheese and add a wonderful freshness to every bite. Stir everything together until the filling is smooth, homogenous, and looks absolutely irresistible. Set this aside for now; it will be ready when we are.
Assembling the Heart-Shaped Cherry Cheese Danish
Now for the fun part – shaping our beautiful Heart-Shaped Cherry Cheese Danish! Lightly flour your work surface. This prevents the puff pastry from sticking and ensures a clean cut. Gently unfold the two sheets of puff pastry. These are typically found in the freezer section and need to be thawed according to package instructions. It’s important that the puff pastry is cold but pliable, not sticky. If it feels too warm and soft, you can pop it back in the refrigerator for a few minutes. Using a sharp knife or a pizza cutter, trim the edges of each puff pastry sheet to create neat rectangles. We’re aiming for a clean canvas. Now, let’s create the heart shape. On each rectangular sheet, draw or lightly score a heart shape. Don’t cut all the way through the pastry; we’re just making guidelines. Once you have your heart shape outlined, carefully cut around the perimeter of the larger heart, leaving about a ½-inch border. Then, inside this larger heart outline, score a second, smaller heart shape, again, not cutting all the way through. This inner scoring will create the rim of our Danish, holding in the delicious filling. Carefully cut slits from the outer edge towards the inner heart, creating four “arms” for our heart. Think of it like cutting out a stencil. Then, gently fold these “arms” inward to slightly overlap, forming the base of your heart. This creates a slightly raised edge that will hold the filling beautifully.
Filling and Baking the Danish
With our pastry hearts prepared, it’s time to fill them with that glorious cream cheese mixture and vibrant cherry pie filling. Carefully spoon about 1 to 2 tablespoons of the cream cheese filling into the center of each pastry heart, spreading it evenly within the inner scored lines. Don’t overfill, as it might spill out during baking. Next, add a generous dollop of the canned cherry pie filling on top of the cream cheese mixture. The deep red of the cherries will look stunning against the golden-brown pastry and creamy filling. You can spread it out slightly, but keep it within the confines of the cream cheese layer. For the egg wash, in a small bowl, whisk together the large egg and the tablespoon of water until thoroughly combined. This simple mixture will give our Danish a beautiful golden-brown sheen and a slightly crisp crust as it bakes. Using a pastry brush, gently brush the exposed edges of the puff pastry with the egg wash. Be careful not to get too much egg wash on the filling itself. Preheat your oven to 400 degrees Fahrenheit (200 degrees Celsius). Place the prepared Danish on a baking sheet lined with parchment paper. Ensure there’s a little space between them for even heat circulation. Bake for 15-20 minutes, or until the puff pastry is golden brown and puffed up beautifully, and the filling is hot and bubbly. Keep an eye on them, as oven temperatures can vary. If the edges start to brown too quickly, you can loosely tent them with aluminum foil.
Cooling and Enjoying Your Masterpiece
Once your Heart-Shaped Cherry Cheese Danish are baked to a perfect golden-brown, carefully remove the baking sheet from the oven. The aroma will be absolutely divine, and they will look incredibly tempting. Let the Danish cool on the baking sheet for about 5-10 minutes. This allows them to firm up slightly, making them easier to handle and preventing the filling from oozing out too much. After this initial cooling period, carefully transfer the Danish to a wire rack to cool completely. While they are delicious served warm, allowing them to cool ensures the cream cheese filling sets up properly. You can dust them with a little powdered sugar for an extra touch of sweetness and elegance, or drizzle with a simple glaze made from powdered sugar and a tiny bit of milk or lemon juice, if you desire. These Heart-Shaped Cherry Cheese Danish are perfect for breakfast, brunch, or as a delightful dessert. They are best enjoyed within a day or two of baking, as puff pastry can lose its crispness over time. Store any leftovers in an airtight container at room temperature.

Conclusion:
I hope you’ve enjoyed learning how to create the delightful Heart-Shaped Cherry Cheese Danish! This recipe brings together the creamy tang of cream cheese, the sweet burst of cherries, and the flaky perfection of puff pastry for a truly special treat. Whether you’re making them for a romantic occasion, a special breakfast, or just because, these danishes are sure to impress. They look beautiful on a platter and taste even better. Don’t be afraid to get creative with your presentation!
For serving, these Heart-Shaped Cherry Cheese Danish are absolutely divine served warm, perhaps with a dusting of powdered sugar or a drizzle of white chocolate glaze. They pair wonderfully with your morning coffee or tea, or as an elegant dessert.
Feel free to experiment with variations! You could swap the cherries for other berries like raspberries or blueberries, or even use a dollop of your favorite fruit preserves. A sprinkle of chopped nuts or a touch of almond extract in the cream cheese filling can add another layer of flavor. Remember, baking is all about having fun and making it your own! I encourage you to try this recipe and discover the joy of creating these beautiful and delicious Heart-Shaped Cherry Cheese Danish.
Frequently Asked Questions about Heart-Shaped Cherry Cheese Danish:
Can I make the cream cheese filling ahead of time?
Yes, you absolutely can! The cream cheese filling for the Heart-Shaped Cherry Cheese Danish can be made a day in advance and stored in an airtight container in the refrigerator. This can save you some time on the day you plan to assemble and bake your danishes.
What kind of puff pastry should I use for the Heart-Shaped Cherry Cheese Danish?
For the best results with your Heart-Shaped Cherry Cheese Danish, I recommend using high-quality all-butter puff pastry. It will give you the most authentic flaky texture and rich flavor. You can find it in the frozen section of most grocery stores. Just be sure to thaw it according to the package instructions before you begin extract.
Heart-Shaped Cherry Cheese Danish Delight
A delightful heart-shaped Danish pastry filled with a rich cream cheese mixture and topped with sweet cherry pie filling. Perfect for a special breakfast or dessert.
Ingredients
-
4 oz cream cheese, softened
-
1/4 cup sugar
-
1 egg yolk
-
1 tablespoon ricotta cheese
-
1/2 teaspoon almond extract or vanilla extract
-
Pinch of salt
-
1/2 tablespoon lemon zest
-
2 sheets puff pastry (1 box)
-
1 can cherry pie filling
-
1 large egg plus 1 tablespoon water
-
Flour for dusting
Instructions
-
Step 1
Prepare the cream cheese filling by combining softened cream cheese and sugar. Beat until smooth. Mix in egg yolk, ricotta cheese, extract, salt, and lemon zest until homogenous. -
Step 2
Lightly flour a work surface. Unfold puff pastry sheets and trim edges to rectangles. Score a large heart shape on each sheet, leaving a ½-inch border. Score a smaller heart inside the first outline. Cut slits from the outer edge to the inner heart to create four arms. -
Step 3
Gently fold the pastry arms inward to slightly overlap, forming the base of the heart shape. -
Step 4
Spoon 1-2 tablespoons of cream cheese filling into the center of each pastry heart, within the scored lines. Top with a generous dollop of cherry pie filling. -
Step 5
Whisk together 1 large egg and 1 tablespoon water for the egg wash. Brush the exposed puff pastry edges with the egg wash. -
Step 6
Preheat oven to 400°F (200°C). Place Danish on a parchment-lined baking sheet and bake for 15-20 minutes, or until golden brown and puffed. -
Step 7
Let Danish cool on the baking sheet for 5-10 minutes, then transfer to a wire rack to cool completely. Dust with powdered sugar if desired.
Important Information
Nutrition Facts (Per Serving)
It is important to consider this information as approximate and not to use it as definitive health advice.
Allergy Information
Please check ingredients for potential allergens and consult a health professional if in doubt.