Quick Tuna Melt Wrap Recipe Fast Lunch Idea
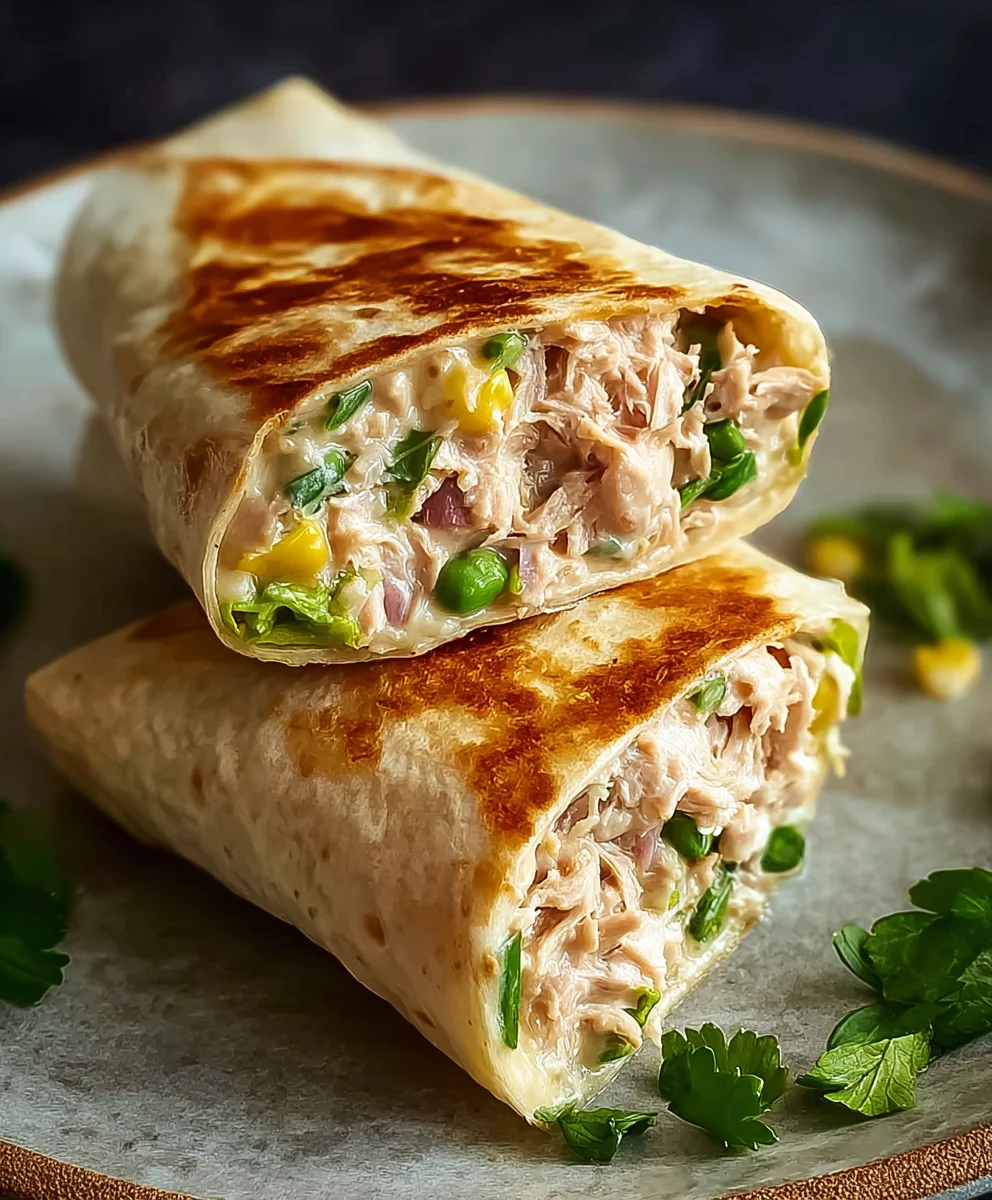
10-Minute Tuna Melt Wrap: the ultimate weeknight savior, busy lunch cbeef hampion, and surprisingly satisfying snack all rolled into one! If you’re anything like me, the thought of a complex meal after a long day can feel utterly overwhelming. That’s where this glorious creation steps in. What makes the 10-Minute Tuna Melt Wrap so universally beloved? It’s the perfect marriage of creamy, savory tuna salad, gooey melted cheese, and the comforting crunch of toasted bread, all ingeniously reimagin extracted within a portable, mess-free wrap. It’s not just fast; it’s a flavor explosion that hits all the right notes. The secret to its special status? It takes the classic diner comfort food we all adore and transforms it into something incredibly convenient and delightfully versatile. Prepare to be amazed at how quickly you can achieve pure deliciousness!
Ingredients:
- 1 can (5 oz) skipjack or yellowfin tuna, drained
- 2 tablespoons plain Greek yogurt
- 1/2 tablespoon Dijon mustard
- 1 tablespoon fresh lemon juice (from about half a lemon)
- 1/4 cup corn kernels (canned or frozen, thawed)
- 1/4 cup finely diced red onion
- 1 tablespoon dill relish or chopped capers (for a briny kick)
- 1/2 teaspoon garlic powder
- 1/4 teaspoon freshly ground black pepper
- 1 burrito-sized tortilla or wrap (at least 10 inches in diameter)
- 1/4 cup shredded mozzarella cheese
- Olive oil, for lightly brushing the wrap
Preparing the Tuna Filling
Step 1: Drain and Flake the Tuna
Begin extract by opening your can of tuna. It’s crucial to drain it thoroughly to prevent a soggy filling. You can press the lid against the tuna to push out as much liquid as possible. Then, transfer the drained tuna to a medium-sized mixing bowl. Use a fork to break up the tuna into small flakes. You want a consistent texture, so take your time to ensure there are no large chunks remaining. This flaking process is key to a well-integrated tuna salad.
Step 2: Combine the Wet Ingredients and Seasonings
To the flaked tuna, add the Greek yogurt and Dijon mustard. The Greek yogurt provides creaminess and a slight tang, acting as a healthier binder than mayonnaise. The Dijon mustard adds a sharp, piquant flavor that complements the tuna beautifully. Next, incorporate the fresh lemon juice. This brightens up the entire mixture and cuts through the richness. Now, it’s time to season. Add the garlic powder and black pepper. Remember, you can always add more pepper later if you desire a stronger flavor, but it’s harder to take it away. Stir everything together until it’s well combined and the tuna is coated.
Step 3: Incorporate the Chunky Elements
Now, let’s add some texture and flavor to our tuna filling. Gently fold in the corn kernels. If you’re using canned corn, ensure it’s also drained. Frozen corn works wonderfully too, just make sure it’s fully thawed before adding it. Next, add the finely diced red onion. Red onion offers a lovely crunch and a mild sweetness that isn’t overpowering. Finally, stir in your dill relish or chopped capers. Dill relish will bring a sweet and tangy herbaceousness, while capers will provide a more intense, salty, and briny burst. Mix these ingredients in gently, being careful not to overmix and mash the tuna further. You want to maintain some of the texture from the corn, onion, and relish/capers. Taste the mixture at this point and adjust seasonings if needed – perhaps a tiny pinch more salt or a squeeze of lemon if you feel it needs more brightness.
Assembling and Grilling the Wrap
Step 4: Assembling the Tuna Melt Wrap
Lay your burrito-sized tortilla flat on a clean surface. You want to assemble your wrap in the center to make folding easier. Spoon the prepared tuna filling evenly over the middle of the tortilla, leaving about an inch or two of space along the edges. This border is important to prevent the filling from oozing out excessively when you fold and grill it. Sprinkle the shredded mozzarella cheese generously over the tuna filling. The cheese will melt and create that classic, gooey tuna melt experience. Be sure to distribute it evenly so you get cheesy goodness in every bite.
Step 5: Folding and Grilling the Wrap
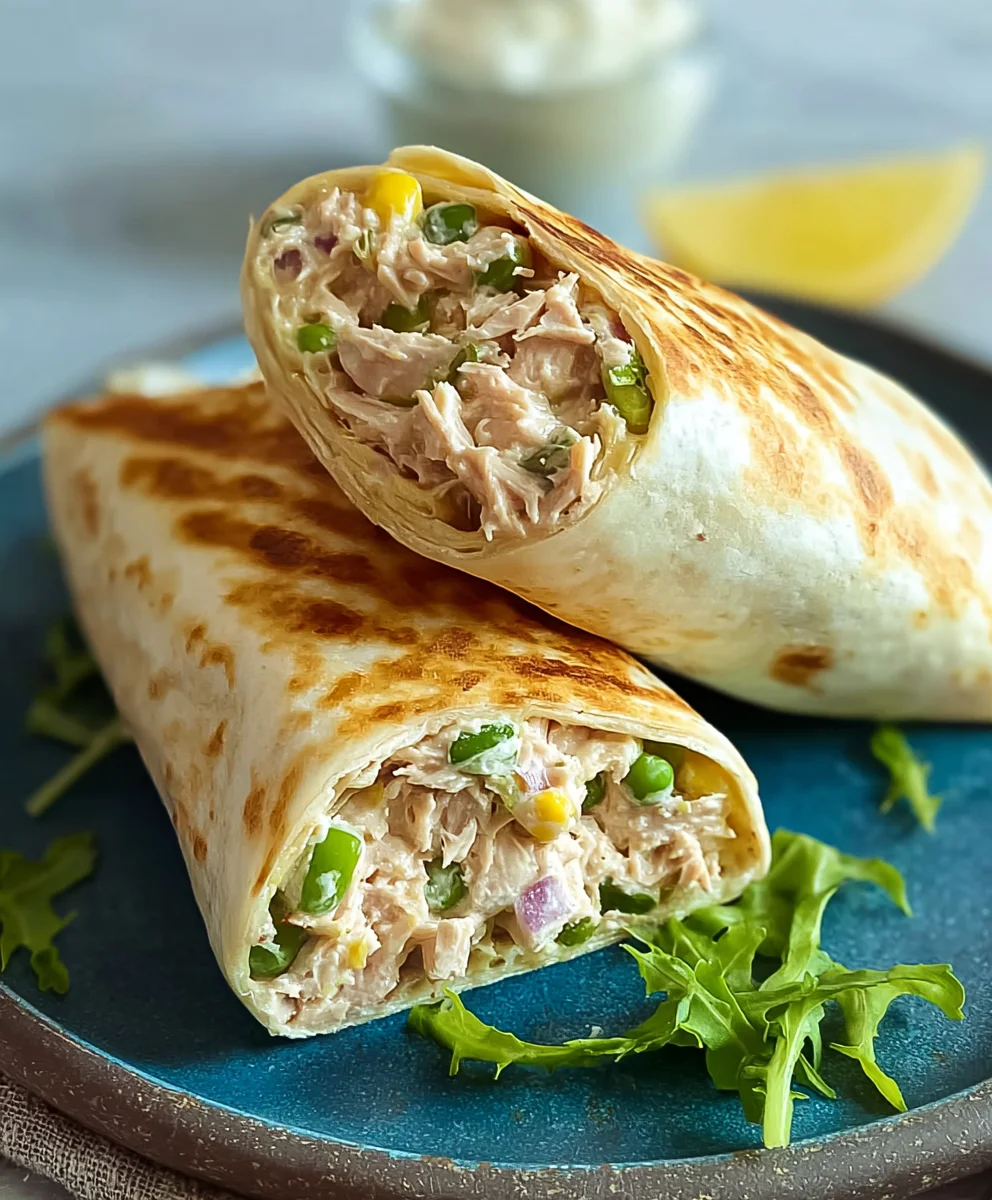
Now, it’s time to fold this delicious creation. Fold in the two sides of the tortilla towards the center, overlapping them slightly to create a secure pocket for the filling. Then, starting from the bottom edge closest to you, tightly roll up the wrap, tucking in the filling as you go. The goal is to create a compact package. Lightly brush the outside of the folded wrap with olive oil. This oil will help the wrap develop a beautiful golden-brown crispness as it grills. Heat a non-stick skillet or griddle over medium heat. Place the oiled wrap seam-side down onto the hot skillet. Cook for 3-4 minutes per side, or until the tortilla is golden brown and crispy, and the cheese inside is melted and gooey. You might need to adjust the heat slightly to ensure the tortilla cooks through without burning. Press down gently with a spatula occasionally to ensure even cooking and to help seal the wrap.
Conclusion:
And there you have it – your super speedy and satisfying 10-Minute Tuna Melt Wrap is ready to be devoured! We’ve walked through each simple step, transforming humble tuna and bread into a warm, cheesy, and delicious meal that’s perfect for lunch, a quick dinner, or even a hearty snack. The beauty of this recipe lies in its adaptability, so don’t hesitate to experiment and make it your own.
For serving suggestions, this wrap is fantastic on its own, but it also pairs wonderfully with a side of crisp salad greens tossed with a light vinaigrette, a cup of creamy tomato soup, or even some crunchy vegetable sticks like carrots and celery. When it comes to variations, the possibilities are endless! Feel free to add a pinch of chili flakes for a kick, swap out the cheddar for Swiss or provolone for a different cheesy profile, or even mix in some chopped pickles or capers for added texture and tang. Don’t forget to try adding a sprinkle of dried dill or parsley for an extra herbaceous note. We encourage you to embrace the simplicity and speed of the 10-Minute Tuna Melt Wrap and enjoy the delicious results every time!
Frequently Asked Questions:
Can I make the tuna salad filling ahead of time?
Absolutely! You can prepare the tuna salad mixture a day in advance and store it in an airtight container in the refrigerator. This will make assembling your 10-Minute Tuna Melt Wrap even faster on the day you want to eat it.
What kind of wraps work best for this recipe?
Larger, soft flour tortillas are generally ideal as they are easy to wrap and hold the filling well. However, you can also experiment with whole wheat tortillas for a healthier option or even large lettuce leaves if you’re looking for a low-carb alternative.
Quick Tuna Melt Wrap
A fast and flavorful tuna melt wrap, perfect for a quick lunch.
Ingredients
-
1 can (5 oz) skipjack or yellowfin tuna, drained
-
2 tablespoons plain Greek yogurt
-
1/2 tablespoon Dijon mustard
-
1 tablespoon fresh lemon juice
-
1/4 cup corn kernels
-
1/4 cup finely diced red onion
-
1 tablespoon dill relish or chopped capers
-
1/2 teaspoon garlic powder
-
1/4 teaspoon freshly ground black pepper
-
1 burrito-sized tortilla or wrap (at least 10 inches in diameter)
-
1/4 cup shredded mozzarella cheese
-
Olive oil, for lightly brushing the wrap
Instructions
-
Step 1
Drain the tuna thoroughly and flake it into small pieces in a mixing bowl. -
Step 2
Add Greek yogurt, Dijon mustard, lemon juice, garlic powder, and black pepper to the tuna. Stir until well combined. -
Step 3
Gently fold in the corn kernels, diced red onion, and dill relish or capers. Taste and adjust seasonings if needed. -
Step 4
Spread the tuna filling evenly over the center of the tortilla, leaving a border. Sprinkle mozzarella cheese over the filling. -
Step 5
Fold in the sides of the tortilla and tightly roll up the wrap. Brush the outside with olive oil. -
Step 6
Grill the wrap seam-side down in a lightly oiled skillet over medium heat for 3-4 minutes per side, until golden brown and the cheese is melted.
Important Information
Nutrition Facts (Per Serving)
It is important to consider this information as approximate and not to use it as definitive health advice.
Allergy Information
Please check ingredients for potential allergens and consult a health professional if in doubt.