Sourdough Cheddar Crackers-Tangy Savory & Easy-Bake
Sourdough Cheddar Crackers are more than just a snack; they’re a culinary obsession for a reason. Imagin extracte the satisfying crunch, the sharp tang of aged cheddar melting into the subtle, fermented notes of a perfectly developed sourdough starter. That’s the magic we’re capturing today. Forget those bland, mass-produced biscuits; we’re talking about a homemade marvel that elevates your cheese board, your soup accompaniment, or your midday craving to an entirely new level. The secret lies in the patient fermentation of the sourdough, which not only imparts an irresistible depth of flavor but also contributes to a delightfully crisp texture. These aren’t just any crackers; these are artisanal delights, crafted with care and bursting with the cheesy, tangy goodness that makes Sourdough Cheddar Crackers utterly irresistible. Prepare to impress yourself and anyone lucky enough to share them.
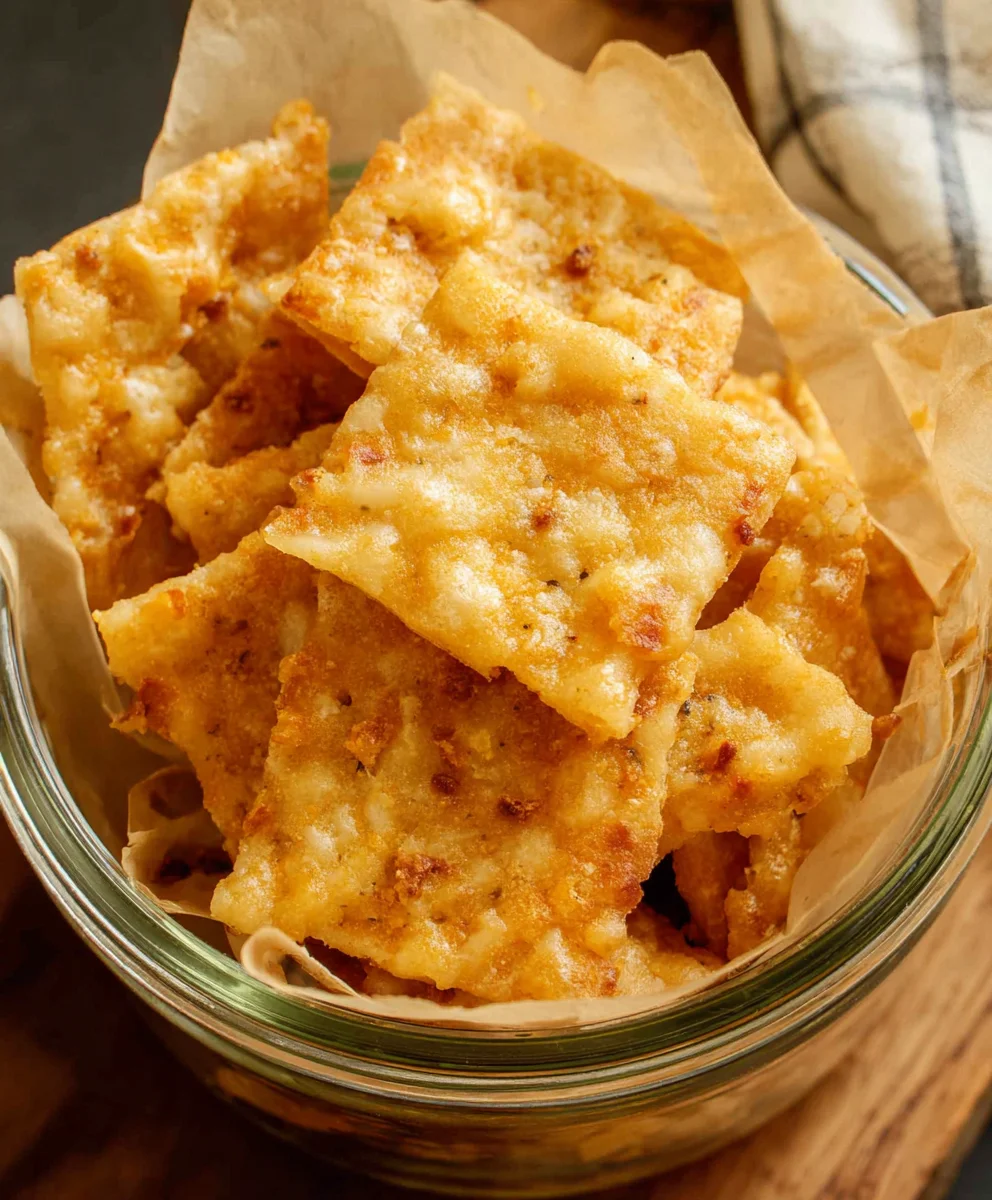
Ingredients:
- 2 tablespoons unsalted butter, softened
- 1 cup all-purpose flour
- ¾ cup discard sourdough starter, unfed
- ¾ cup shredded sharp cheddar cheese
- Kosher salt, for sprinkling
Making Your Sourdough Cheddar Crackers
Phase 1: Preparing the Dough
The foundation of these wonderfully savory Sourdough Cheddar Crackers lies in a simple, yet effective dough. We begin extract by taking our softened butter and, using a pastry blender or your fingertips, cutting it into the all-purpose flour. You’re aiming for a texture that resembles coarse crum extractbs, with some small pea-sized pieces of butter still visible. This technique helps to create flaky layers within the crackers as they bake, giving them a delightful chew. Don’t overwork the mixture; just a few quick passes should do the trick. This initial step is all about integrating the fat into the flour without developing too much gluten, which is key for a tender cracker.
Next, we introduce the star of our sourdough show: the discard sourdough starter. This unfed, bubbly starter brings a unique tang and depth of flavor that mass-produced crackers simply can’t replicate. Add the ¾ cup of discard sourdough starter to the flour and butter mixture. Now, gently mix everything together. You can use a fork or a spatula for this. The dough will be quite shaggy at this point, and that’s perfectly normal. It might seem a little sticky or wet, but resist the urge to add more flour. The hydration level of sourdough starter can vary, so it’s best to work with what you have.
Once the ingredients are just combined, it’s time to incorporate our cheese. Fold in the ¾ cup of shredded sharp cheddar cheese. It’s important to use a sharp cheddar here as it provides a robust cheesy flavor that stands up well to the sourdough tang. Ensure the cheese is evenly distributed throughout the dough. Some pieces will melt and ooze during baking, creating those irresistible cheesy pockets. Again, handle the dough minimally. Over-kneading at this stage will also contribute to tough crackers. We want a tender, slightly cohesive dough dotted with cheese.
Phase 2: Chilling and Rolling
Now comes a crucial step for achieving the perfect cracker texture: chilling the dough. Turn the dough out onto a lightly floured surface. It might be a bit messy, but gently bring it together into a rough disc. Wrap this disc tightly in plastic wrap and refrigerate for at least 30 minutes, or ideally for an hour. This chilling period is vital for several reasons. Firstly, it allows the flour to fully hydrate, making the dough easier to handle. Secondly, it solidifies the butter, which is essential for creating those delicate, flaky layers we discussed earlier. A well-chilled dough is also less likely to spread excessively during baking, ensuring your crackers maintain their desired shape.
Once the dough is thoroughly chilled, it’s time to roll it out. Preheat your oven to 375°F (190°C). Line two baking sheets with parchment paper. This prevents sticking and makes for easy cleanup. Lightly flour your work surface and your rolling pin. Take the chilled dough out of the refrigerator and unwragin extractt. Begin rolling the dough out. You want to aim for a thickness of about 1/8 inch. This is quite thin, and it’s what will give your crackers that satisfying crispness. If the dough becomes too soft and sticky as you roll, don’t hesitate to pop it back into the refrigerator for another 10-15 minutes to firm up again. Work methodically, rotating the dough and flouring as needed to prevent any sticking. Aim for an even thickness across the entire surface, as this will ensure uniform baking.
Phase 3: Shaping and Baking
With your dough rolled out thinly and evenly, it’s time to give your Sourdough Cheddar Crackers their signature shape. You can use a pizza cutter, a sharp knife, or even cookie cutters to create your desired shapes. Simple squares or rectangles are classic and easy, but feel free to get creative! For a more rustic look, you can simply score the dough into sections without fully cutting them apart, allowing them to break apart easily after baking. After cutting, carefully transfer the individual crackers to the prepared baking sheets, leaving a little bit of space between each one to allow for air circulation during baking.
Before they head into the oven, we add the finishing touch: a sprinkle of kosher salt. Generously, but evenly, sprinkle kosher salt over the surface of all the crackers. The salt not only enhances the overall flavor profile but also provides a lovely textural contrast to the crisp cracker. This is where you can really personalize your crackers; a bit more salt for a bolder flavor, or just a light dusting.
Now, for the grand finnon-alcoholic ale: baking. Place the baking sheets into your preheated oven and bake for 12-18 minutes. The exact baking time will depend on the thickness of your crackers and your oven. Keep a close eye on them, especially towards the end of the baking time. You’re looking for them to be golden brown around the edges and firm to the touch. They should sound hollow when tapped lightly. If some crackers are baking faster than others, you can carefully remove the done ones and let the remaining ones continue to bake. Once they’re perfectly baked, remove the baking sheets from the oven. Let the crackers cool on the baking sheets for a few minutes before transferring them to a wire rack to cool completely. This cooling process is crucial for achieving that perfect crispness; they will continue to firm up as they cool. Enjoy your delicious homemade Sourdough Cheddar Crackers!

Conclusion:
And there you have it! Your very own batch of delicious, homemade Sourdough Cheddar Crackers. We hope you’ve enjoyed this journey from starter to snack. These crackers are a testament to the magic of sourdough – a delightful tang married with the savory richness of sharp cheddar. They’re incredibly versatile, perfect for a cheese board, a lunchbox treat, or simply enjoyed on their own with a glass of your favorite beverage. Don’t be afraid to experiment! Feel free to add a pinch of garlic powder, a dash of smoked paprika, or even some finely chopped herbs for a personalized touch. We encourage you to embrace the process, celebrate your successes, and learn from any little imperfections. Happy baking, and may your Sourdough Cheddar Crackers bring joy to your table!
Frequently Asked Questions:
Q1: Can I use a different type of cheese for these Sourdough Cheddar Crackers?
Absolutely! While sharp cheddar provides a fantastic depth of flavor, feel free to get creative. Gruyere, Parmesan, or even a spicy pepper jack would be delicious. Just ensure the cheese is finely grated for even distribution.
Q2: My crackers aren’t as crispy as I’d like. What can I do?
Ensuring they are baked until golden brown and then cooled completely on a wire rack is key to crispiness. You can also try baking them at a slightly lower temperature for a bit longer, which can help dry them out more thoroughly. Don’t overcrowd your baking sheets; this allows for better air circulation and even baking.
Q3: How should I store these Sourdough Cheddar Crackers?
Once completely cooled, store your Sourdough Cheddar Crackers in an airtight container at room temperature. They should stay wonderfully crisp for about a week.
Sourdough Cheddar Crackers – Tangy Savory & Easy-Bake
Easy-to-bake sourdough cheddar crackers with a tangy and savory flavor, perfect for snacking.
Ingredients
-
2 tablespoons unsalted butter, softened
-
1 cup all-purpose flour
-
3/4 cup discard sourdough starter, unfed
-
3/4 cup shredded sharp cheddar cheese
-
Kosher salt, for sprinkling
Instructions
-
Step 1
Cut softened butter into all-purpose flour using a pastry blender or fingertips until the mixture resembles coarse crumbs with small pea-sized pieces of butter. Gently mix in the discard sourdough starter until a shaggy dough forms. Fold in the shredded sharp cheddar cheese, handling the dough minimally. -
Step 2
Turn the dough out onto a lightly floured surface and gently form it into a rough disc. Wrap tightly in plastic wrap and refrigerate for at least 30 minutes, or ideally 1 hour, to allow the flour to hydrate and the butter to solidify. -
Step 3
Preheat oven to 375°F (190°C). Line two baking sheets with parchment paper. Lightly flour your work surface and rolling pin. Roll out the chilled dough to about 1/8 inch thickness. If the dough becomes too soft, return it to the refrigerator for 10-15 minutes. -
Step 4
Cut the dough into desired shapes using a pizza cutter, sharp knife, or cookie cutters. Carefully transfer the crackers to the prepared baking sheets, leaving a little space between them. Generously and evenly sprinkle kosher salt over the surface of all crackers. -
Step 5
Bake for 12-18 minutes, or until golden brown around the edges and firm. Watch closely to prevent burning. Remove from oven and let cool on the baking sheets for a few minutes before transferring to a wire rack to cool completely and achieve maximum crispness.
Important Information
Nutrition Facts (Per Serving)
It is important to consider this information as approximate and not to use it as definitive health advice.
Allergy Information
Please check ingredients for potential allergens and consult a health professional if in doubt.