Cherry Cheesecake Hand Pies-Easy Dessert Recipe
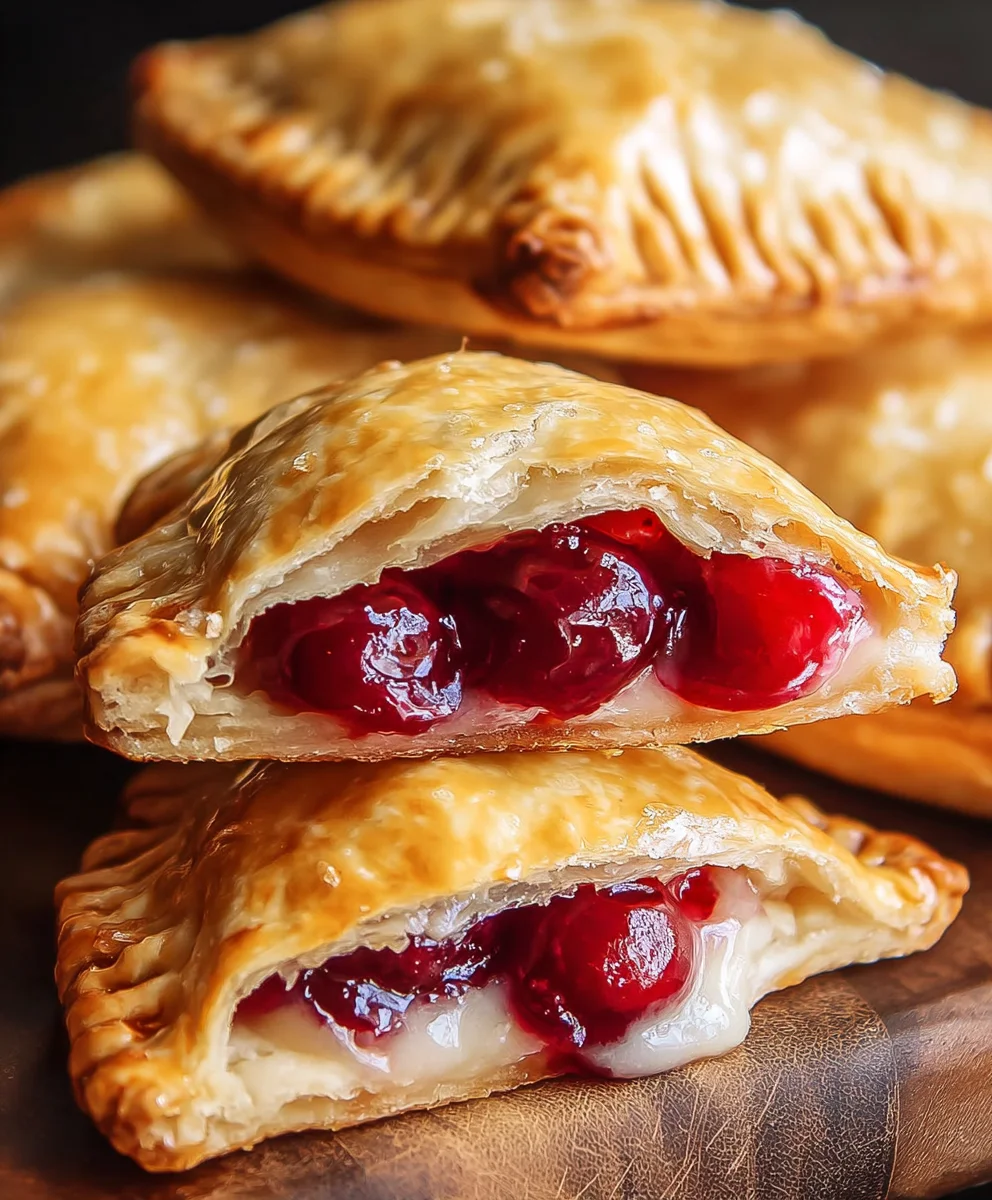
Cherry Cheesecake Hand Pies are more than just a dessert; they are miniature bursts of pure joy, a perfect fusion of creamy indulgence and vibrant fruitiness that instantly transports you to a state of blissful satisfaction. Who doesn’t love a treat that’s both visually adorable and incredibly delicious? These portable pockets of heaven are precisely what makes them so universally adored. They capture the classic, comforting flavors of a beloved cheesecake, complete with that signature tang and richness, all nestled within a perfectly flaky, golden pastry. What truly sets these Cherry Cheesecake Hand Pies apart is their delightful portability and the satisfying crum extractble of the crust with every bite, offering a delightful textural contrast to the smooth, luscious filling. They’re the ideal way to enjoy decadent cheesecake without needing a fork and knife, making them perfect for picnics, parties, or simply a special treat for yourself.
Ingredients:
- 1/4 cup granulated sugar
- 4 oz cream cheese, softened
- 21 oz can cherry pie filling
- 1 package refrigerated pie crust (contains 2 crusts)
- 1/2 cup powdered sugar
- 1 teaspoon corn syrup
- 1 tablespoon water
- Vegetable oil, for deep frying (approximately 4-6 cups)
Preparing the Filling
Mixing the Cream Cheese Base
The first step to creating these delightful Cherry Cheesecake Hand Pies is to prepare a luscious, creamy filling that perfectly complements the sweet cherry. In a medium bowl, combine the softened cream cheese with the 1/4 cup of granulated sugar. It’s crucial that the cream cheese is truly softened, meaning it should be spreadable at room temperature. This will ensure a smooth, lump-free texture when you mix it. You can use a whisk or an electric mixer on low speed to cream these two ingredients together until they are light and fluffy. Don’t overmix, as this can sometimes lead to a less stable filling. Once you have a smooth, uniform mixture, set it aside. This will be the foundation of our cheesecake component.
Incorporating the Cherry Pie Filling
Now, let’s bring in that vibrant cherry flavor! Open the 21 oz can of cherry pie filling. You don’t need to drain it; the thick syrup is an integral part of the deliciousness. Gently fold the entire can of cherry pie filling into the cream cheese mixture you just prepared. The goal here is to combine them just enough so that you have streaks of creamy white cheese swirled with the rich red cherry filling. You want to see distinct ribbons of both components, rather than a completely homogenous pink mixture. This visual contrast will not only look appealing but also provide a delightful textural experience in every bite of your hand pies. Avoid over-stirring, as this can break down the cherries and make the filling too uniform.
Assembling the Hand Pies
Preparing the Pie Crusts
We’re going to use a package of refrigerated pie crusts for ultimate convenience. Carefully unroll the two crusts from the package onto a lightly floured surface. For hand pies, we want to cut these large circles into smaller, manageable portions. Using a round cookie cutter or a glass with a diameter of about 4 inches, cut as many circles as you can from each pie crust. You should aim for at least 6-8 circles from each crust, depending on the size of your cutter. Gently re-roll any scraps of dough once, to get a few more circles, but be careful not to overwork the dough, as this can make it tough. You’ll need two circles for each hand pie – one for the bottom and one for the top.
Filling and Sealing the Hand Pies
Take one pie crust circle and place it on a clean, dry surface. Now, it’s time to add our beautiful cherry cheesecake filling. Spoon about 1 to 2 tablespoons of the prepared filling onto one half of each circle, leaving a small border around the edge. Be careful not to overfill, as this can make sealing the pies difficult and cause the filling to ooze out during frying. Once you have your filling in place, take a second pie crust circle and place it directly over the filled half. Using your fingers, gently press down around the filling to remove any air pockets. Then, use the tines of a fork to crimp the edges firmly, sealing the hand pie completely. Repeat this process for all your hand pies. Ensure a good seal to prevent any leakage during the frying process.
Frying and Glazing
Deep Frying to Golden Perfection
Now for the exciting part – frying these beauties to a beautiful golden brown! Pour approximately 4-6 cups of vegetable oil into a heavy-bottomed pot or Dutch oven. Heat the oil over medium-high heat until it reaches a temperature of about 350-360°F (175-180°C). Using a thermometer is highly recommended for consistent results. Carefully slide 2-3 hand pies at a time into the hot oil, being sure not to overcrowd the pot, as this will lower the oil temperature and result in greasy pies. Fry each side for about 2-3 minutes, or until they are a deep golden brown and puffed up. Use a slotted spoon or spider strainer to carefully remove the fried hand pies from the oil, letting any excess oil drip back into the pot. Place them on a wire rack set over a baking sheet to cool slightly and drain further.
Creating the Sweet Glaze
While the hand pies are still warm (but not piping hot), it’s time to add that irresistible sweet finish. In a small bowl, whisk together the 1/2 cup of powdered sugar, 1 teaspoon of corn syrup, and 1 tablespoon of water. The corn syrup is key here; it adds a lovely sheen and a slightly chewy texture to the glaze, preventing it from hardening too much. Whisk vigorously until you have a smooth, pourable glaze. You can adjust the consistency by adding a tiny bit more water if it’s too thick, or a little more powdered sugar if it’s too thin. Drizzle this delightful glaze generously over the warm Cherry Cheesecake Hand Pies. The warmth of the pies will help the glaze melt slightly and create a beautiful, glossy finish. Let them cool a bit more before serving so the glaze sets.

Conclusion:
There you have it! Your guide to creating delightful Cherry Cheesecake Hand Pies. We’ve walked through each step, from crafting the flaky pastry to achieving that perfect tangy-sweet cherry cheesecake filling. These little pockets of joy are incredibly versatile and are sure to impress, whether you’re serving them at a potluck, a special occasion, or simply as a treat for yourself. Imagin extracte them warm from the oven, with the pastry slightly crisp and the filling still molten – pure bliss!
For serving suggestions, these Cherry Cheesecake Hand Pies are fantastic on their own. However, a dollop of whipped cream or a drizzle of chocolate sauce can elevate them even further. They also pair beautifully with a scoop of vanilla bean ice cream for a classic dessert experience. Don’t be afraid to get creative with variations! You could try adding a pinch of cinnamon to the filling for extra warmth, or perhaps a touch of almond extract for a nutty twist. Other berry combinations, like strawberry-raspberry or blueberry-lime, would also be delicious.
We hope you feel inspired and confident to give these Cherry Cheesecake Hand Pies a try. They are a rewarding bake that delivers big on flavor and charm. Happy baking!
Frequently Asked Questions:
Can I make the pastry dough ahead of time?
Absolutely! The pastry dough for your Cherry Cheesecake Hand Pies can be made up to 2 days in advance and stored in the refrigerator. Simply wrap it tightly in plastic wrap to prevent it from drying out. You can also freeze the dough for up to 3 months. Thaw it overnight in the refrigerator before using.
How should I store leftover Cherry Cheesecake Hand Pies?
Leftover Cherry Cheesecake Hand Pies can be stored in an airtight container in the refrigerator for up to 3-4 days. For best results, gently reheat them in a low oven (around 300°F or 150°C) for about 5-10 minutes to crisp up the pastry again before serving.
Cherry Cheesecake Hand Pies
Easy and delicious hand pies filled with a creamy cheesecake and cherry filling, deep-fried to golden perfection and drizzled with a sweet glaze.
Ingredients
-
1/4 cup granulated sugar
-
4 oz cream cheese, softened
-
21 oz can cherry pie filling
-
1 package refrigerated pie crust (contains 2 crusts)
-
1/2 cup powdered sugar
-
1 teaspoon corn syrup
-
1 tablespoon water
-
Vegetable oil, for deep frying (approximately 4-6 cups)
Instructions
-
Step 1
Prepare the cream cheese base by creaming together 4 oz softened cream cheese and 1/4 cup granulated sugar in a medium bowl until light and fluffy. -
Step 2
Gently fold the entire 21 oz can of cherry pie filling into the cream cheese mixture, aiming for streaks of cream cheese and cherry rather than a uniform color. -
Step 3
Unroll 1 package of refrigerated pie crusts and cut out 4-inch circles using a cookie cutter or glass. You will need two circles per hand pie. -
Step 4
Spoon 1-2 tablespoons of the filling onto one half of a pie crust circle, leaving a border. Place another circle on top and crimp the edges firmly with a fork to seal. -
Step 5
Heat approximately 4-6 cups of vegetable oil in a heavy-bottomed pot to 350-360°F (175-180°C). Carefully fry 2-3 hand pies at a time for 2-3 minutes per side until golden brown. -
Step 6
Remove fried hand pies with a slotted spoon and place on a wire rack to drain. While still warm, whisk together 1/2 cup powdered sugar, 1 teaspoon corn syrup, and 1 tablespoon water to create a glaze. Drizzle over the hand pies.
Important Information
Nutrition Facts (Per Serving)
It is important to consider this information as approximate and not to use it as definitive health advice.
Allergy Information
Please check ingredients for potential allergens and consult a health professional if in doubt.