White Chocolate Orange Creamsicle Truffles-Easy Recipe
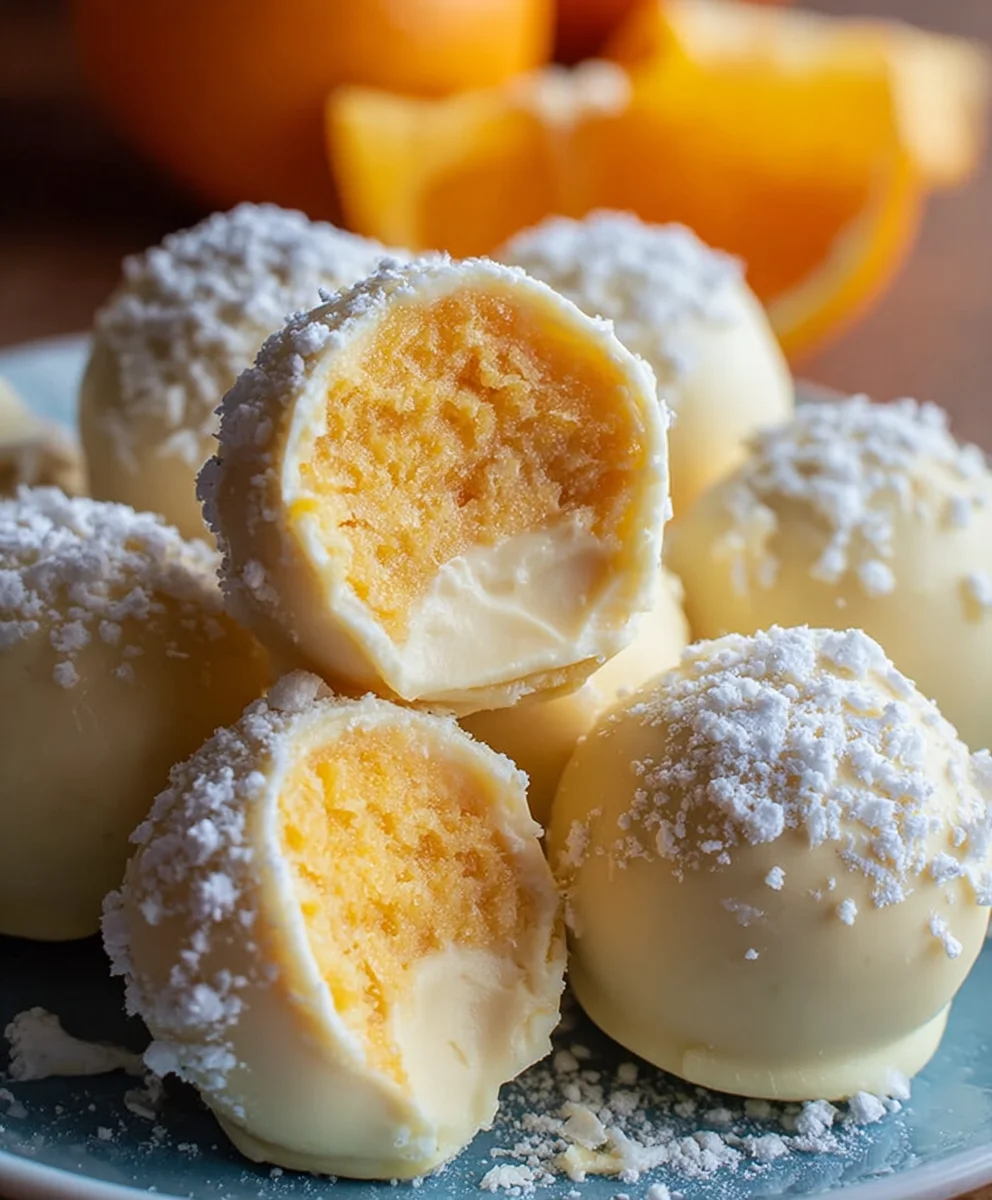
White Chocolate Orange Creamsicle Truffles are more than just a sweet treat; they’re a delightful trip down memory lane. Remember those iconic summer days, the sticky fingers, and the pure joy of a frozen creamsicle melting in your hand? We’re bottling that nostalgic magic into these incredibly easy yet elegant truffle bites. These aren’t your average chocolates; they capture the bright, zesty burst of orange perfectly balanced with the creamy sweetness of vanilla, all enveloped in a smooth, luscious white chocolate coating. What makes these White Chocolate Orange Creamsicle Truffles truly special is their ability to transport you back to simpler times with every bite, offering a sophisticated take on a beloved childhood classic. Get ready to impress your friends and family, or simply indulge in a moment of pure, unadulterated happiness.
Ingredients:
- 8 oz. white chocolate, chopped into small pieces
- 5 tablespoons unsalted butter
- 3 tablespoons heavy cream
- Pinch of salt
- 1 teaspoon orange extract
- Orange (or red and yellow) food coloring (optional)
- 1/3 cup powdered sugar
Crafting Your White Chocolate Orange Creamsicle Truffles
This recipe guides you through creating delightful White Chocolate Orange Creamsicle Truffles, a treat that captures the nostalgic essence of the classic frozen dessert. We’ll be working with a smooth, creamy white chocolate ganache infused with vibrant orange flavor, then rolling it into perfect spheres and dusting them with a light coating.
Phase 1: Creating the White Chocolate Ganache Base
The foundation of our truffles is a luscious white chocolate ganache. The quality of your white chocolate will significantly impact the final taste, so opt for a good-quality baking white chocolate rather than candy melts, which often have a less desirable texture and flavor. Chopping the white chocolate into small, uniform pieces is crucial. This ensures that the chocolate melts evenly and smoothly when combined with the warm cream and butter. If the pieces are too large, you might end up with pockets of unmelted chocolate or, conversely, overheated and scorched chocolate.
To begin extract this first phase, gently heat the heavy cream and unsalted butter in a small saucepan over low heat. You want to bring them to a simmer, just until tiny bubbles form around the edges of the pan. Do not let it boil vigorously, as this can cause the cream to separate and affect the texture of your ganache. Simultaneously, place your chopped white chocolate into a heatproof bowl. Once the cream and butter mixture is hot and steaming, carefully pour it over the chopped white chocolate. Let this mixture sit undisturbed for about 5 minutes. This resting period allows the residual heat from the cream to gently melt the chocolate without direct high heat, which can make white chocolate seize or become grainy.
After the resting period, gently whisk the mixture starting from the center and working your way outwards. Continue whisking until the ganache is completely smooth, glossy, and uniform in color. You should not see any streaks of unmelted chocolate. At this stage, stir in a pinch of salt. The salt is a flavor enhancer; it doesn’t make the truffles salty, but rather balances the sweetness of the white chocolate and amplifies the other flavors. Next, add the orange extract. Be precise with the measurement; too much orange extract can create an overpowering, artificial flavor. Start with the specified teaspoon and taste the ganache (once it’s cooled slightly, of course!) to see if you’d like to add a touch more. If you’re aiming for that classic Creamsicle look, this is also the time to incorporate a drop or two of orange food coloring. You can also use a combination of red and yellow to achieve a more nuanced orange hue. Stir it in gently until the color is evenly distributed.
Phase 2: Chilling and Shaping the Truffles
Once your ganache is perfectly smooth and infused with flavor, cover the bowl tightly with plastic wrap, pressing the wrap directly onto the surface of the ganache. This prevents a skin from forming. Place the bowl in the refrigerator for at least 2-3 hours, or until the ganache is firm enough to scoop and roll. The consistency you’re looking for is similar to firm cookie dough – it should hold its shape when scooped but be pliable enough to roll between your hands without being overly sticky or too hard.
When the ganache is chilled and ready, prepare your workspace. You might want to have a small bowl of hot water nearby to dip your hands in periodically if the ganache starts to stick, and a baking sheet lined with parchment paper to place the rolled truffles on. Using a small cookie scoop or a tablespoon, portion out the ganache. Roll each portion into a smooth, round ball between your palms. If the ganache becomes too soft from the warmth of your hands, refrigerate it for another 15-20 minutes before continuing. Aim for consistent sizing so your truffles look uniform. As you roll each truffle, place it on the prepared baking sheet.
Phase 3: The Finishing Touches
This final phase involves coating the shaped truffles in powdered sugar, giving them their characteristic soft, powdery finish reminiscent of a creamsicle’s creamy coating. Once all the ganache has been rolled into balls and placed on the baking sheet, it’s time for the dusting. Place the 1/3 cup of powdered sugar into a shallow bowl or a plate. Gently roll each chilled truffle in the powdered sugar until it is evenly coated. You want a light dusting, not a thick layer, so be delicate. If you want a slightly more pronounced orange color, you can mix a tiny bit of orange food coloring into the powdered sugar before dusting, but this is entirely optional. Place the dusted truffles back onto the parchment-lined baking sheet. For the best texture, I recommend chilling the finished truffles for at least another 30 minutes in the refrigerator before serving. This allows the ganache to firm up further and the flavors to meld beautifully.
Conclusion:
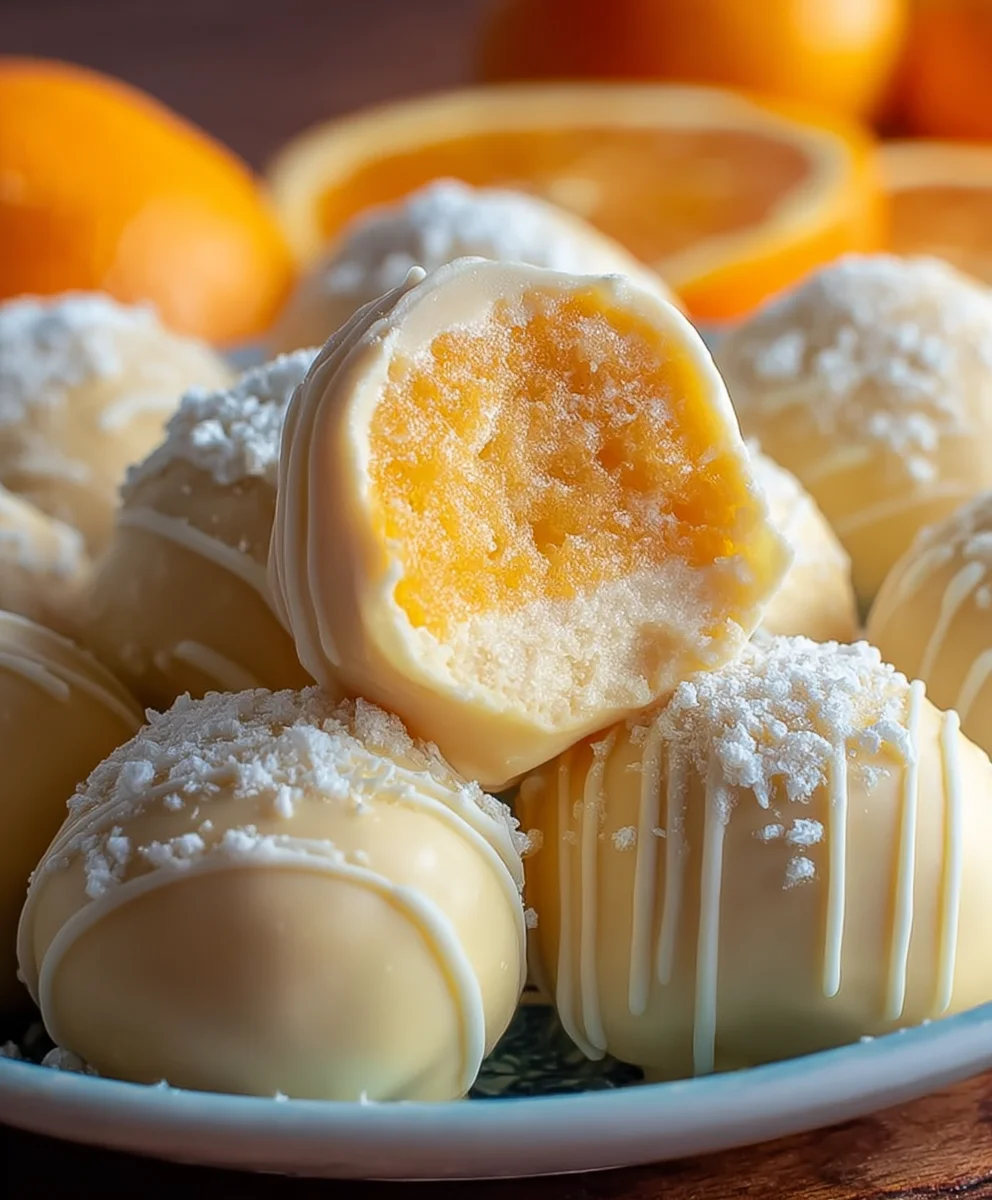
And there you have it – the delightful journey to creating your very own White Chocolate Orange Creamsicle Truffles is complete! These sweet and tangy treats are a perfect embodiment of that classic summer flavor, elevated with the luxurious touch of white chocolate. Whether you’re whipping them up for a special occasion, a thoughtful gift, or simply a personal indulgence, the process is rewarding, and the result is undeniably delicious. The creamy orange center, encased in a smooth white chocolate shell, offers a burst of nostalgic joy with every bite. Don’t be afraid to get creative and make them your own!
For serving, consider presenting these White Chocolate Orange Creamsicle Truffles on a decorative platter. They pair beautifully with a light dessert grape juice, a cup of tea, or even a cold glass of milk. For variations, try drizzling them with a contrasting dark chocolate or a touch of edible glitter for extra sparkle. You could also experiment with adding a tiny pinch of orange zest directly into the white chocolate ganache for an even more intense citrus note. Remember, the most important ingredient is the love you put into making them. Enjoy every single bite!
Frequently Asked Questions about White Chocolate Orange Creamsicle Truffles:
Q1: Can I make the White Chocolate Orange Creamsicle Truffles ahead of time?
Absolutely! These truffles are ideal for making in advance. Once rolled and coated, they can be stored in an airtight container in the refrigerator for up to a week. Let them sit at room temperature for about 10-15 minutes before serving to ensure the best texture.
Q2: My white chocolate seized up when I tried to melt it. What went wrong?
White chocolate can be a bit finicky. The most common reason for it seizing is the introduction of even a tiny amount of moisture. Ensure your utensils, bowls, and work surface are completely dry. Melting it gently over a double boiler or in short bursts in the microwave, stirring frequently, also helps prevent this. If it does seize, sometimes adding a tablespoon of neutral oil like vegetable or canola oil can help smooth it out, though the texture might be slightly different.
White Chocolate Orange Creamsicle Truffles-Easy Recipe
Delightful truffles capturing the nostalgic essence of the classic frozen dessert with a smooth, creamy white chocolate ganache infused with vibrant orange flavor.
Ingredients
-
8 oz. white chocolate, chopped into small pieces
-
5 tablespoons unsalted butter
-
3 tablespoons heavy cream
-
Pinch of salt
-
1 teaspoon orange extract
-
Orange (or red and yellow) food coloring (optional)
-
1/3 cup powdered sugar
Instructions
-
Step 1
Gently heat heavy cream and unsalted butter in a small saucepan over low heat until simmering. Place chopped white chocolate in a heatproof bowl. Pour hot cream and butter over chocolate and let sit for 5 minutes. -
Step 2
Whisk the mixture until smooth and glossy. Stir in a pinch of salt and 1 teaspoon of orange extract. Add optional food coloring if desired until evenly distributed. -
Step 3
Cover the bowl with plastic wrap, pressing directly onto the surface of the ganache. Refrigerate for at least 2-3 hours, or until firm enough to scoop and roll. -
Step 4
Scoop portions of the chilled ganache and roll into smooth, round balls. Place rolled truffles on a parchment-lined baking sheet. -
Step 5
Place powdered sugar in a shallow bowl. Gently roll each truffle in the powdered sugar until evenly coated. Return dusted truffles to the baking sheet. -
Step 6
Chill the finished truffles in the refrigerator for at least another 30 minutes before serving.
Important Information
Nutrition Facts (Per Serving)
It is important to consider this information as approximate and not to use it as definitive health advice.
Allergy Information
Please check ingredients for potential allergens and consult a health professional if in doubt.