No-Bake Banoffee Cheesecake Dream Recipe
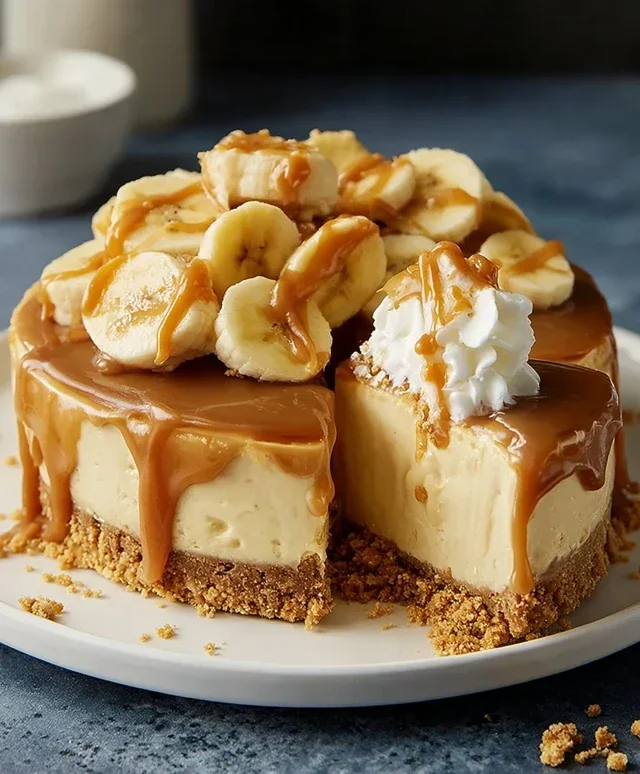
No-Bake Banoffee Cheesecake is the ultimate dessert fantasy for anyone who craves a symphony of sweet, creamy, and crunchy textures without the oven’s fuss. This iconic British treat, a beloved marriage of bananas, toffee, and creamy cheesecake, has captured hearts (and taste buds!) for a reason. It’s undeniably decadent, yet surprisingly simple to assemble, making it a go-to for impressing guests or indulgin extractg in a personal moment of pure bliss. What truly sets our No-Bake Banoffee Cheesecake apart is the perfect harmony between the rich, buttery biscuit base, the luscious dulce de leche-infused cheesecake filling, and the sweet, ripe banana slices, all crowned with a generous dollop of whipped cream and a dusting of chocolate shavings. Get ready to experience dessert perfection, no oven required!
No-Bake Banoffee Cheesecake
This No-Bake Banoffee Cheesecake is an absolute dream! It’s the perfect combination of creamy, sweet, and a little bit decadent, all without ever having to turn on the oven. Imagin extracte a buttery biscuit base, a lusciously smooth cashew and cream cheese filling, layers of sweet caramel, and of course, fresh banana. It’s a crowd-pleaser for sure, and surprisingly simple to put together. Whether you’re catering to a dairy-free diet or simply looking for a show-stopping dessert that requires minimal effort, this recipe is for you. The beauty of a no-bake cheesecake is its adaptability, and this banoffee version truly shines.
Ingredients:
Preparing the Base
The foundation of any great cheesecake is its crust, and for this no-bake marvel, we’re going for a simple yet satisfying biscuit base. Start by placing your plain biscuits into a food processor. Pulse them until they form fine crum extractbs. If you don’t have a food processor, don’t worry! You can place the biscuits in a sturdy zip-top bag and use a rolling pin to crush them into fine crum extractbs. The finer the crum extractbs, the more cohesive your base will be. Once you have your biscuit crum extractbs, transfer them to a medium bowl.
Next, melt your dairy-free butter or margarine. You can do this in a small saucepan over low heat or in the microwave in short intervals, stirring in between. Once melted, pour the liquid butter over the biscuit crum extractbs. Mix thoroughly with a spoon or your hands until all the crum extractbs are evenly moistened. This is the magic step that binds the crum extractbs together. The mixture should resemble wet sand.
Now, it’s time to press this mixture into your chosen cheesecake tin. A 7-inch or 8-inch springform tin works best for easy removal. Spoon the crum extractb mixture into the tin and press it down firmly and evenly across the base. You can use the back of a spoon or the flat bottom of a glass to help you achieve a compact and flat surface. This will ensure your base holds its shape when you slice the cheesecake. For an extra firm base, you can pop this into the freezer for about 15-20 minutes while you prepare the filling.
Creating the Creamy Filling
This is where the magic truly happens! For the filling, we need to prepare our soaked cashews. Drain and rinse the pre-soaked cashew nuts very well. It’s crucial they are thoroughly drained to avoid a watery filling. Place the drained cashews into a high-powered blender. Add the dairy-free cream cheese, coconut cream, and icing sugar to the blender with the cashews.
Now, it’s time to blend until the mixture is incredibly smooth and creamy. This might take a few minutes, especially if you don’t have a super-high-powered blender. You’ll want to scrape down the sides of the blender periodically to ensure everything is incorporated. The goal is a silky-smooth consistency with no grainy texture from the cashews. Taste the filling at this point and if you prefer it sweeter, you can add a little more icing sugar, blending again until smooth.
Assembling the Banoffee Layers
Once your filling is beautifully smooth, it’s time to assemble your banoffee masterpiece. Take your chilled biscuit base out of the freezer. Gently spoon about half of the creamy cashew filling over the biscuit base and spread it out evenly.
Now for the banana layer! Peel and slice one medium-sized banana. Arrange these banana slices in a single layer over the cream cheese filling. Don’t worry if they don’t cover perfectly; it just adds to the rustic charm.
Next, drizzle a generous amount of vegan caramel sauce over the banana slices. You don’t need to be shy here – the more caramel, the more banoffee-y it will be! After the caramel, spoon the remaining cashew filling over the caramel and banana layer, spreading it smoothly to cover everything.
The Finishing Touches and Chilling
Now, we’re on the home stretch! Gently smooth the top of the cheesecake with a spatula. You can create some decorative swirls on top if you like, which will look lovely once drizzled with more caramel. Place the cheesecake in the refrigerator and let it chill for at least 4-6 hours, or preferably overnight. This chilling time is essential for the cheesecake to set properly and for all the flavours to meld together.
Before serving, whip the dairy-free whipping cream until stiff peaks form. You can sweeten it slightly with a dusting of icing sugar if desired, but it’s often perfect as is. Carefully remove the cheesecake from the springform tin. You can do this by running a knife around the edge before releasing the clasp.
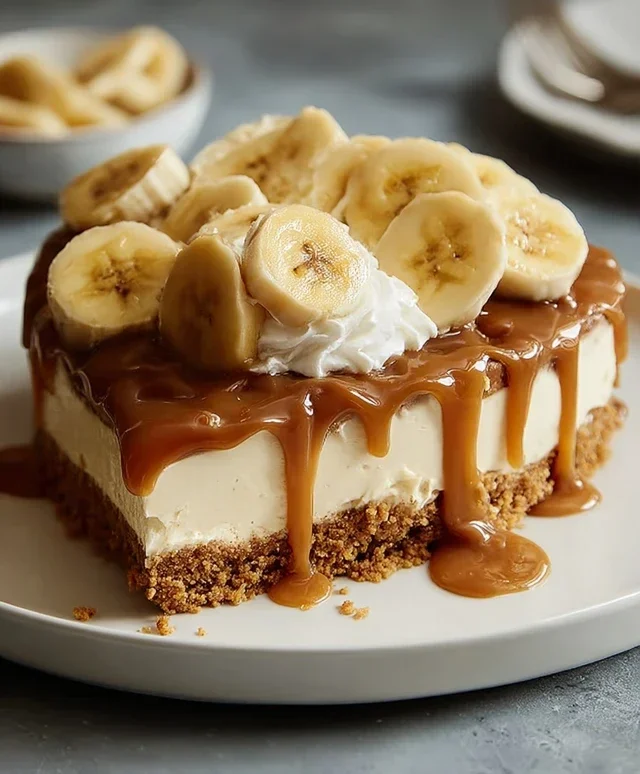
Decorate the top of your magnificent no-bake banoffee cheesecake with dollops of whipped cream, more fresh banana slices, and a final, luscious drizzle of vegan caramel sauce. The visual appeal is part of the experience, so have fun with your decoration! Serve chilled and enjoy the delighted reactions of your friends and family. This dessert is a true showstopper with minimal fuss.
Conclusion:
And there you have it! This No-Bake Banoffee Cheesecake is an absolute dream for anyone seeking a decadent yet fuss-free dessert. Its beauty lies in its simplicity, requiring no oven time and delivering an explosion of classic banoffee flavors with every bite. The crunchy biscuit base, creamy toffee and banana filling, and light whipped cream topping create a symphony of textures and tastes that are truly irresistible. I’ve found it to be the perfect crowd-pleaser, always disappearing in minutes!
Serving this delightful creation is wonderfully versatile. It’s fantastic on its own, but consider garnishing with extra banana slices, a drizzle of toffee sauce, or a dusting of chocolate shavings for an elevated presentation. For variations, feel free to experiment! You could swap the digestive biscuits for grabeef ham crackers or even add a hint of cinnamon to the base. If you’re feeling adventurous, a touch of rum extract in the toffee layer can add an extra layer of complexity. I wholeheartedly encourage you to give this No-Bake Banoffee Cheesecake a try. It’s a testament to how delicious simple, no-bake desserts can be, and I promise you won’t regret it.
Frequently Asked Questions:
Can I make this No-Bake Banoffee Cheesecake ahead of time?
Absolutely! This cheesecake is actually best made a few hours in advance, or even the day before. This allows the flavors to meld beautifully and the filling to set up perfectly in the refrigerator.
What are some good substitutes for bananas if I have an allergy?
While the banana is key to banoffee, you could try using other fruits that pair well with toffee. Sliced peaches or pears, for instance, could offer a lovely sweetness and texture. Just ensure they are ripe for the best flavor.
No-Bake Banoffee Cheesecake
A delicious no-bake banoffee cheesecake with a biscuit base, creamy cashew filling, and layers of banana and caramel.
Ingredients
-
200g plain biscuits (use gluten-free biscuits if required)
-
100g dairy-free butter or margarine
-
140g cashew nuts (pre-soaked in warm water overnight)
-
340g dairy-free cream cheese
-
50g coconut cream
-
80g icing sugar
-
1 medium-sized banana
-
Vegan caramel sauce
-
Fresh banana slices
-
80ml dairy-free whipping cream
Instructions
-
Step 1
Crush the plain biscuits into fine crumbs and mix with the melted dairy-free butter or margarine. Press this mixture firmly into the base of a 20cm springform tin. -
Step 2
Drain the soaked cashew nuts. Blend them in a food processor until very smooth and creamy. Add the dairy-free cream cheese, coconut cream, and icing sugar. Blend again until smooth and well combined. -
Step 3
Mash one medium-sized banana and spread it evenly over the biscuit base in the tin. -
Step 4
Pour the cashew and cream cheese mixture over the banana layer and smooth the top. -
Step 5
Drizzle a generous amount of vegan caramel sauce over the cheesecake filling. -
Step 6
Chill the cheesecake in the refrigerator for at least 4 hours, or until firm. -
Step 7
Whip the dairy-free whipping cream until soft peaks form. Decorate the top of the cheesecake with dollops of whipped cream and fresh banana slices just before serving. Add an extra drizzle of vegan caramel sauce if desired.
Important Information
Nutrition Facts (Per Serving)
It is important to consider this information as approximate and not to use it as definitive health advice.
Allergy Information
Please check ingredients for potential allergens and consult a health professional if in doubt.